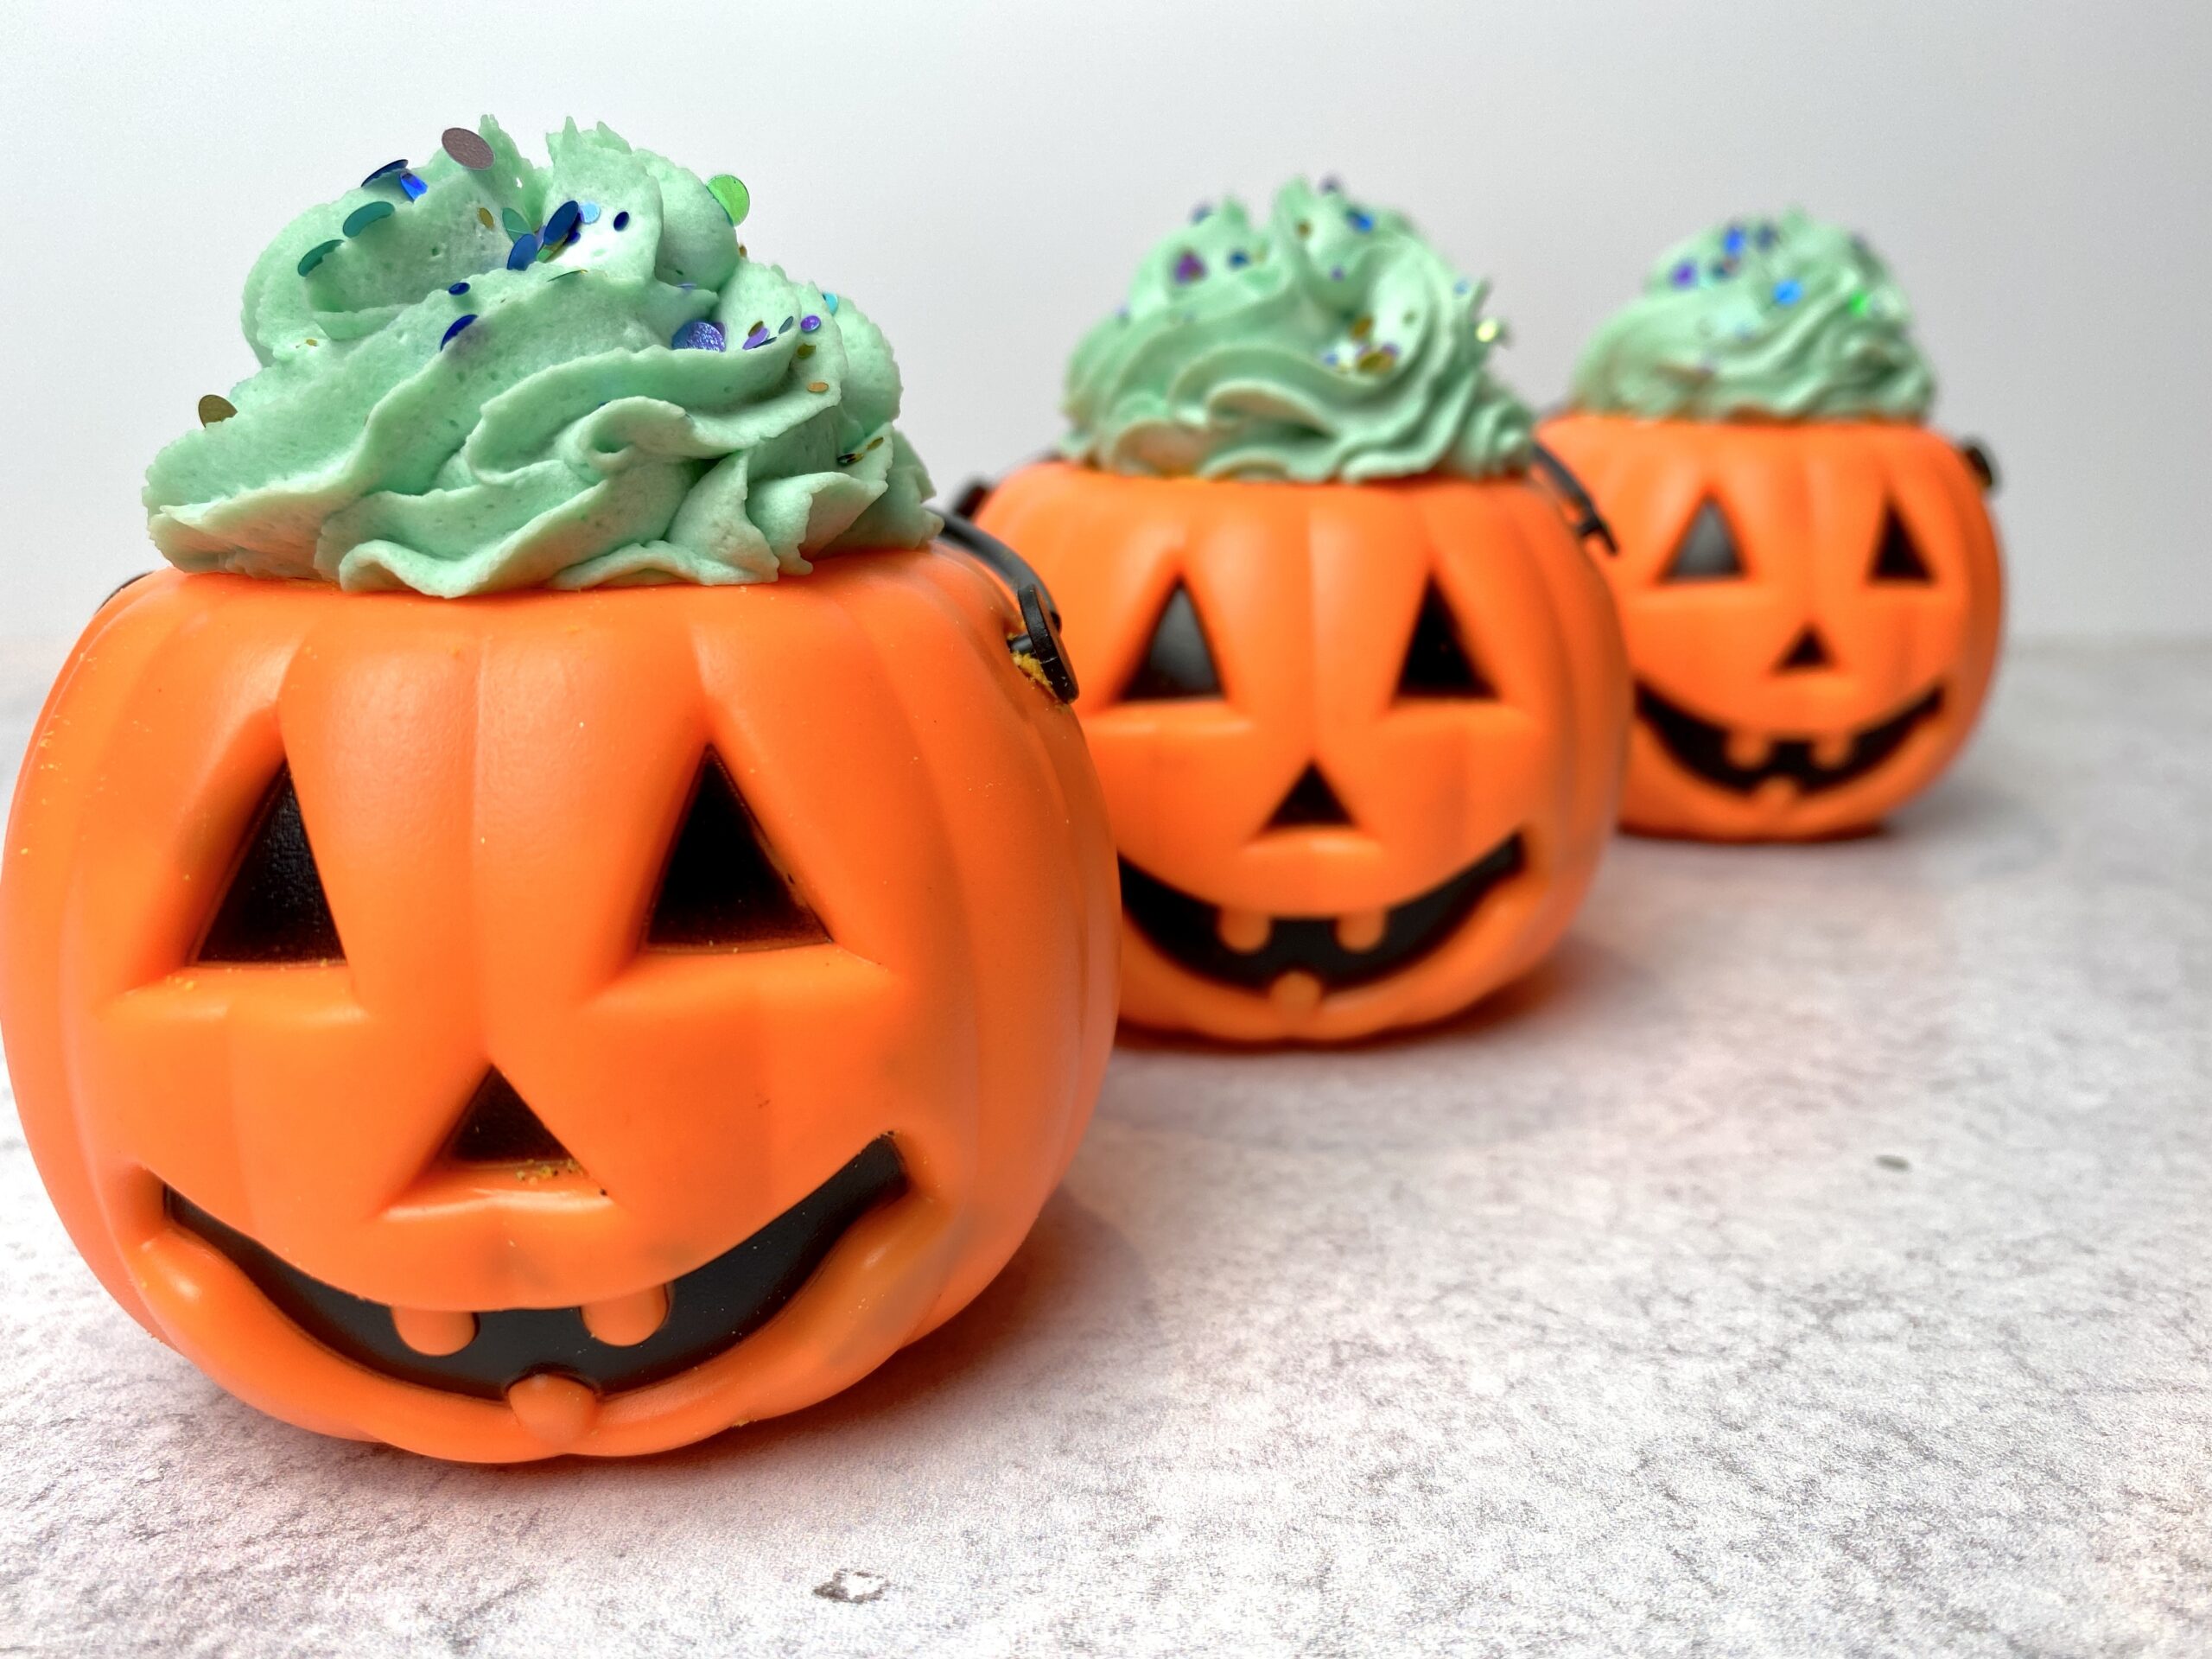
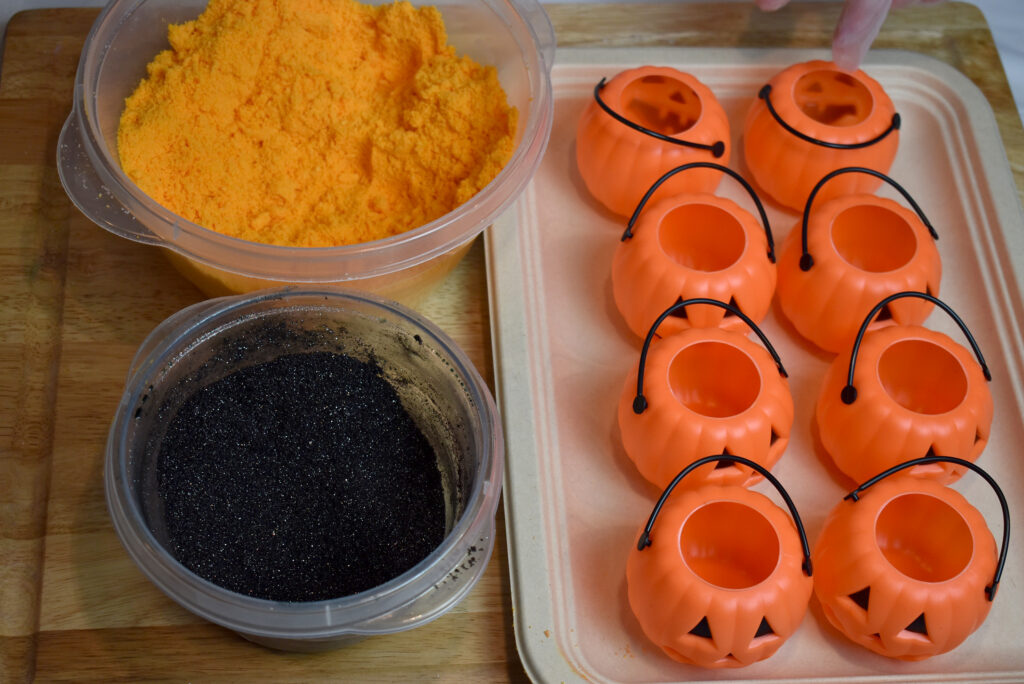
The cauldrons make adorable bath bomb containers…but so do these pumpkins! We got them at Party City but you can find them online. If you missed our two cauldron posts, check out Spooky Purple Cauldron Bath Bombs and Green Layered Cauldron Bath Bombs. Using these are similar! You simply hold the bubble bar part under water to create a bubble bath and dunk the pumpkin container in water, raise it up and watch the bath bomb part bubble and fizz out. My kids LOVE them!
For this project, Robyn and I used Robyn’s Humid Weather Bath Bomb Recipe. We were together making soap in Florida and it behaved perfectly with the high humidity here.
We made the piping using Wonder Bar. Wonder Bar is a bubble bar recipe that can be pressed, scooped, rolled and piped!
Tips for Making Pumpkin Bath Bombs
- To pack or not to pack…When I’ve (Amanda) made them in the past, I really pack them. When Robyn made them for this project, she didn’t pack them as tightly as I do. She just loosely filled and then gave it a little pat at the end.
- Binder? We made some with binder and some without. Making Robyn’s recipe without binder worked just fine because it does have a bit of liquid surfactant in it! They hardened nicely in the pumpkin and were easily shrink wrapped when dry.
- Toppings – You can make your pumpkins with or without a topping. If you want to keep it a simple bath bomb, that works! We topped ours with Wonder Bar and I’ve even seen some people top with a drizzle. I really like topping with Wonder Bar because then you can add fancy sprinkles or even small toys.
Let’s make them!
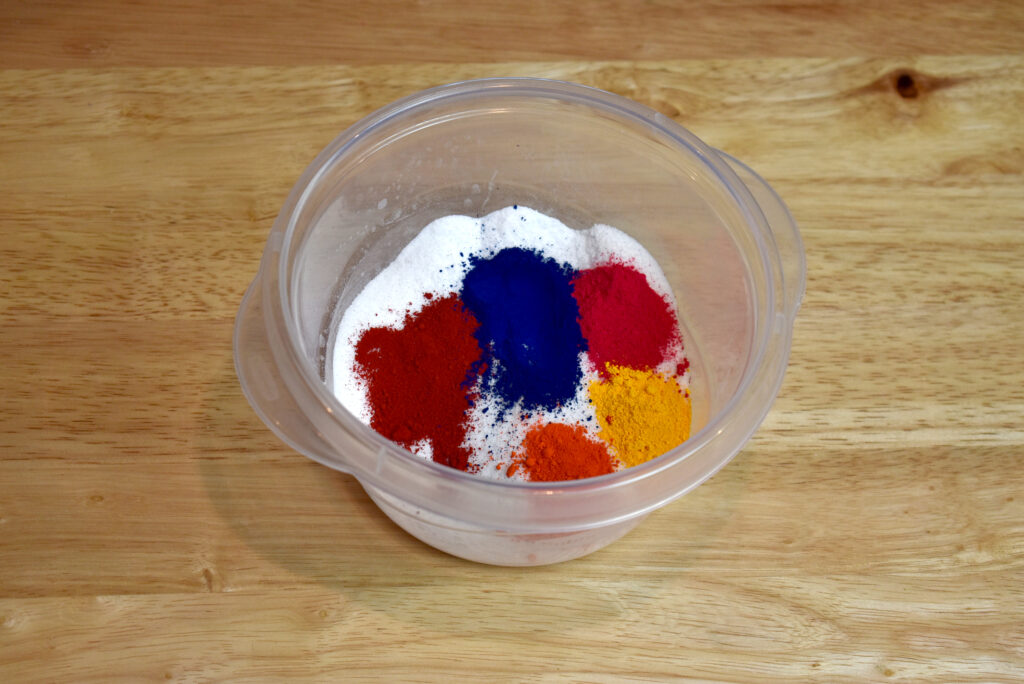
First, make your Quick Glembed Mix! We colored ours black using Lakes! Check our Robyn’s Black Color Study.
Glembed Mix is simply a sparkly embed powder. An embed powder is waaaaay quicker and waaaaay easier than making embeds. (Be sure to make first so it’s ready to go!)
This Glembed Powder Mix is super sparkly because we used synthetic mica (fluorphlogopite mica). Synthetic mica is generally used when you want the pearlescent look to your bath water. Just note…you use a lot! We could have even used more fluorphlogopite in this recipe…so test test test! Here’s how we made our Glembed Mix.
Quick Black Glembed Powder Mix for Bath Bombs
- Baking Soda – 50 grams
- Citric Acid – 50 grams
- Yellow 5 Lake – 1/4 teaspoon
- Red 27 Lake – 1/4 teaspoon
- Yellow 6 Lake – 1/4 teaspoon
- Blue 1 Lake – 1/2 teaspoon
- Red 40 Lake – 1/2 teaspoon
- Fluorphlogopite Mica – Black Onyx from Nurture Soap – 2 grams
- Polysorbate 80 – Since we added so much color to this black mix, we also added 3 grams of polysorbate 80
- Water – A few sprays from fine mist sprayer
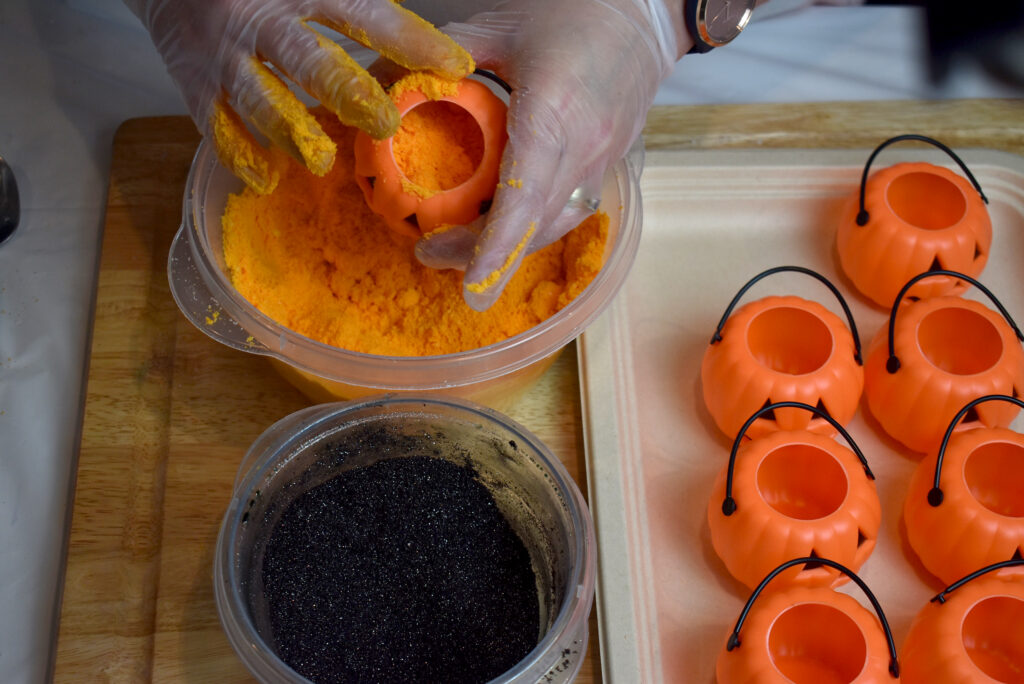
Step 1: Add baking soda, citric acid, Lakes, fluorphlogopite mica and polysorbate 80 together in a bowl.
Step 2: Mix well and spray with water as a binder just so it firms up when molded into your bath bomb.
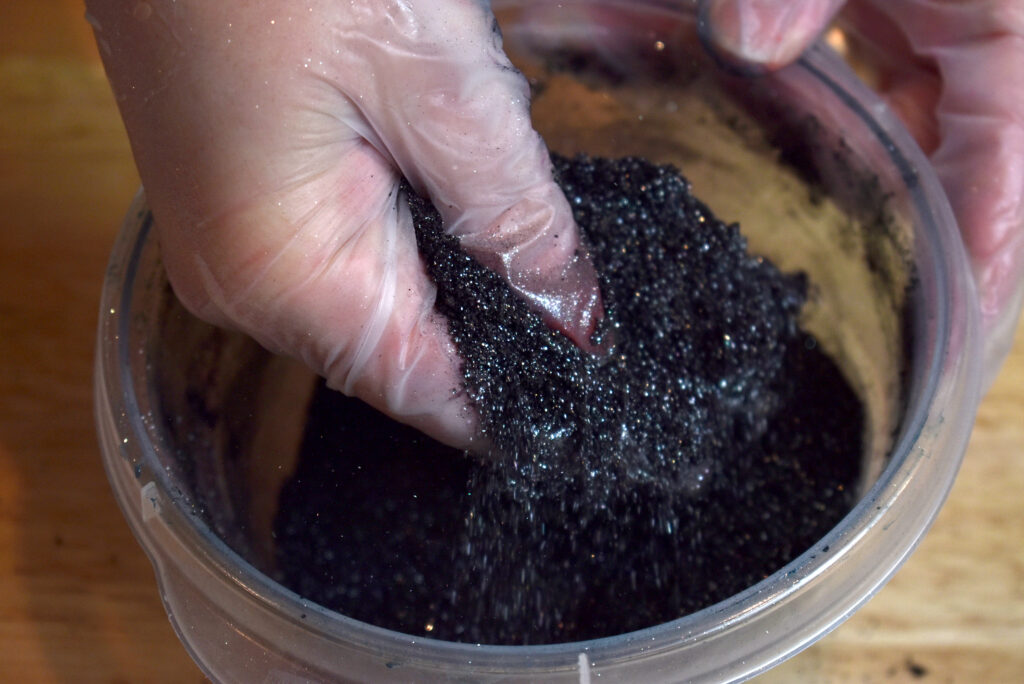
TIP: When making a black mix, if it looks on the red side, add more blue. If it looks on the blue side, add more red.
Set aside and get your bath bomb mix ready for your bath bombs.
We used Robyn’s Humid Weather Bath Bomb Recipe!
Step 1: Mix up your bath bomb mixture! We used 1/4 of a batch of Robyn’s recipe to make 6 pumpkins.
Step 2: Color the entire mixture orange. We used 3/4 teaspoon of yellow 5 and 1/4 teaspoon of yellow 6 to darken it slightly.
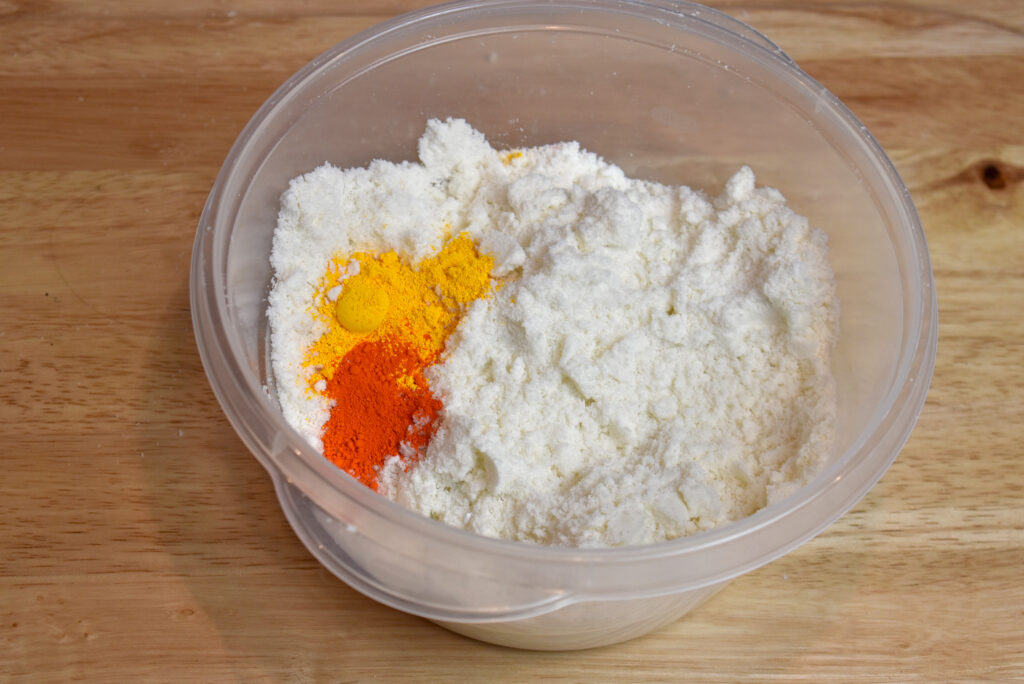
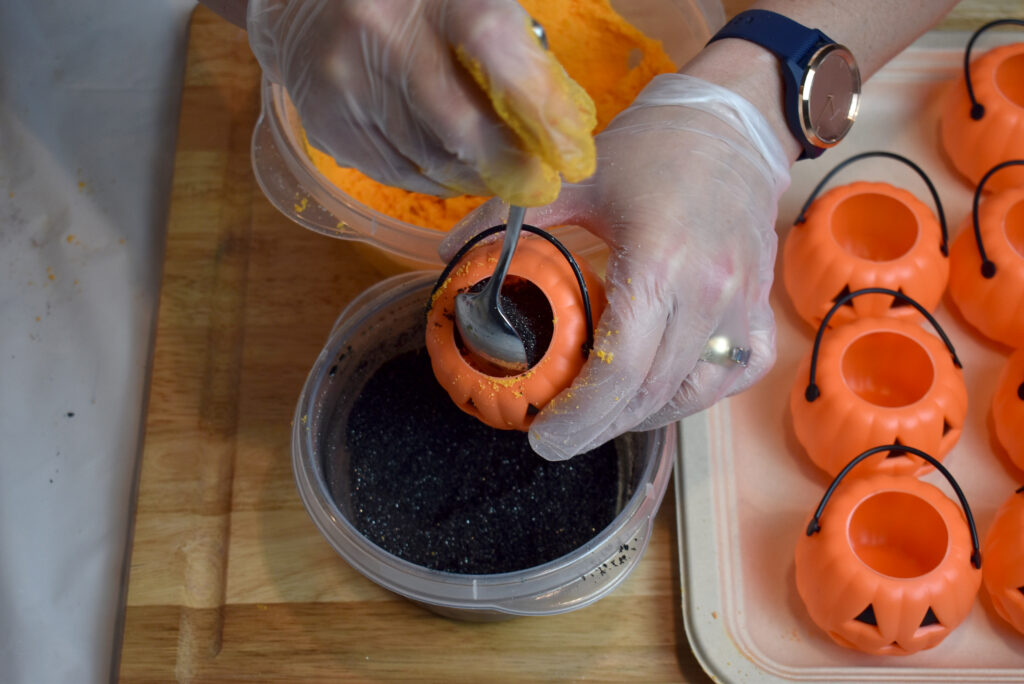
Step 3: Rotating between your Glembed Mixture and orange mixture, layer into your pumpkins. We used quite a bit of Glembed Mixture in each pumpkin, but it really is a matter of preference! Add as little or as much as you want. Make sure to end with the orange mixture as it will probably get harder than the Glembed Mix.

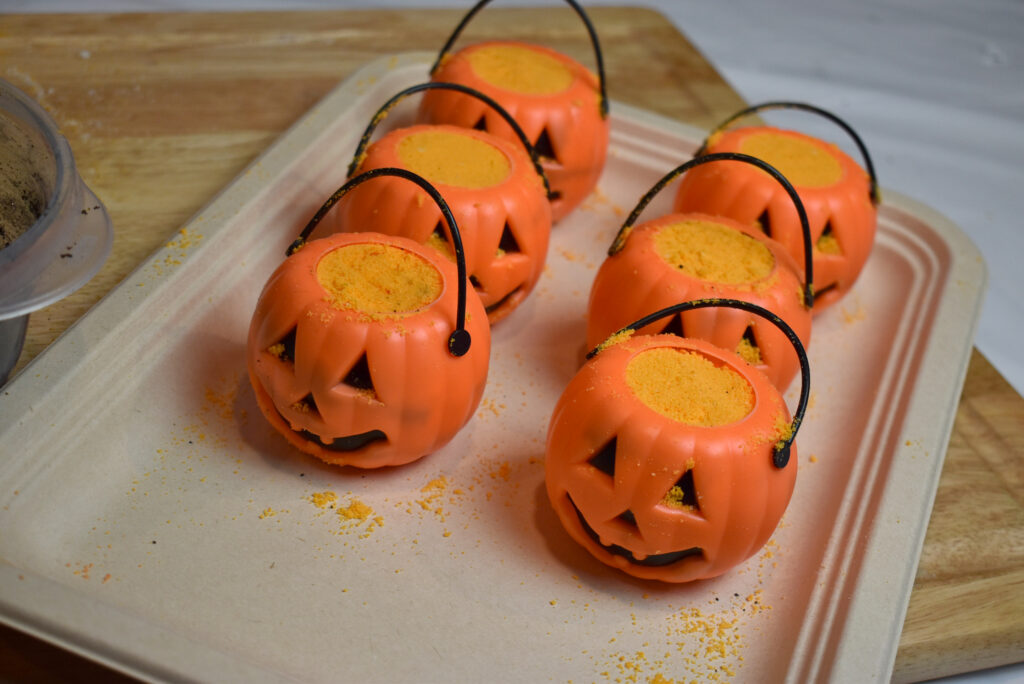
Step 4: Dry your bath bombs before decorating. Depending on how humid it is where you live, you might need to dry them 1-4 days. I dry in a room with a dehumidifer running and mine only need about 24 hours to dry (even in humid Florida!).
TIP: Drying your bath bombs: The best way to quickly dry your bath bombs is to place them in a room with a dehumidifier running. If you have no humidity where you live, then you probably don’t have to do this. But if you have any humidity, I highly recommend investing in a dehumidifier. Even if you don’t have high humidity, it can help your bath bombs dry quickly so you can decorate and package even faster! I like this dehumidifier from Homelabs on Amazon.
Once dry, you can decorate!
You’ll need some Wonder Bar to pipe onto the top! You don’t have to make a whole batch, because then you’d have to much left over. You can simply grab some from a masterbatch. Check out this blog post where we talk about how to masterbatch Wonder Bar.
We made a small batch of Wonder Bar and colored it green using a bit of Yellow 5 and Blue 1 Lakes. We piped using an Ateco 2F piping tip and then topped with some eco glitter!
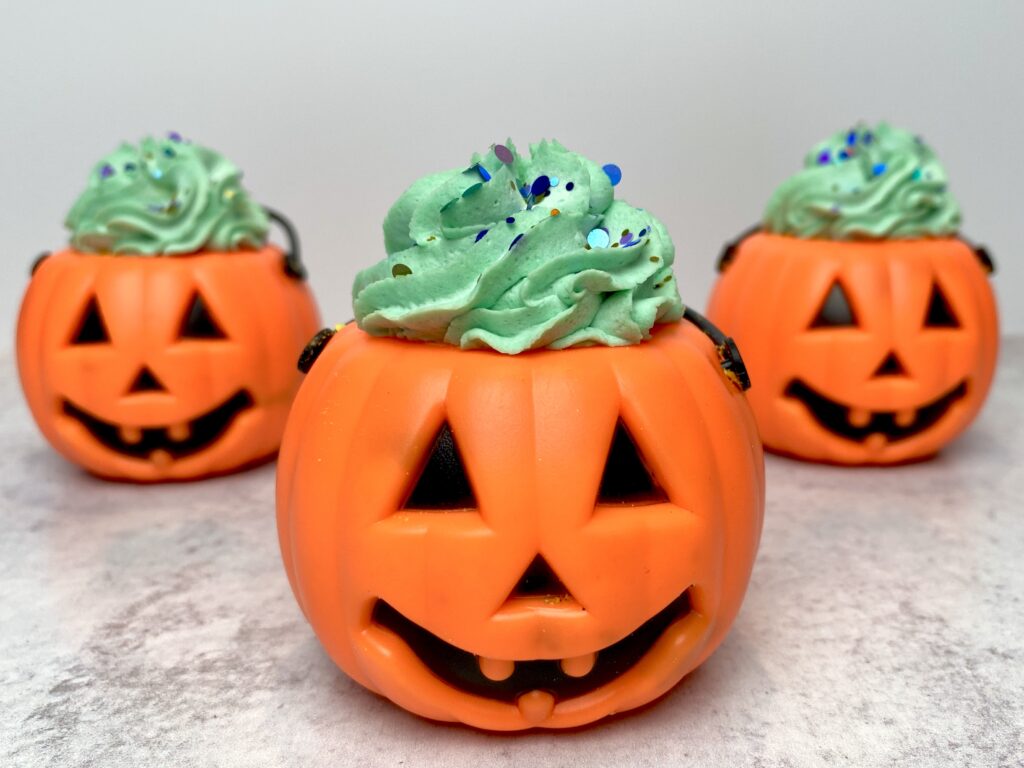
So cute! When you use them in the bath they release a bit of orange and then black, just like a jack-o-lantern!
Allow your pumpkins to dry completely! Once dry, you can package in shrink wrap. (Yep! Wonder Bar gets hard enough to shrink wrap!)
To use a pumpkin, you simply let water run over the bubble bar topping to create a bath full of bubbles and then dip the bath bomb into water, lifting up and out. It is fun to watch the fizzing bath bomb mixture spill out like the pumpkin is bubbling over.
Happy Bubble Making!
Robyn & Amanda
Wonder Bar Bubble Bar Recipe + Process Guide
Get one recipe to make it all! Make bubble bar scoops, rolls and bubble frosting, using just ONE recipe! Get Wonder Bar here.
Robyn’s Humid Weather Bath Bomb Recipe
Making bath bombs in wet, rainy weather can be so frustrating! If you live in an area with constant high humidity, then you’ll need a recipe that can hang day in and day out without failing, warting, cracking or crumbling. Check out Robyn’s Humid Weather Bath Bomb Recipe!