If you are new to making bath bombs and want to give them a try, here is my favorite basic bath bomb recipe. There is no perfect recipe for making bath bombs because it all depends on where you live. You might need to modify it depending on your climate and humidity level where you live. (I’ll have more blog posts soon on how to modify recipes for dry and humid climates.)
Ingredients
- Baking Soda – 1 cup (250 grams)
- Citric Acid – ½ cup (100 grams)
- Cream of Tartar – 1 tablespoon (12 grams)
- Kaolin Clay – 1 tablespoon (3 grams)
- Corn Starch, Tapioca Starch or Arrowroot Powder – 1 tablespoon (10 grams)
- Avocado Oil – 1 teaspoon (5 grams)
- Polysorbate 80 – 1 teaspoon (5 grams)
- Scent – 7 grams
- Color
Equipment
- Mixing bowl
- Measuring cups/spoons or digital scale
- Hand mixer
- Spatula
- Mold
- Face mask, gloves and hair net
- Spray bottle with binder (I use a 50/50 blend of alcohol and water)
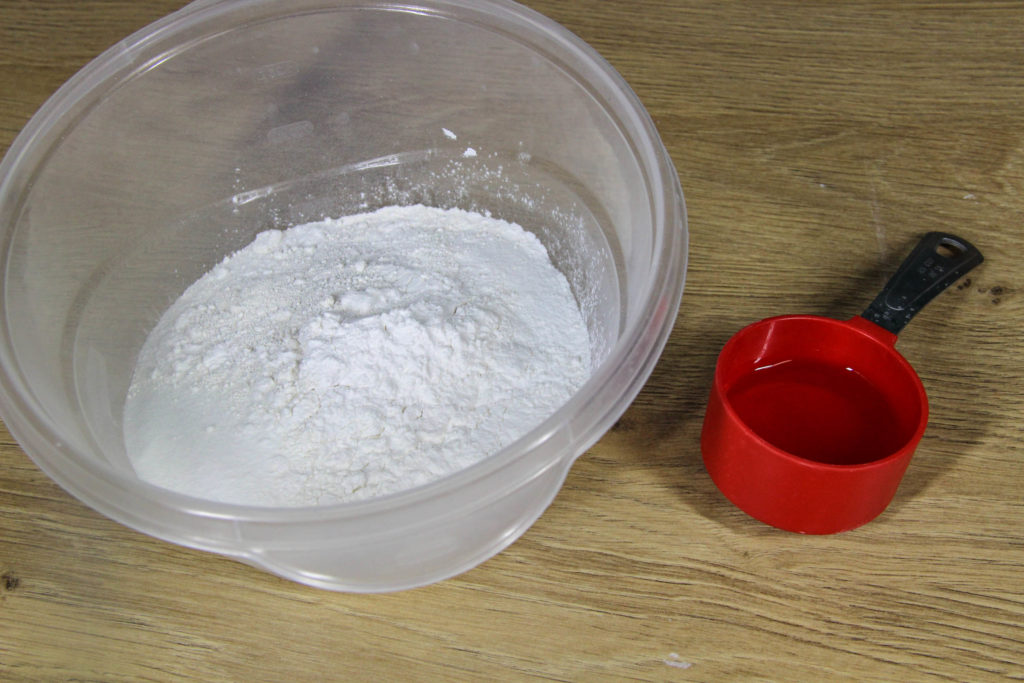
Step 1: Measure or weigh all the dry ingredients into your mixing bowl. In another container (a small measuring cup works well), measure or weigh all the wet ingredients and mix them together. If you’re using a butter in place of the avocado oil, be sure to melt it first.
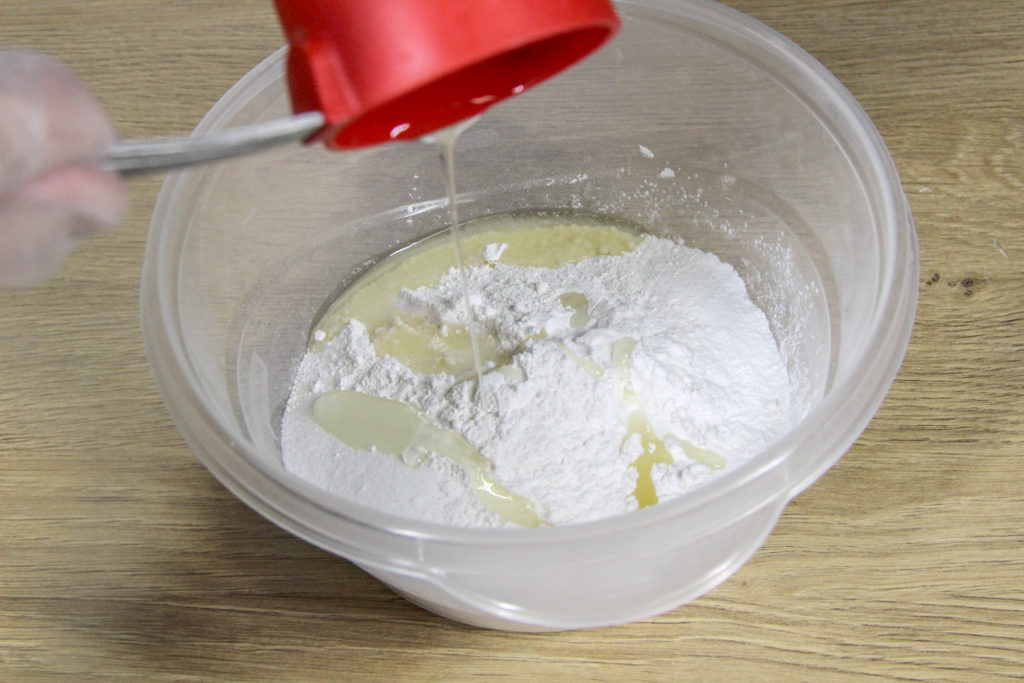
Step 2: Pour the wet ingredients into the dry ingredients and immediately start to mix. If you let it sit, it will react and fizz.
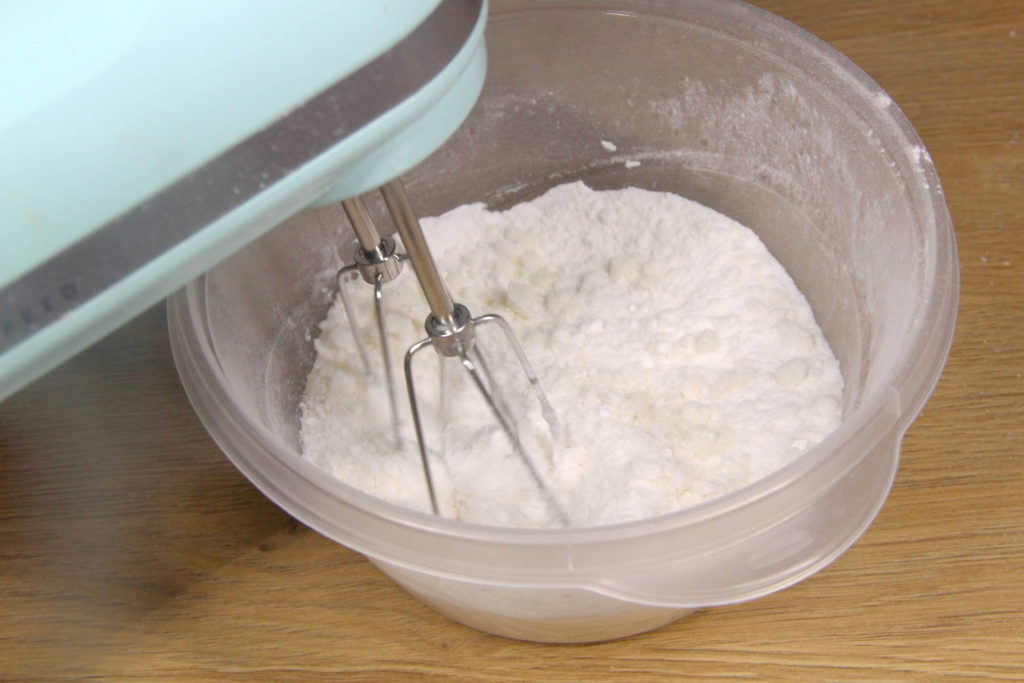
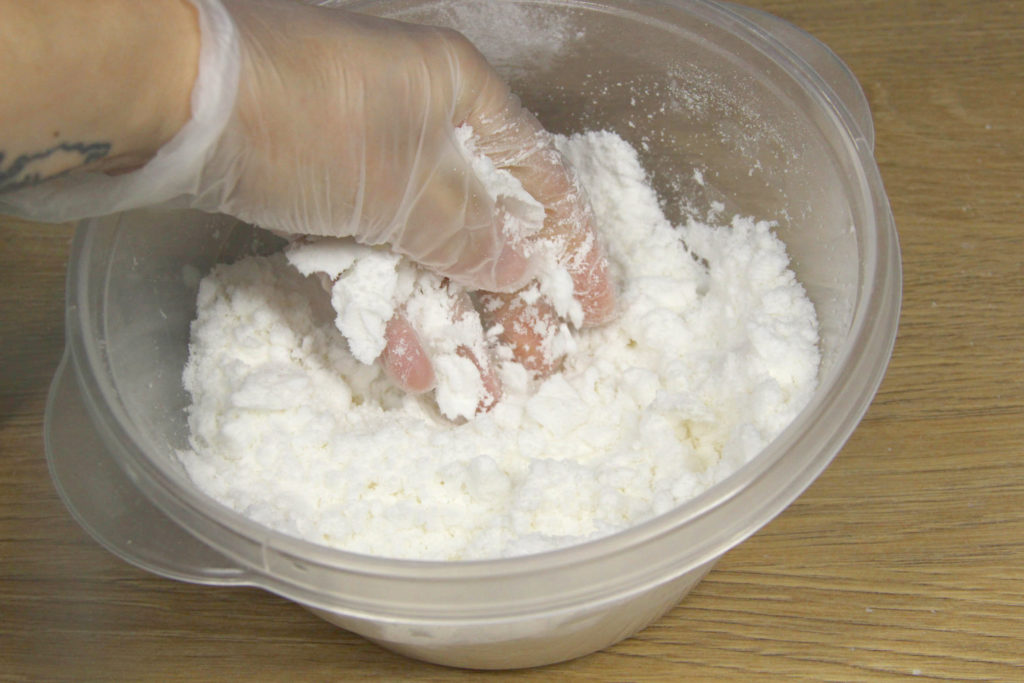
Step 3: Blend the mixture using a hand mixer or a stand mixer. I haven’t found that the powders jump into the air when mixing. If you’re concerned, you can cover the bowl with a towel as you mix.
Mix for about a minute. This helps to break up clumps and aerate the mixture. You can also break up any clumps using your hands if needed. Remember that oil clumps in your mixture can cause warting, so be sure to break them up.
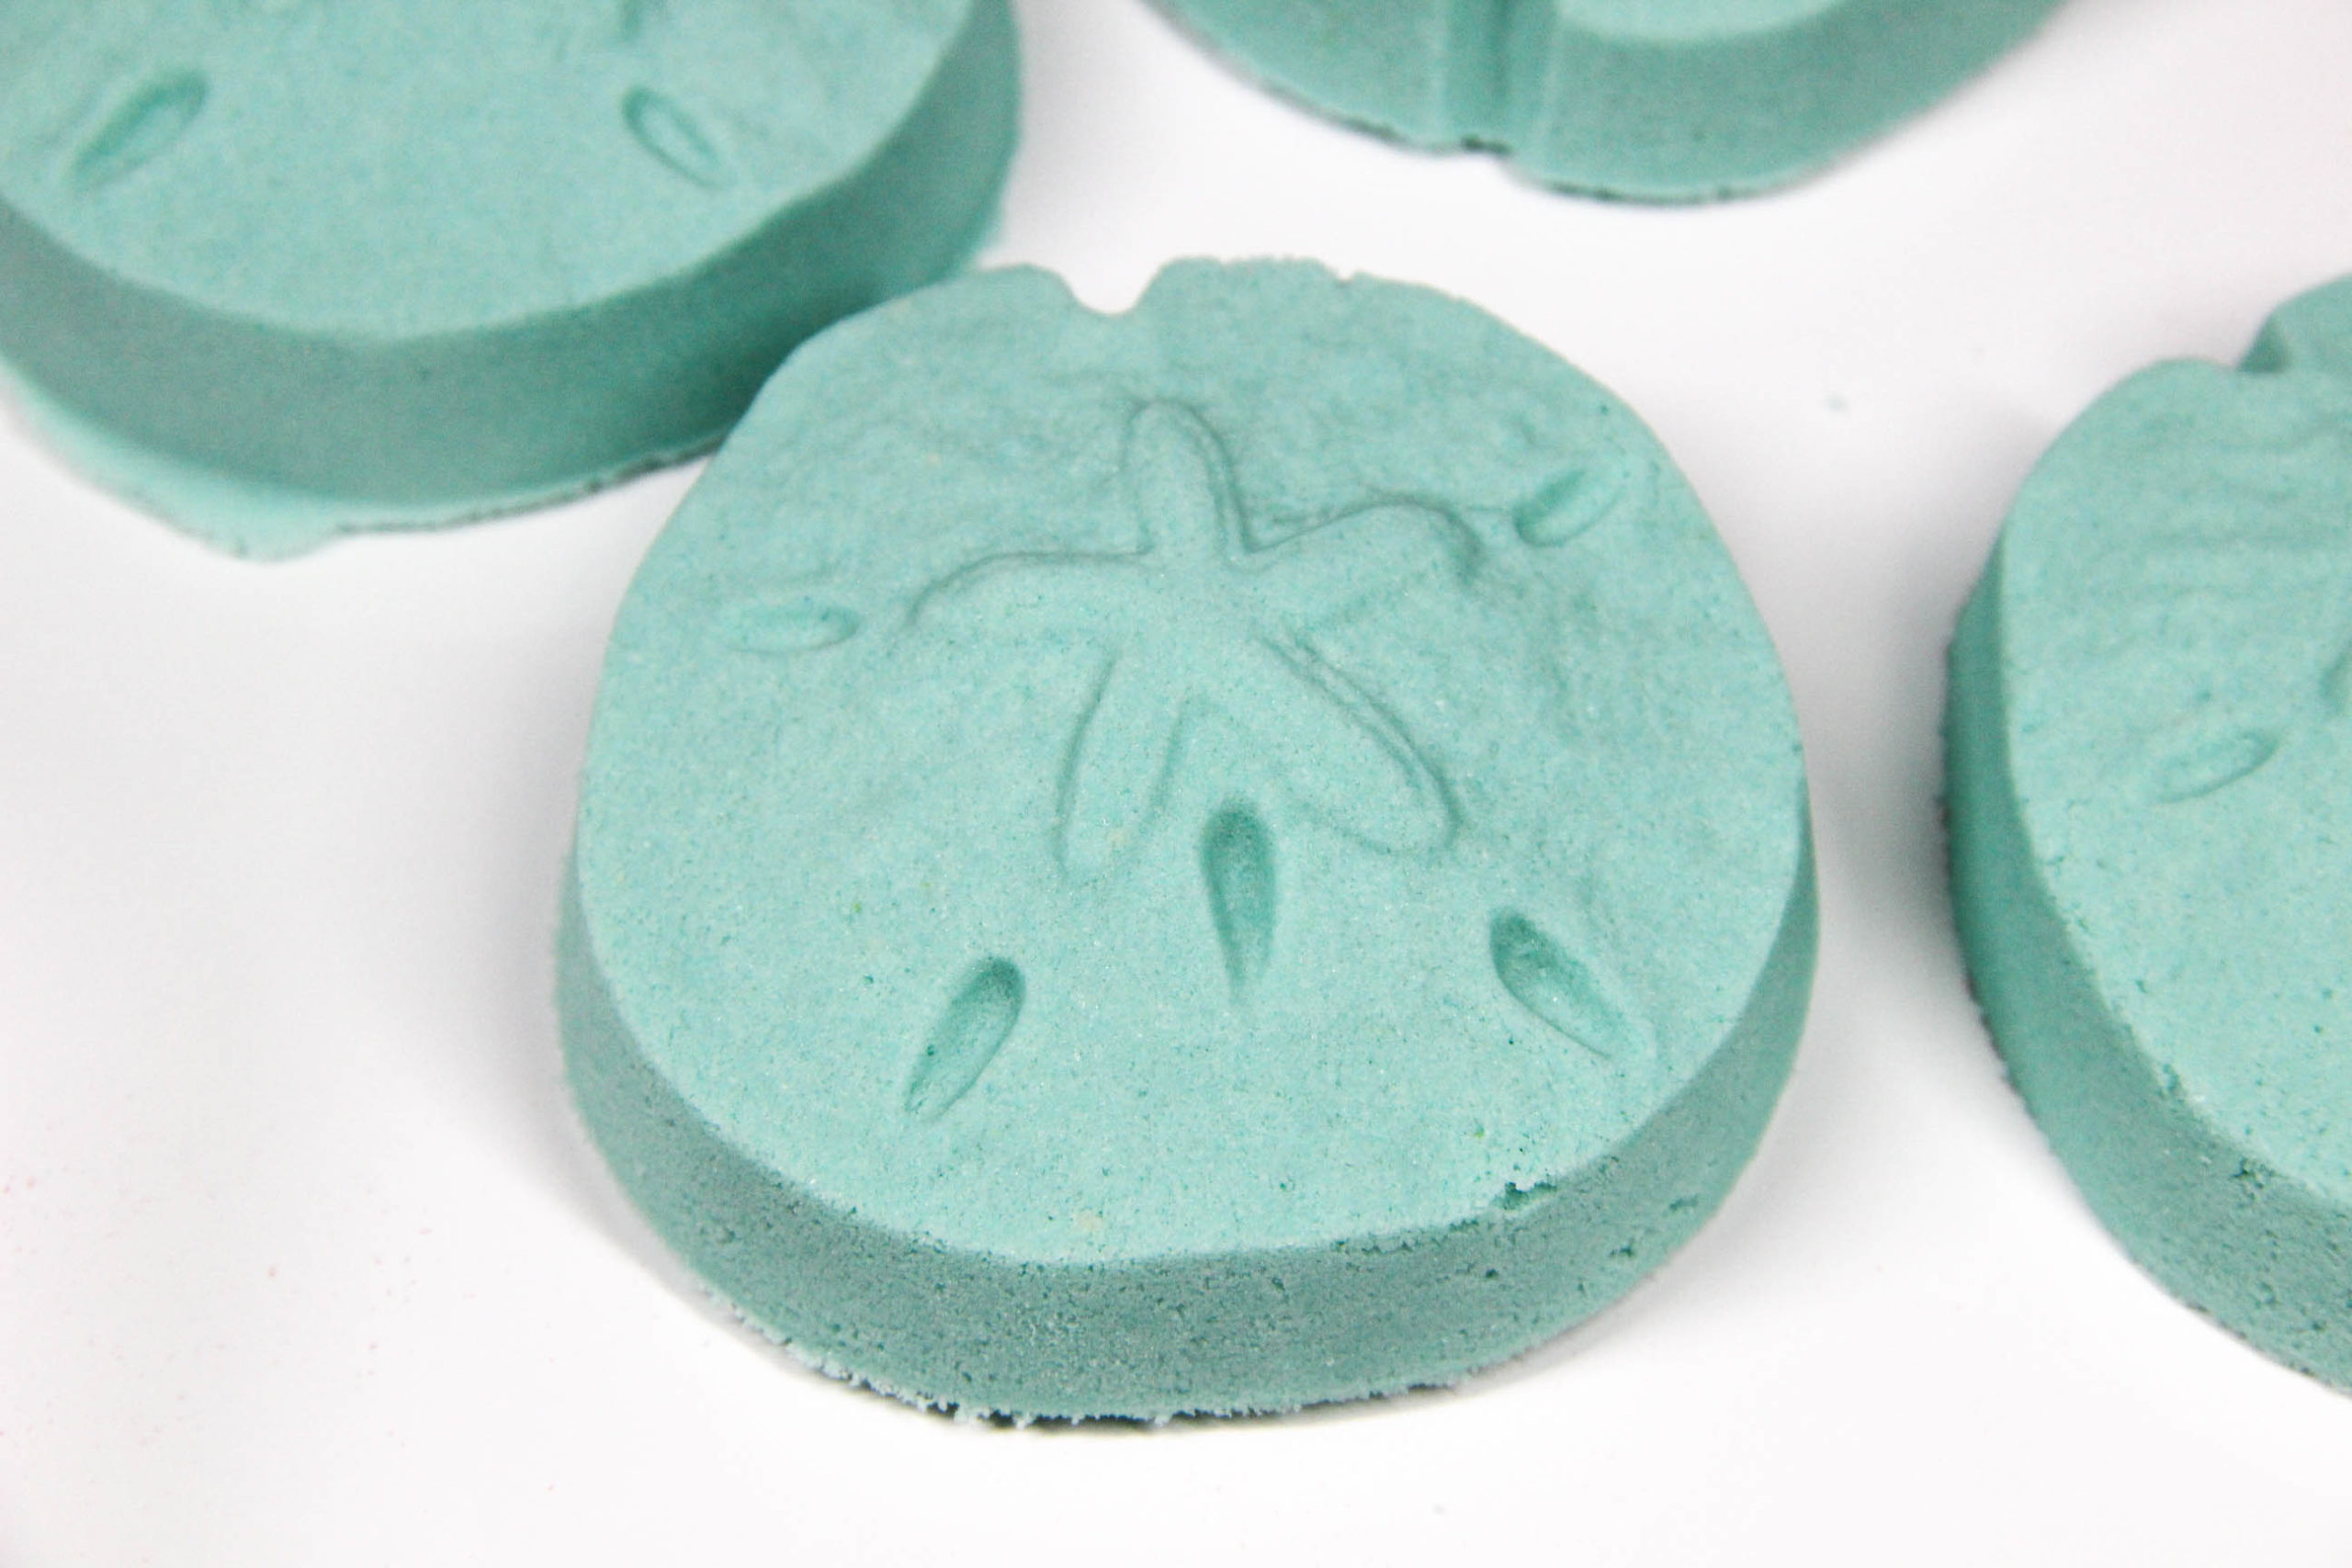
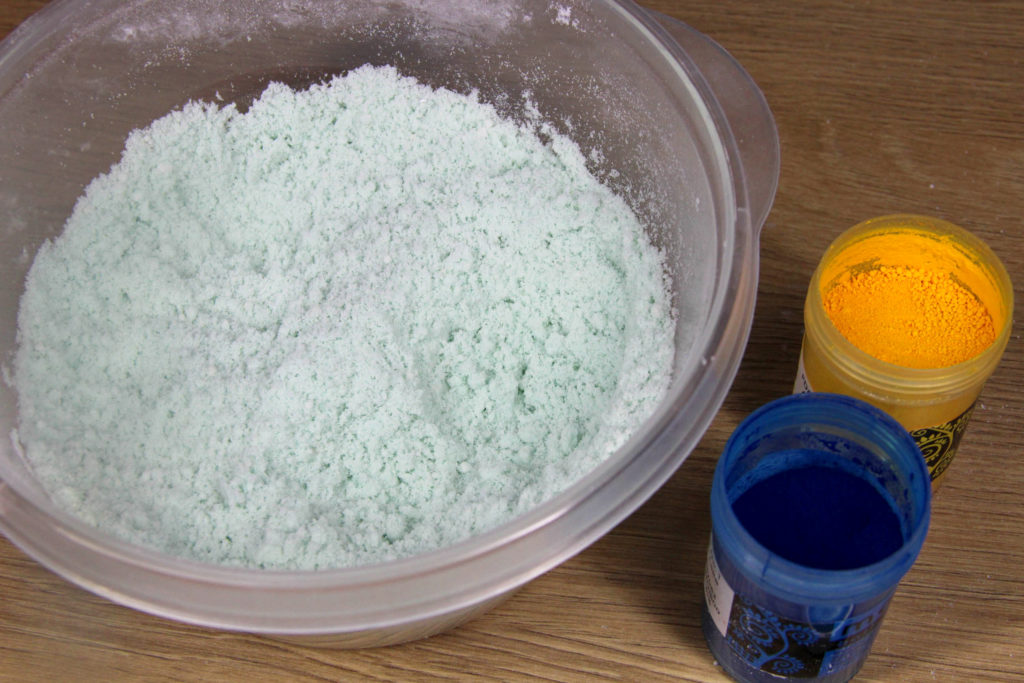
Step 4: Add your coloring (if you’re using one) and mix using a hand mixer to disperse. I used a pinch of Batch Certified Yellow 5 Lake and Blue 1 Lake to get this nice sea foam green.
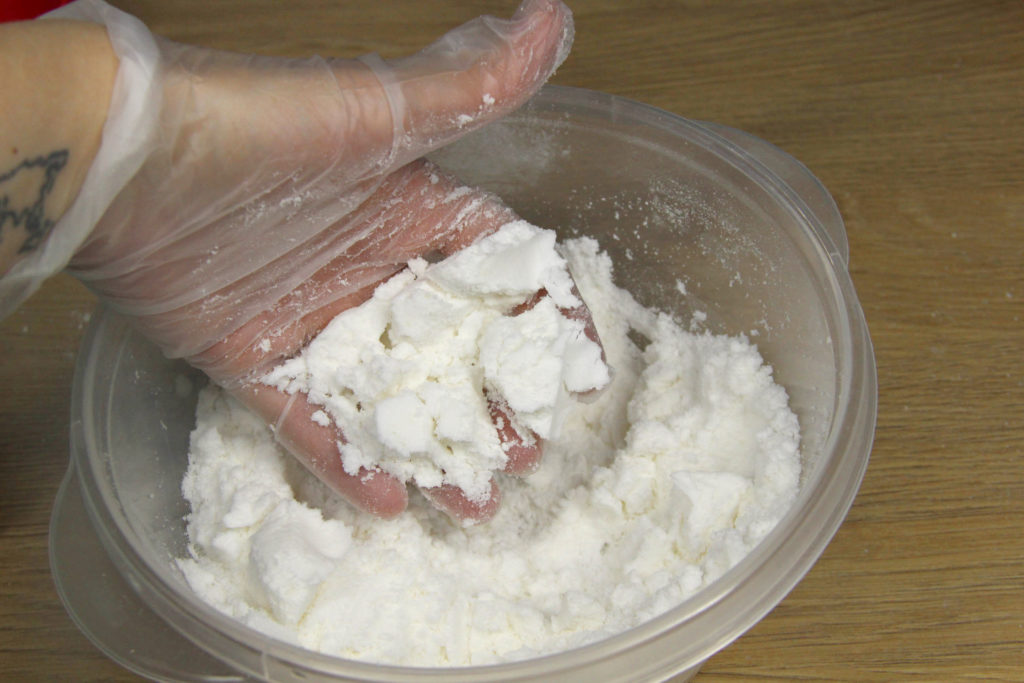
Step 5: Test your mixture to see if it’s ready. It shouldn’t be ready yet, but I want you to feel it and see how it looks at this stage.
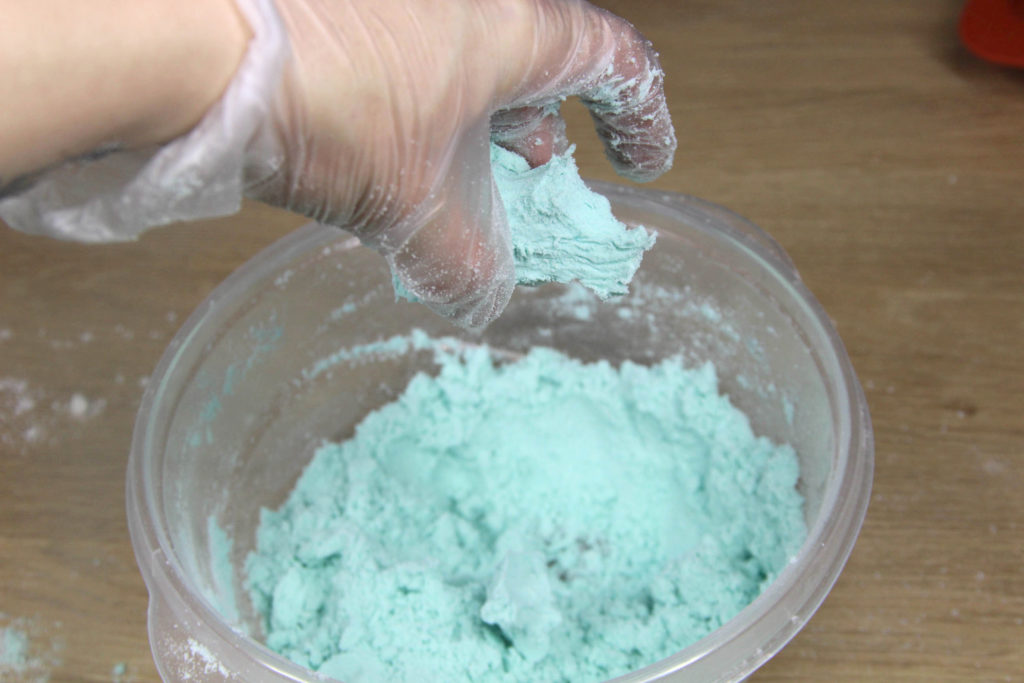
To test your mixture, grab a handful of mixture and squeeze it to compress. Note the results. Does it stay compressed or does it fall apart? If your mixture is anything like mine at this point, it will crumble easily and won’t hold its shape. (I tested and took the pic before adding my color.)
Step 6: Wet the mixture to get it to the correct consistency for molding.
Wet your mixture using a fine-mist spray bottle of binder. Spray five times, then test again. Because your spray bottle will vary from mine, I can’t tell you exactly how many sprays it will take. Test often to not over-spray.
The mixture feels like lightly damp sand, not like wet sand, which would be too much moisture.
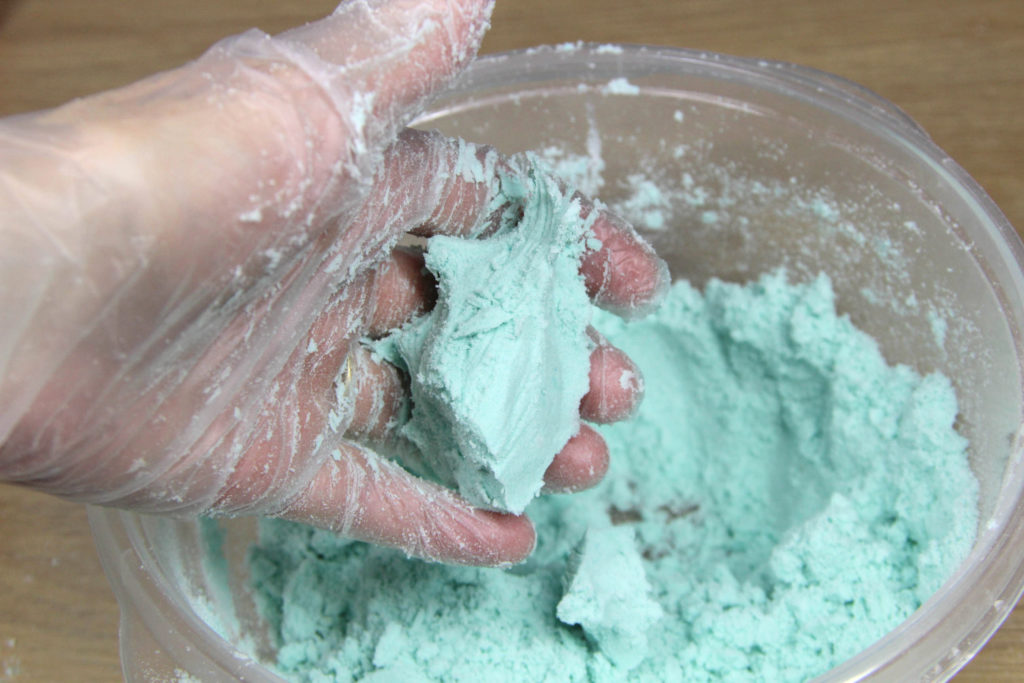
I like to test mine by tapping it with my thumb. It should stay together and not break apart easily. Some makers hold the clump of mixture in the air (maybe 10-12 inches) and drop it into the bowl. If it stays together, it’s ready.

This really is the hardest part! If you can get this part down, you can successfully make bath bombs!
Here are some tips:
- Test your mixture often to not over-spray. Spray five times and then test it. Not ready? Spray another five times. You’ll soon know how much it takes and can spray more between testing. Don’t overdo it when first starting.
- Use a fine-mist spray bottle to have better control and dispersion of the spray. Don’t use a huge plastic spray bottle from the cleaning aisle at the supermarket. Those will spray too much.
- If you do add too much moisture, you can add a bit more baking soda and/or citric acid to dry it out.
Step 7: Now that your mixture is the perfect consistency, it’s time to mold! You can use any type of bath bomb mold that you like. If you are new to making bath bombs, hard plastic molds tend to be easiest to use. Pack your mixture tightly, pressing down firmly.
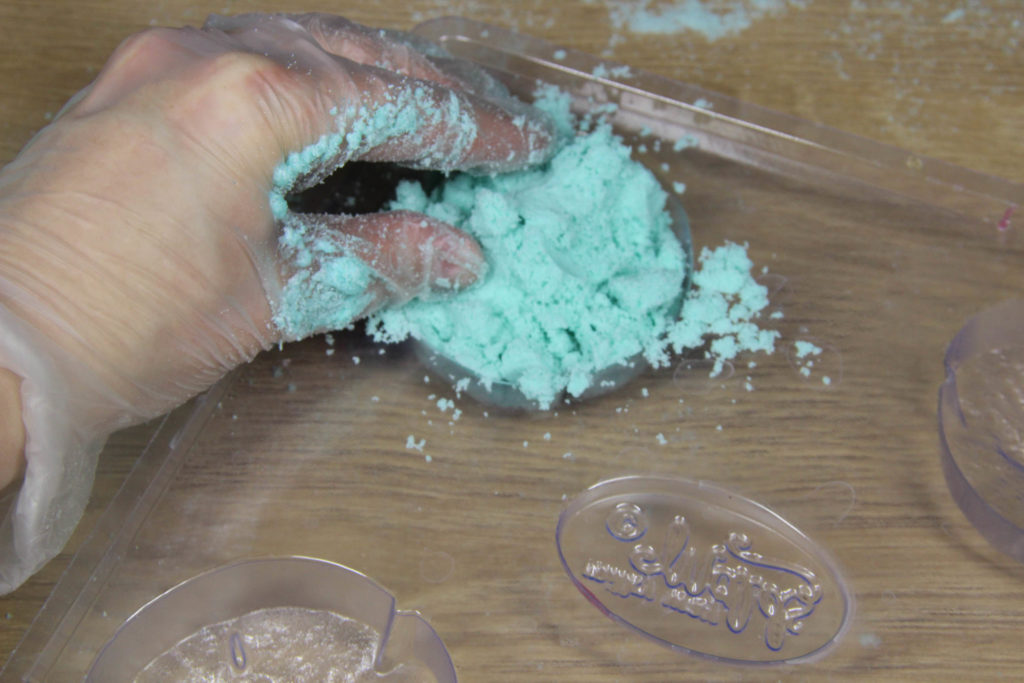
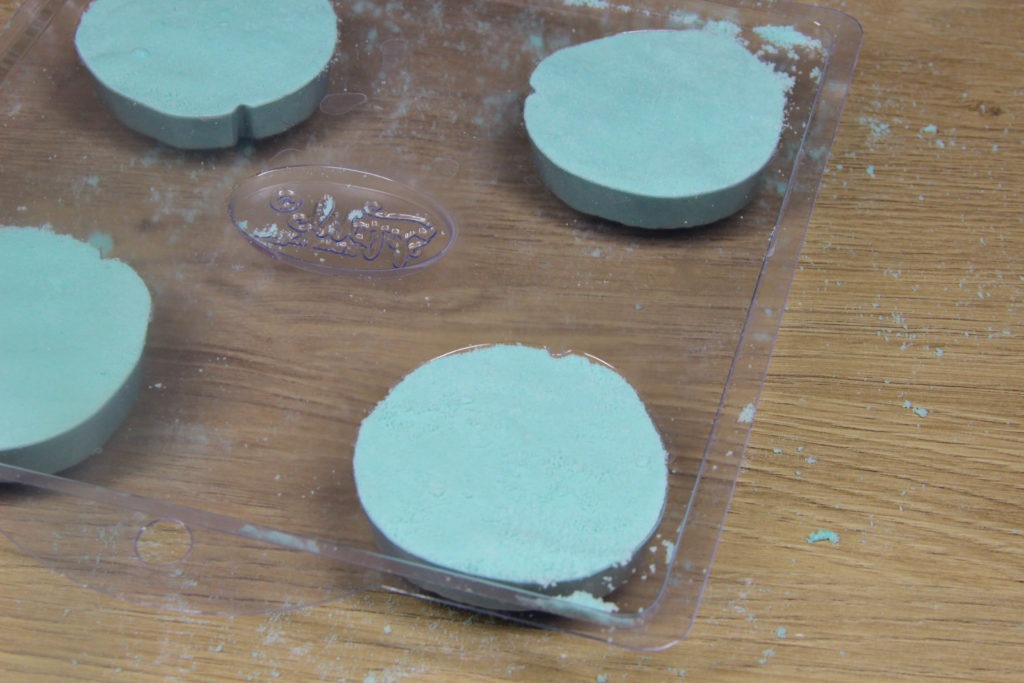
If you’re using these plastic tray molds, you can actually let your bath bombs sit for about 10 minutes to harden a bit. This will help them unmold without any issues.
If your bath bomb crumbles or breaks during unmolding, simply mix back into the batch and start over with molding.
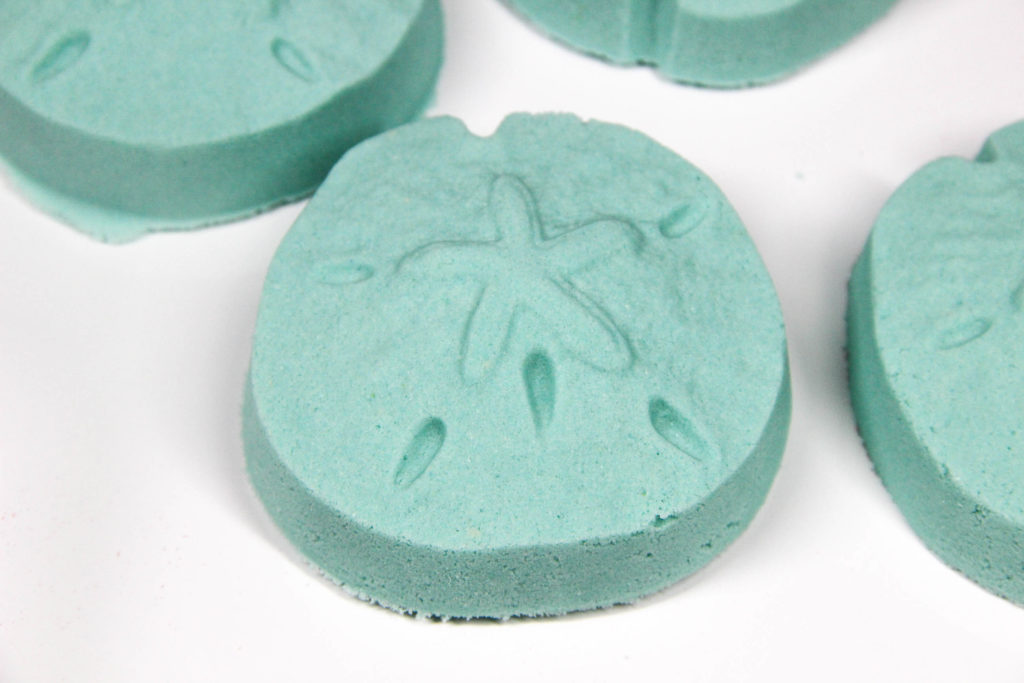
Step 8: Allow your bath bombs to dry 12-24 hours before packaging.
Happy Bath Bomb Making! -Amanda Aaron
Thank you so much Amanda. Finally a recipe in grams. I was going crazy trying to find one. Thank you. 🙂
You are welcome!
Hi, how would I change this recipe to add Cocamidopropyl betaine.
I know 1tsp can be fine for 3 cups of dry mix. I would estimate half a teaspoon for this recipe
What if we want to add SLSA? How would I incorporate this into the recipe?
10%-15% of the whole recipe.
Question were can I find the liquid surfacant you use in your bath bomb book..Fun In The Tub
Hello! I get the Bubble Up from Wholesale Supplies Plus. But you can use any liquid surf. Cocamidopropyl betaine
What’s the “binder” made of in the spray bottle?
50/50 Easter and alcohol she mentioned
I just found this recipe I hope it works all other I’ve found did not but I feel like your recipe will work thank you I will bd trying today
We definitely hope it works for you! You can also join our Facebook support group for lots of gray hints and help!
Could I just add a teaspoon of SLSA?
Sure you could add some SLSa! 😊
Thanks for the recipe. I’m confused, citrus acid. Is it juice or a fresh fruit? Love your recipe.
Citric acid is like the texture or salt. You can find it on amazon or many grocery stores. Though it is possible to make a “bath bomb” without it, the main 2 ingredients that make a TRUE bath bomb are baking soda and citric acid.
How many bath bombs does this yield on average?
it depends on size. example: I have bath bomb molds that are:1inch, 1,5 inch, 2 inch, 2,5 inch, 3 inch and some that are not round, but flat designs that are great for filling up to 4oz. if a recipe has about 12oz and I know that my 3 inch mold holds about 10oz, I know ill get 1 bath bomb with mix left over. if a recipe has 12oz mixture, I also know it can fill 3 f my 4oz flat design molds. another example, if my 2 inch mold makes a 4oz bath bomb, I know I can make 3 of those from a 12 oz mix. note, average bath bomb is about 2.5 inches and 6oz.
Why are my bath bombs puffing up like a fresh baked cake right out of the oven?
We find this generally happens with bath bombs that are super fresh! If they were more than 3 days old and this still happened then you might need to reduce the slsa in your recipe!
Can I add butters to this as well. How do I know how much to add?
You can replace the liquid oil with butters if you want! Just melt them and mix with your other liquid ingredients!
sounds like what happens when the baking soda and citric acid come into contact with water or moisture. If you add water, no more than 1 tbsp to a recipe like this and SLOWLY, BIT by BIT or the citric acid will activate with the baking soda.
I live in Las Vegas with low humidity. Would I need to add more oil to the recipe to prevent crumbling or just spray more water
a bit more oil. more water may make more crumble or/and activation
SO glad I found this group! I’ve been at this for 4 months and it’s always hit or miss. Thanks, Robyn!
How much SLSa would I use for this recipe?
Also, if I wanted to use cocoa butter too, would I reduce the avocado oil? Or up the baking soda/citric acid?
A lot of recipes call for 2:1 baking soda to citric acid. Do you use more baking soda so it’s less fizzy? Personally, I want mine to be more foamy, so this might work well for me.
you would melt the butter and replace whatever amount of oil with it. As for the soda and acid…i knew a lady who would put a bit less soda and a bit less soda and a but more acid. example: 2 cups soda means 1 cup acid. but she would do 1 3/4 soda and 1 1/4 acid.
hello so I tried this out and it made a perfect bath bomb so I have been making multiple batches to make one bath bomb at a time but I was wanting to make more than one bath bomb at a time. this made me one 3 inch bath bomb how would I reformulate this to be able to make 18-20 out of one batch ?
you may want to check your math as many 3 inch bath bombs are up tp 8 oz and this recipe already has more than 12oz of ingredients. Still would not be enough for two 3oz ones though. More like one 3oz and two 2oz, four 1oz or one 2oz and two 1oz. to answer your question, just multiply everything. I’d try multiplyingx10. I also suggest ounces instead of grams when changing the formula his large amount.
I have bought Robyn’s book bath bomb revolution and love it and was wondering if there was an even more advanced recipe?
More advanced would have things like: colour, slsa, fragrance, butters, dried flowers, bath salts.
also coco betaine
If this made one bath bomb, then just multiply the amount of each ingredient by the number of bath bombs you want to make … That would tell you how much of each ingredient you need to make the amount you want.
I would like to subscribe to new email notificates
How do you find your book to buy? Amazon?
Amanda’s book is called Fun In The Tub and Robyn’s book is called Bath Bomb Revolution! They are both available on Amazon! 😊
I can’t wait to try this recipe for the bath bomb first then move in to CBD. Thank you so much for sharing.
what is kaolin clay and polysorbate 80 and where can I get it? Can I use something else instead?