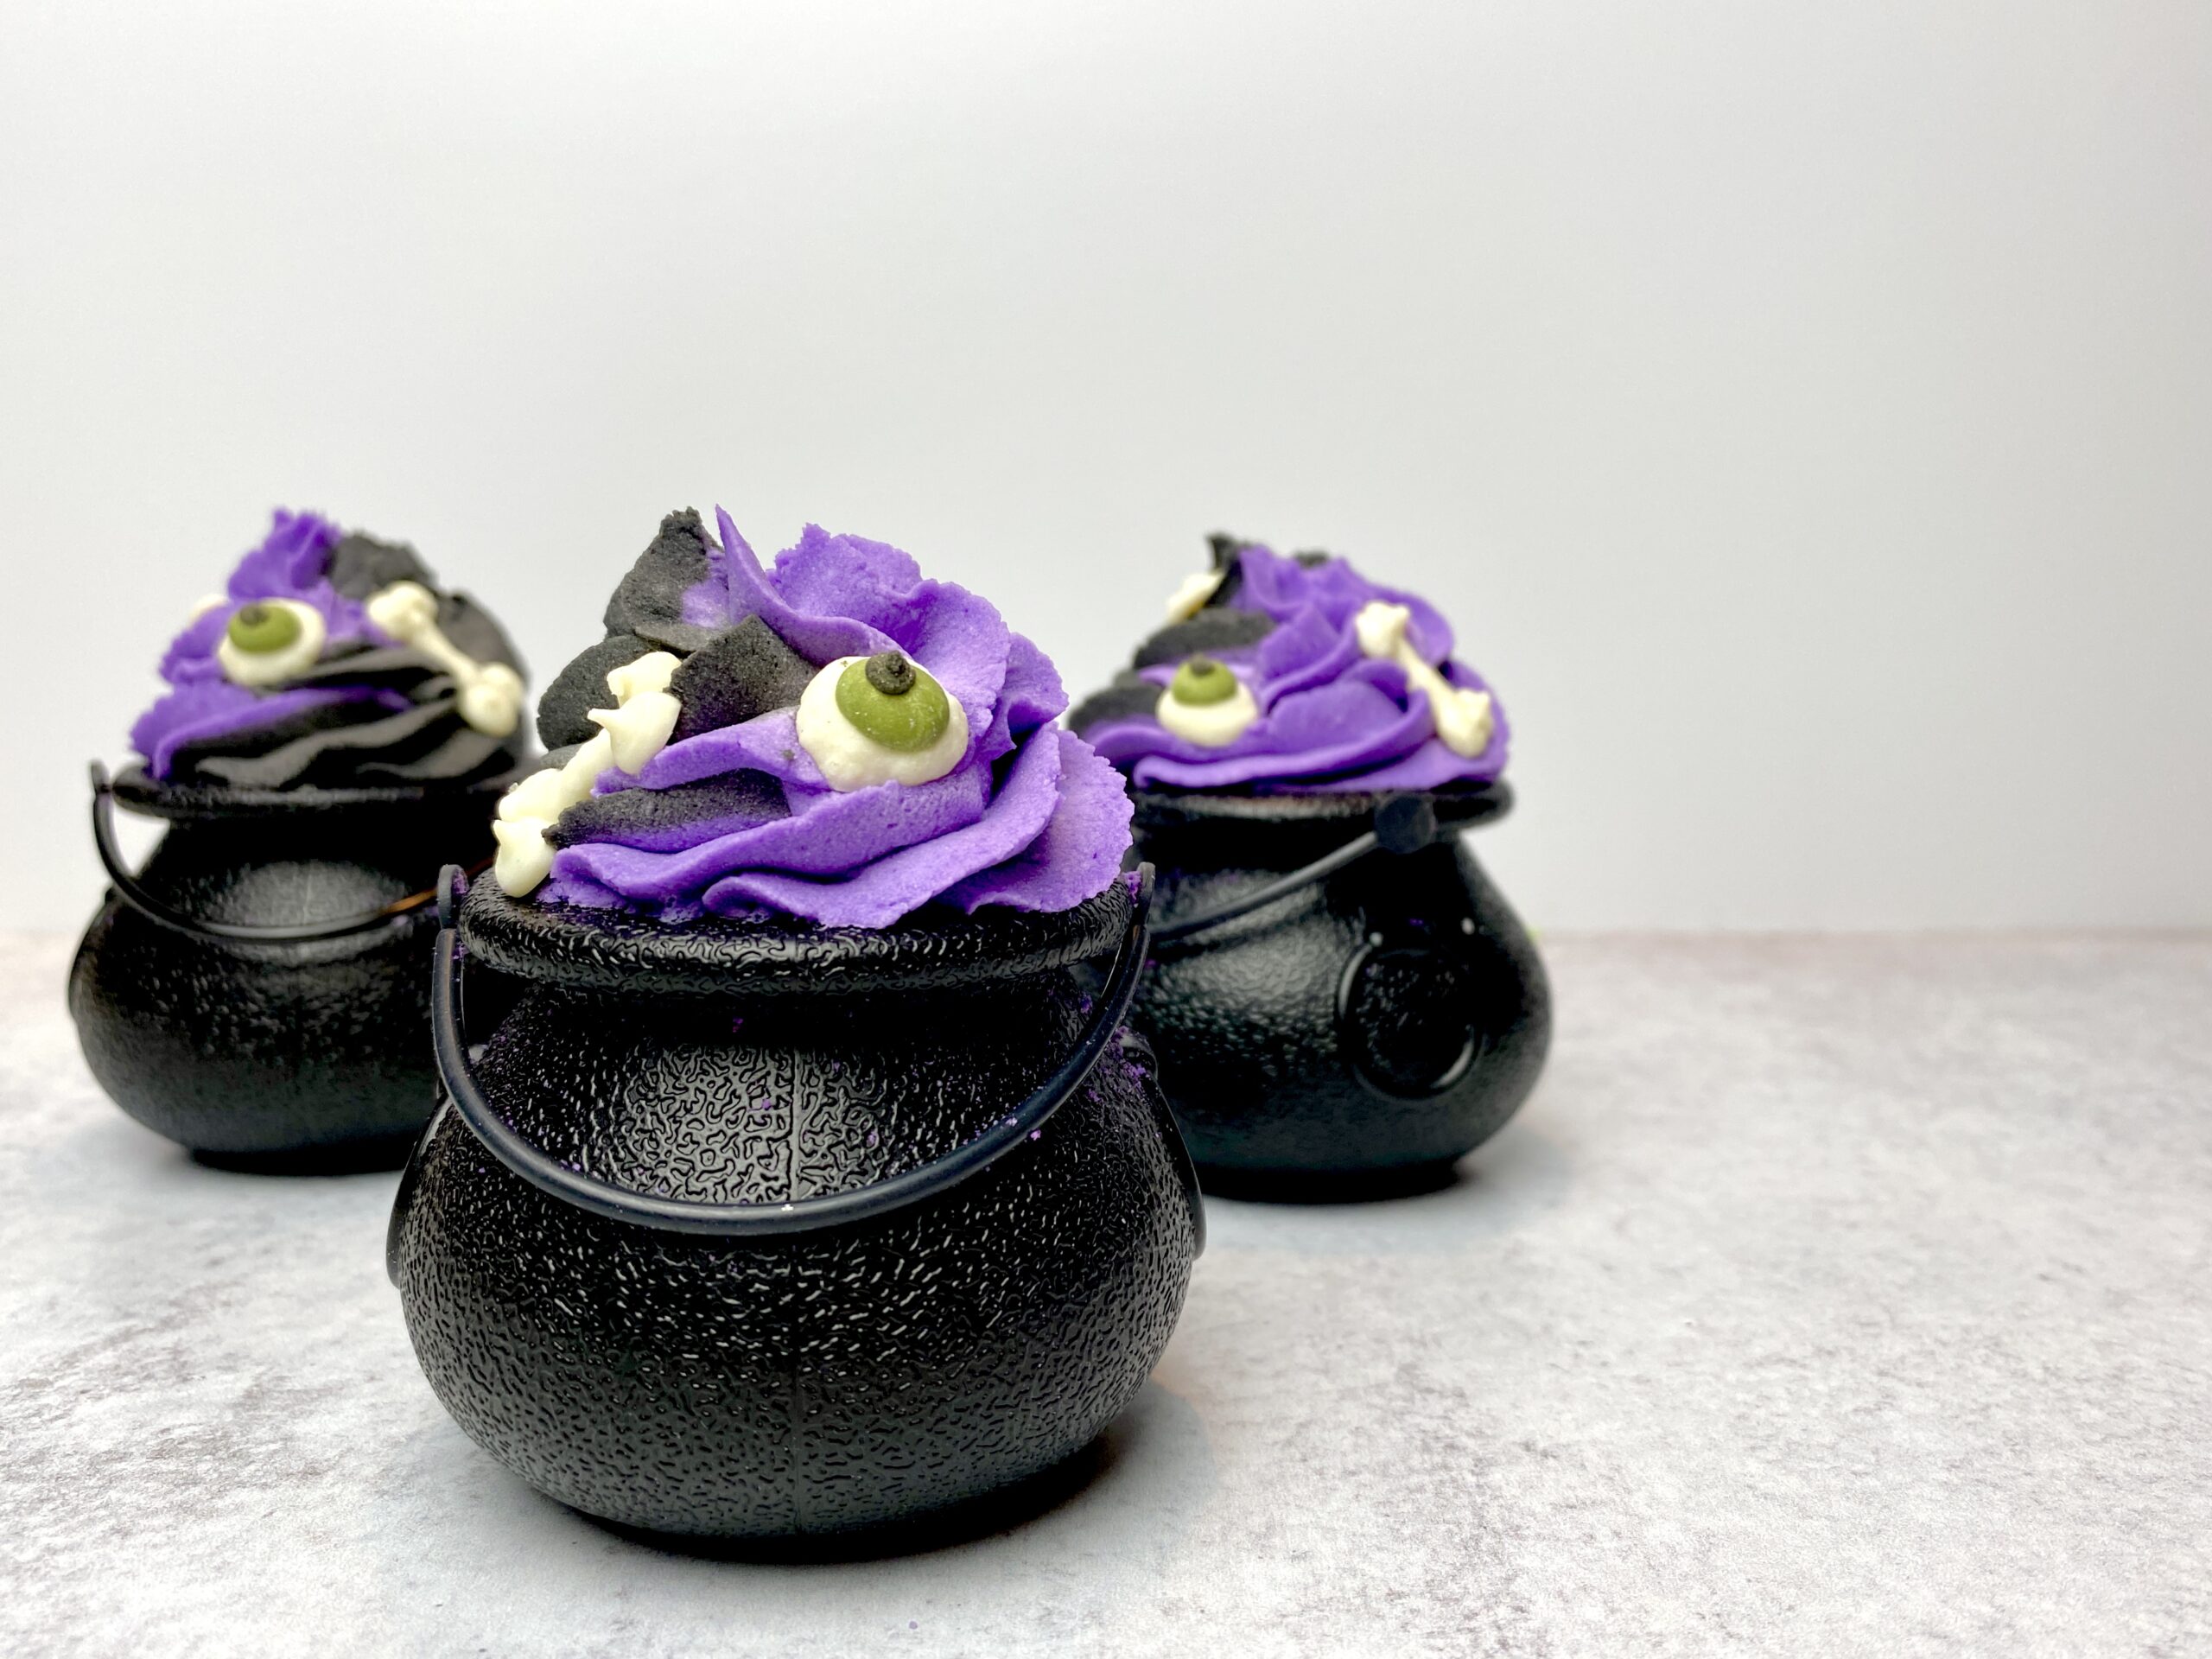
Cauldron bath bombs are super fun to use in the tub! My daughter loves them, but if I’m honest, I might love them more! Ha!
They’re fun for kids because they can use the bath bomb by dunking it into the water and watching as the bath bombs mixture fizzes out. Then when done, they can play with the cauldron container for days!
Cauldrons are easy to find these days. We found them locally at Party City. Many craft supply stores and even stores such as Target and Walmart carry them as candy/treat containers. You can also order them online from Amazon or Oriental Trading Co.
They are probably one of the easiest bath bombs to make! You simply fill each container with bath bomb mix and allow to dry. You can top it with a pipable bubble bar recipe such as Wonder Bar if you like. It really does complete the look! Here’s what we made!
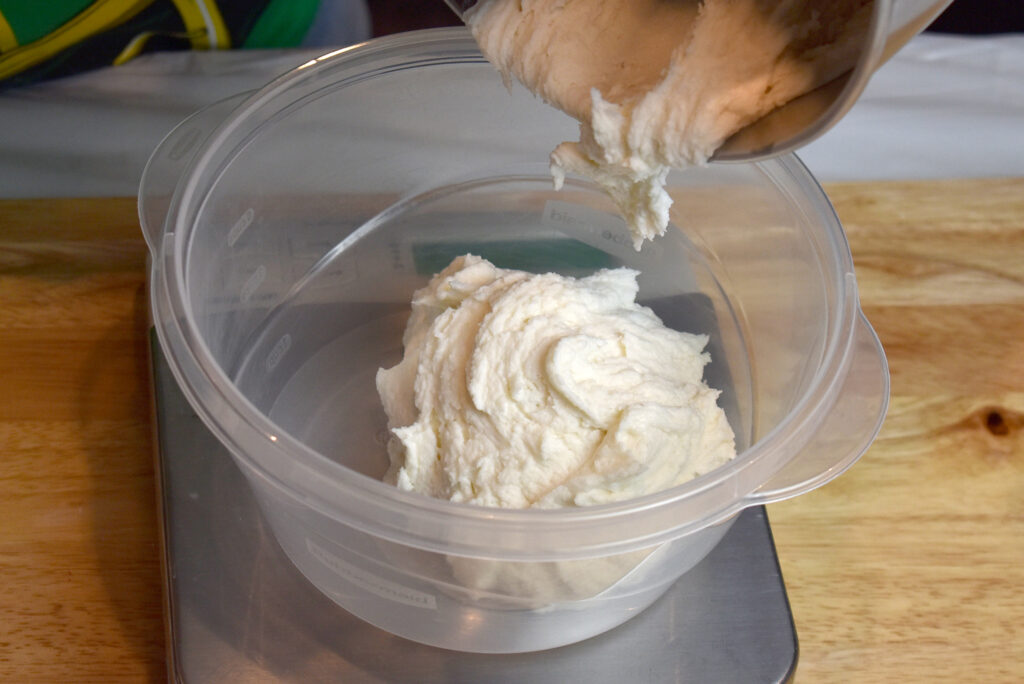
For this project, Robyn and I used Robyn’s Humid Weather Bath Bomb Recipe. We were together making soap in Florida and it behaved perfectly with the high humidity here.
We made the eyes and bones using the Sprinkle Recipe and the piping using Wonder Bar.
Tips for Making Cauldron Bath Bombs
- To pack or not to pack…When I’ve (Amanda) made them in the past, I really pack them. When Robyn made them for this project, she didn’t pack them as tightly as I do. She just loosely filled and then gave it a little pat at the end.
- Binder? We made some with binder and some without. Making Robyn’s recipe without binder worked just fine because it does have a bit of liquid surfactant in it! They hardened nicely in the cauldron and were easily shrink wrapped when dry.
- Toppings – You can make your cauldrons with or without a topping. If you want to keep it a simple bath bomb, that works! We topped ours with Wonder Bar and I’ve even seen some people top with a drizzle. I really like topping with Wonder Bar because then you can add fancy sprinkles or even small toys.
Let’s make them!
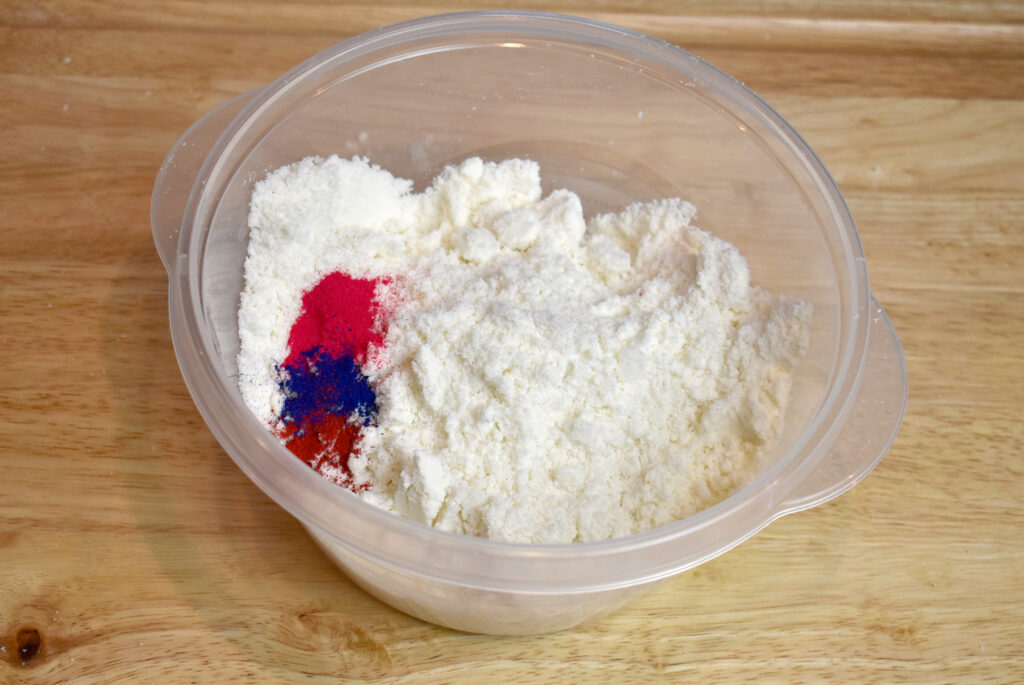
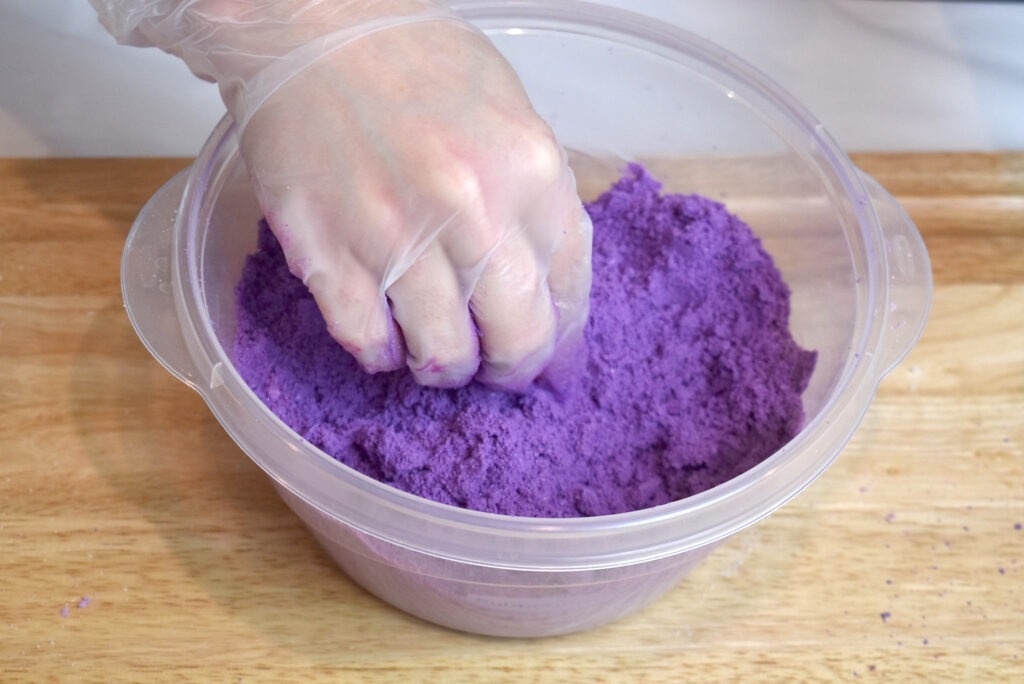
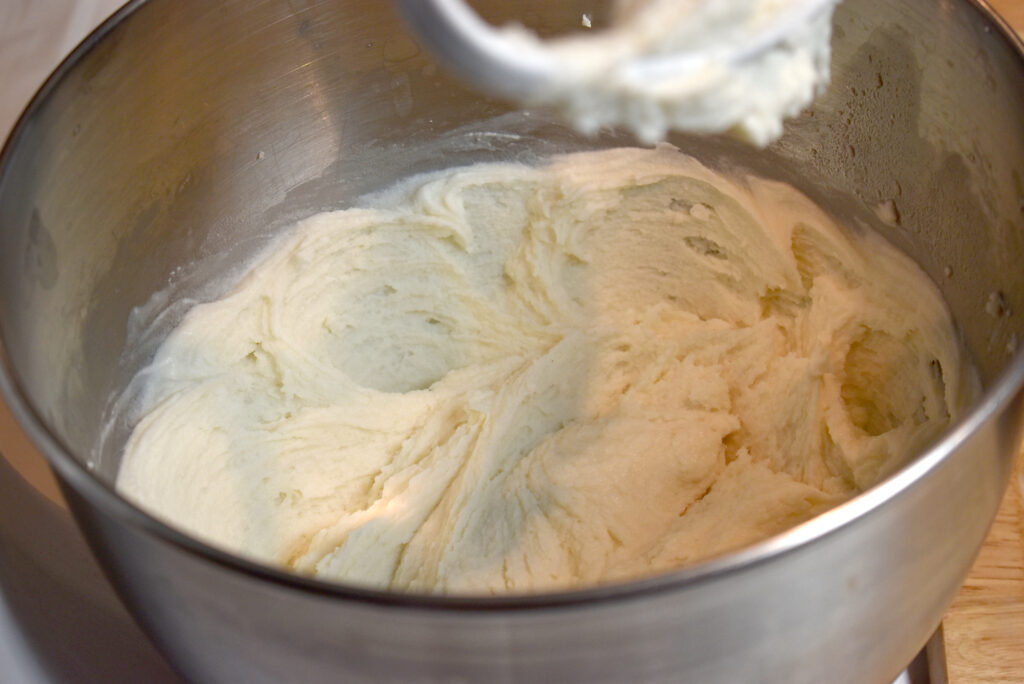
Step 1: Mix up your bath bomb mixture!
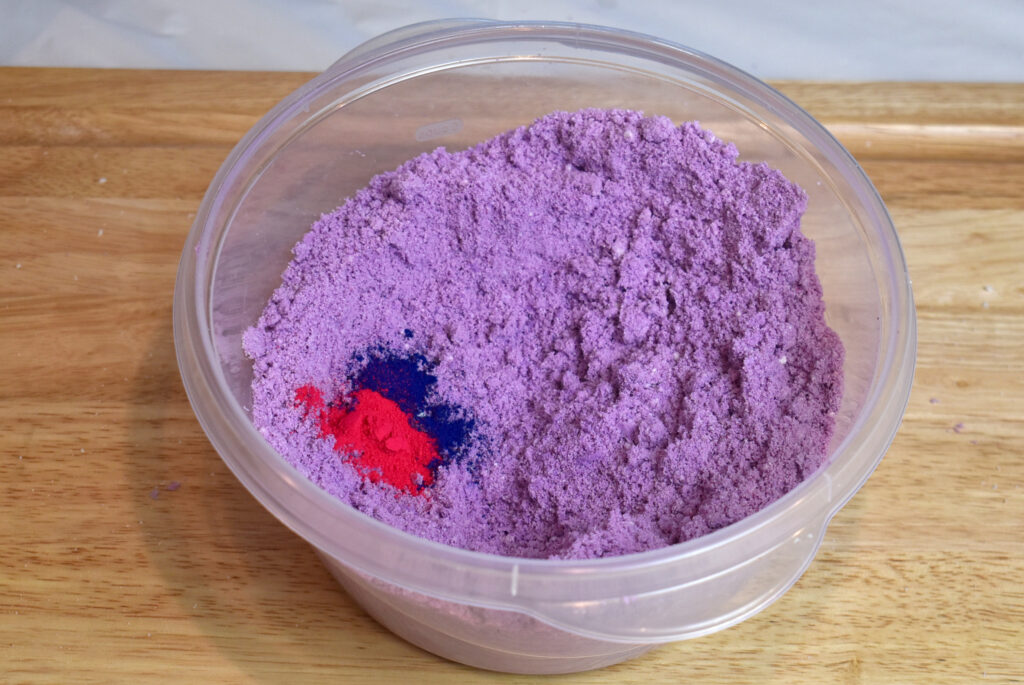
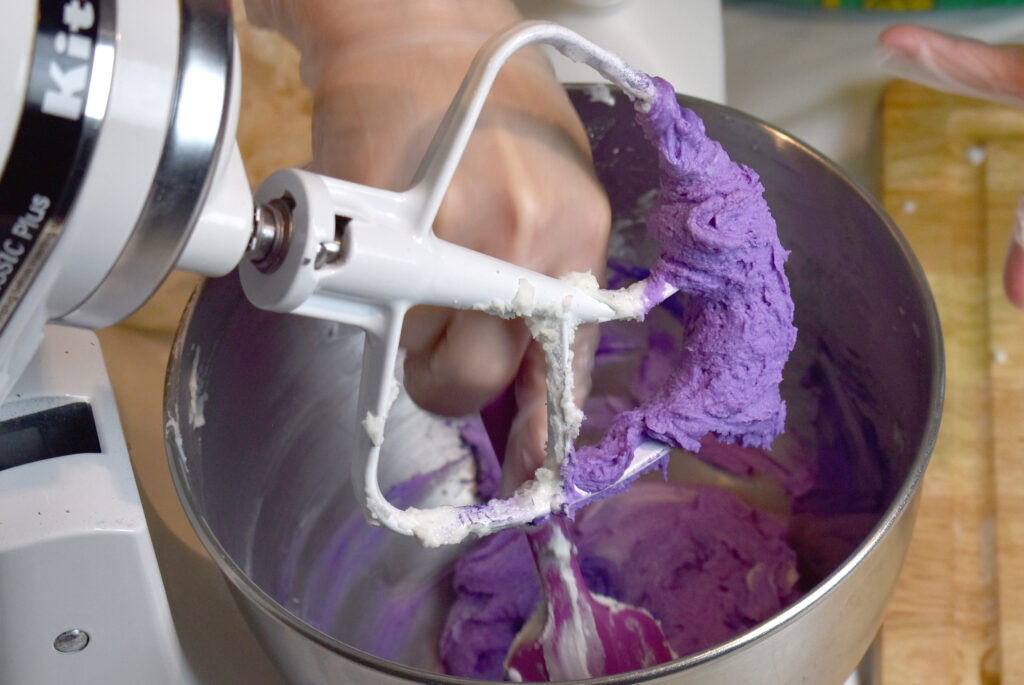
Step 2: Color purple (or whatever color you’d like! We used 2 parts Red 27 Lake, 1 part Blue 1 Lake and a microscoop of Red 40 (to darken our purple).
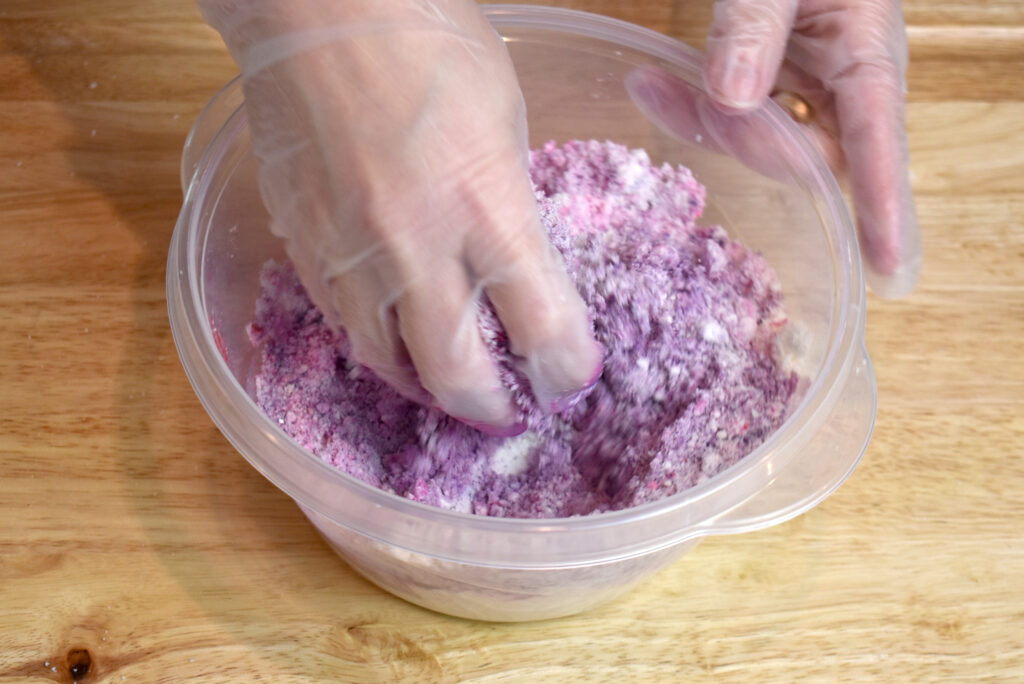
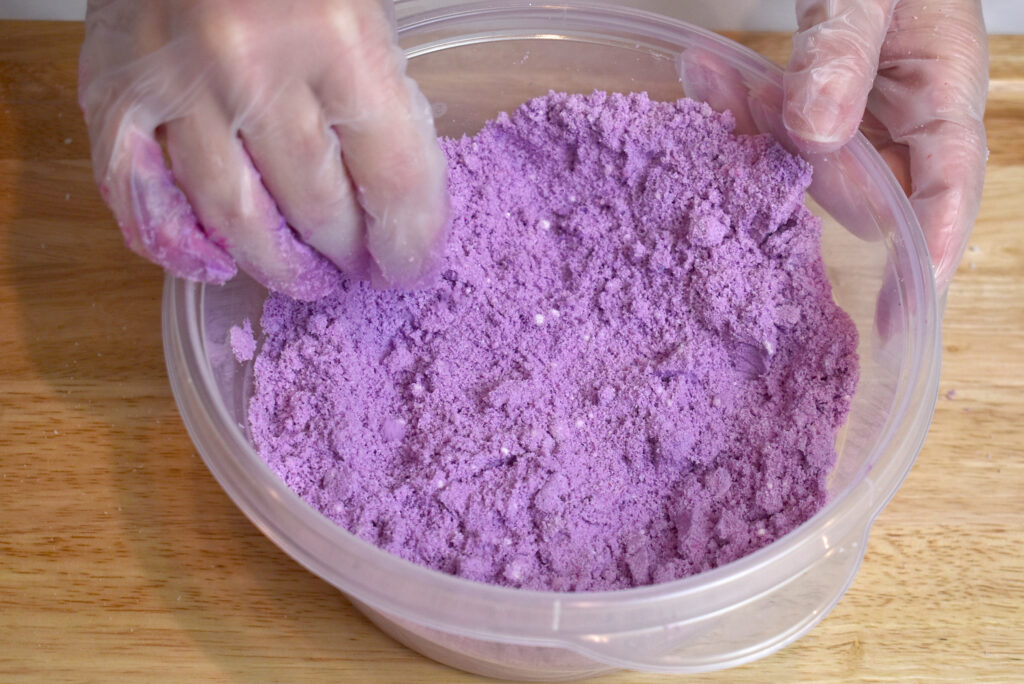
After adding our colors and mixing we decided that we needed more color! So, we did another round of lakes.
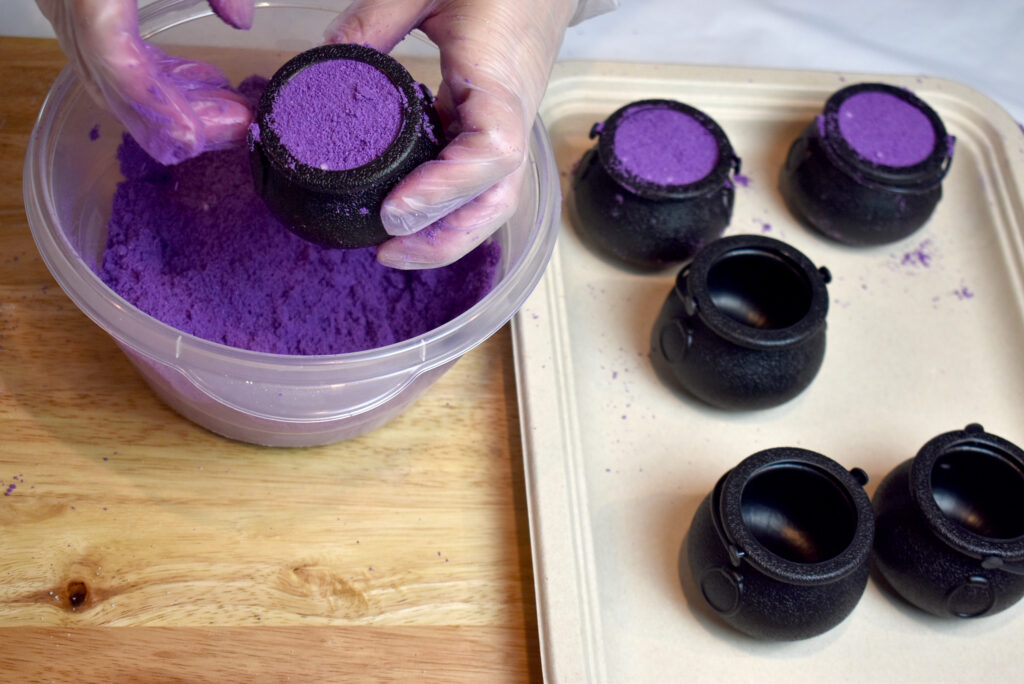
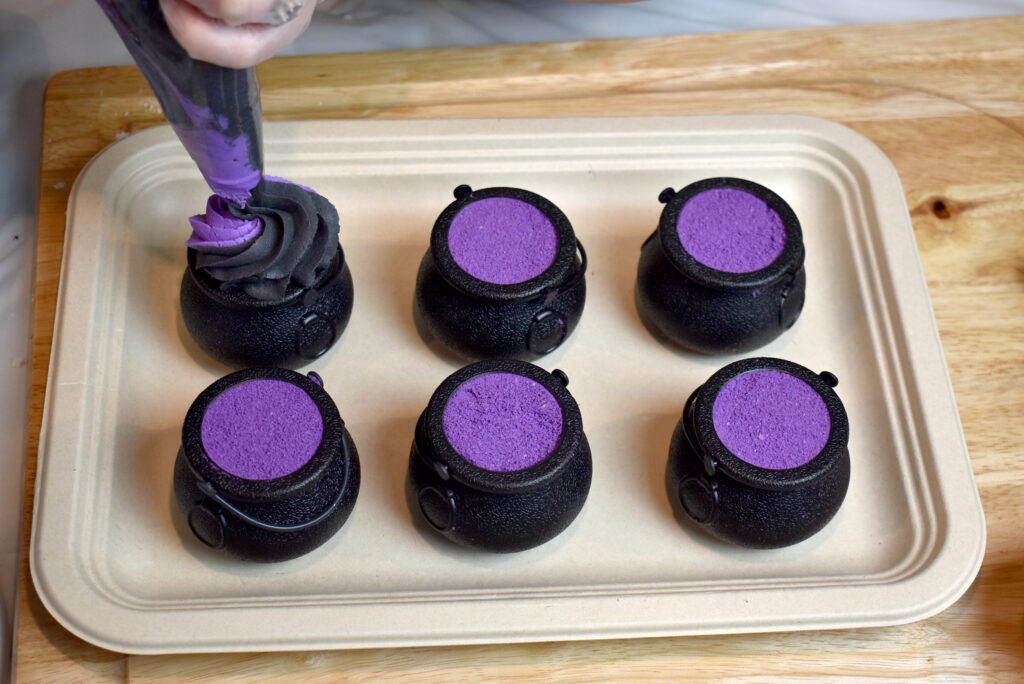
Step 3: Mold your bath bombs! Simply fill each cauldron to the top. As I mentioned earlier, I really pack mine, Robyn filled these a bit more loosely, giving it a soft pat when full. I don’t think there’s a wrong way to do it.
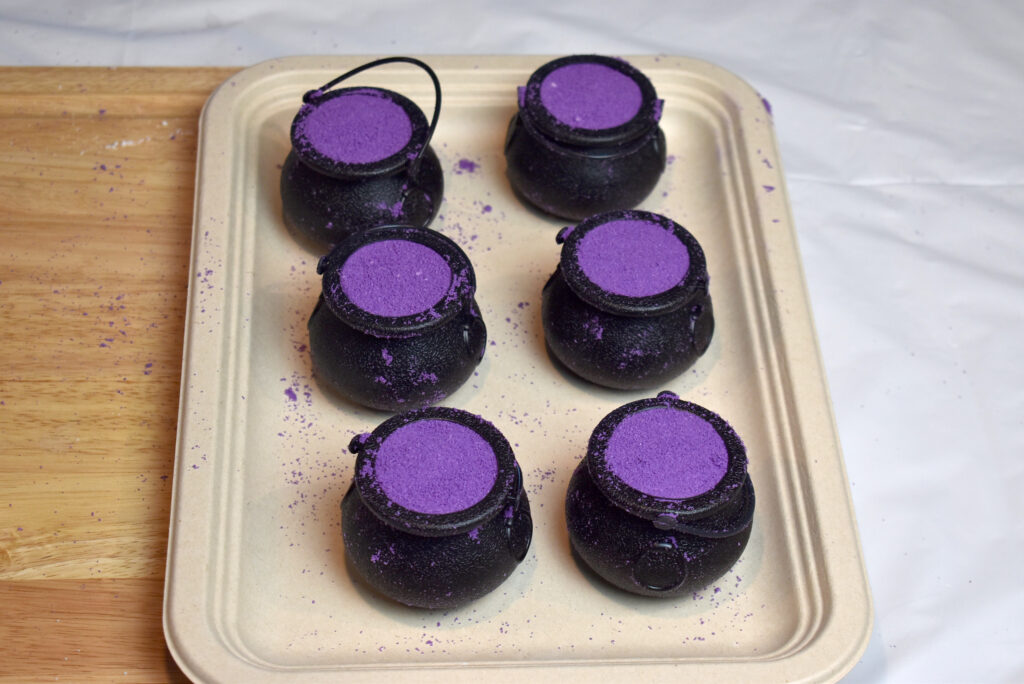
Step 4: Dry your bath bombs before decorating. Depending on how humid it is where you live, you might need to dry them 1-4 days. I dry in a room with a dehumidifer running and mine only need about 24 hours to dry (even in humid Florida!).
TIP: Drying your bath bombs: The best way to quickly dry your bath bombs is to place them in a room with a dehumidifier running. If you have no humidity where you live, then you probably don’t have to do this. But if you have any humidity, I highly recommend investing in a dehumidifier. Even if you don’t have high humidity, it can help your bath bombs dry quickly so you can decorate and package even faster! I like this dehumidifier from Homelabs on Amazon.
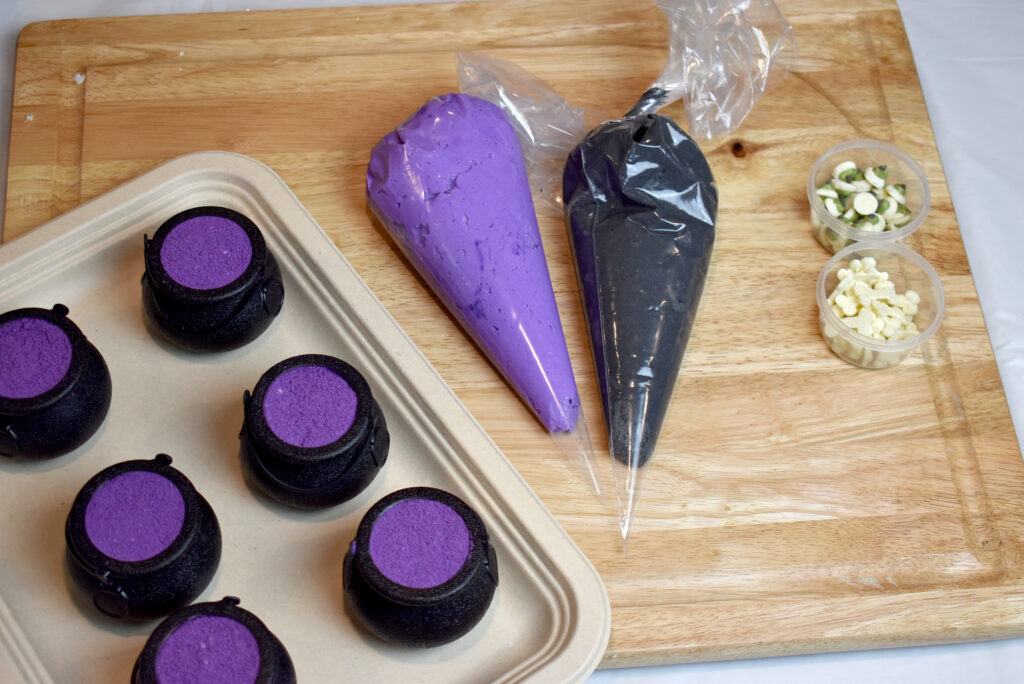
Once dry, you can decorate!
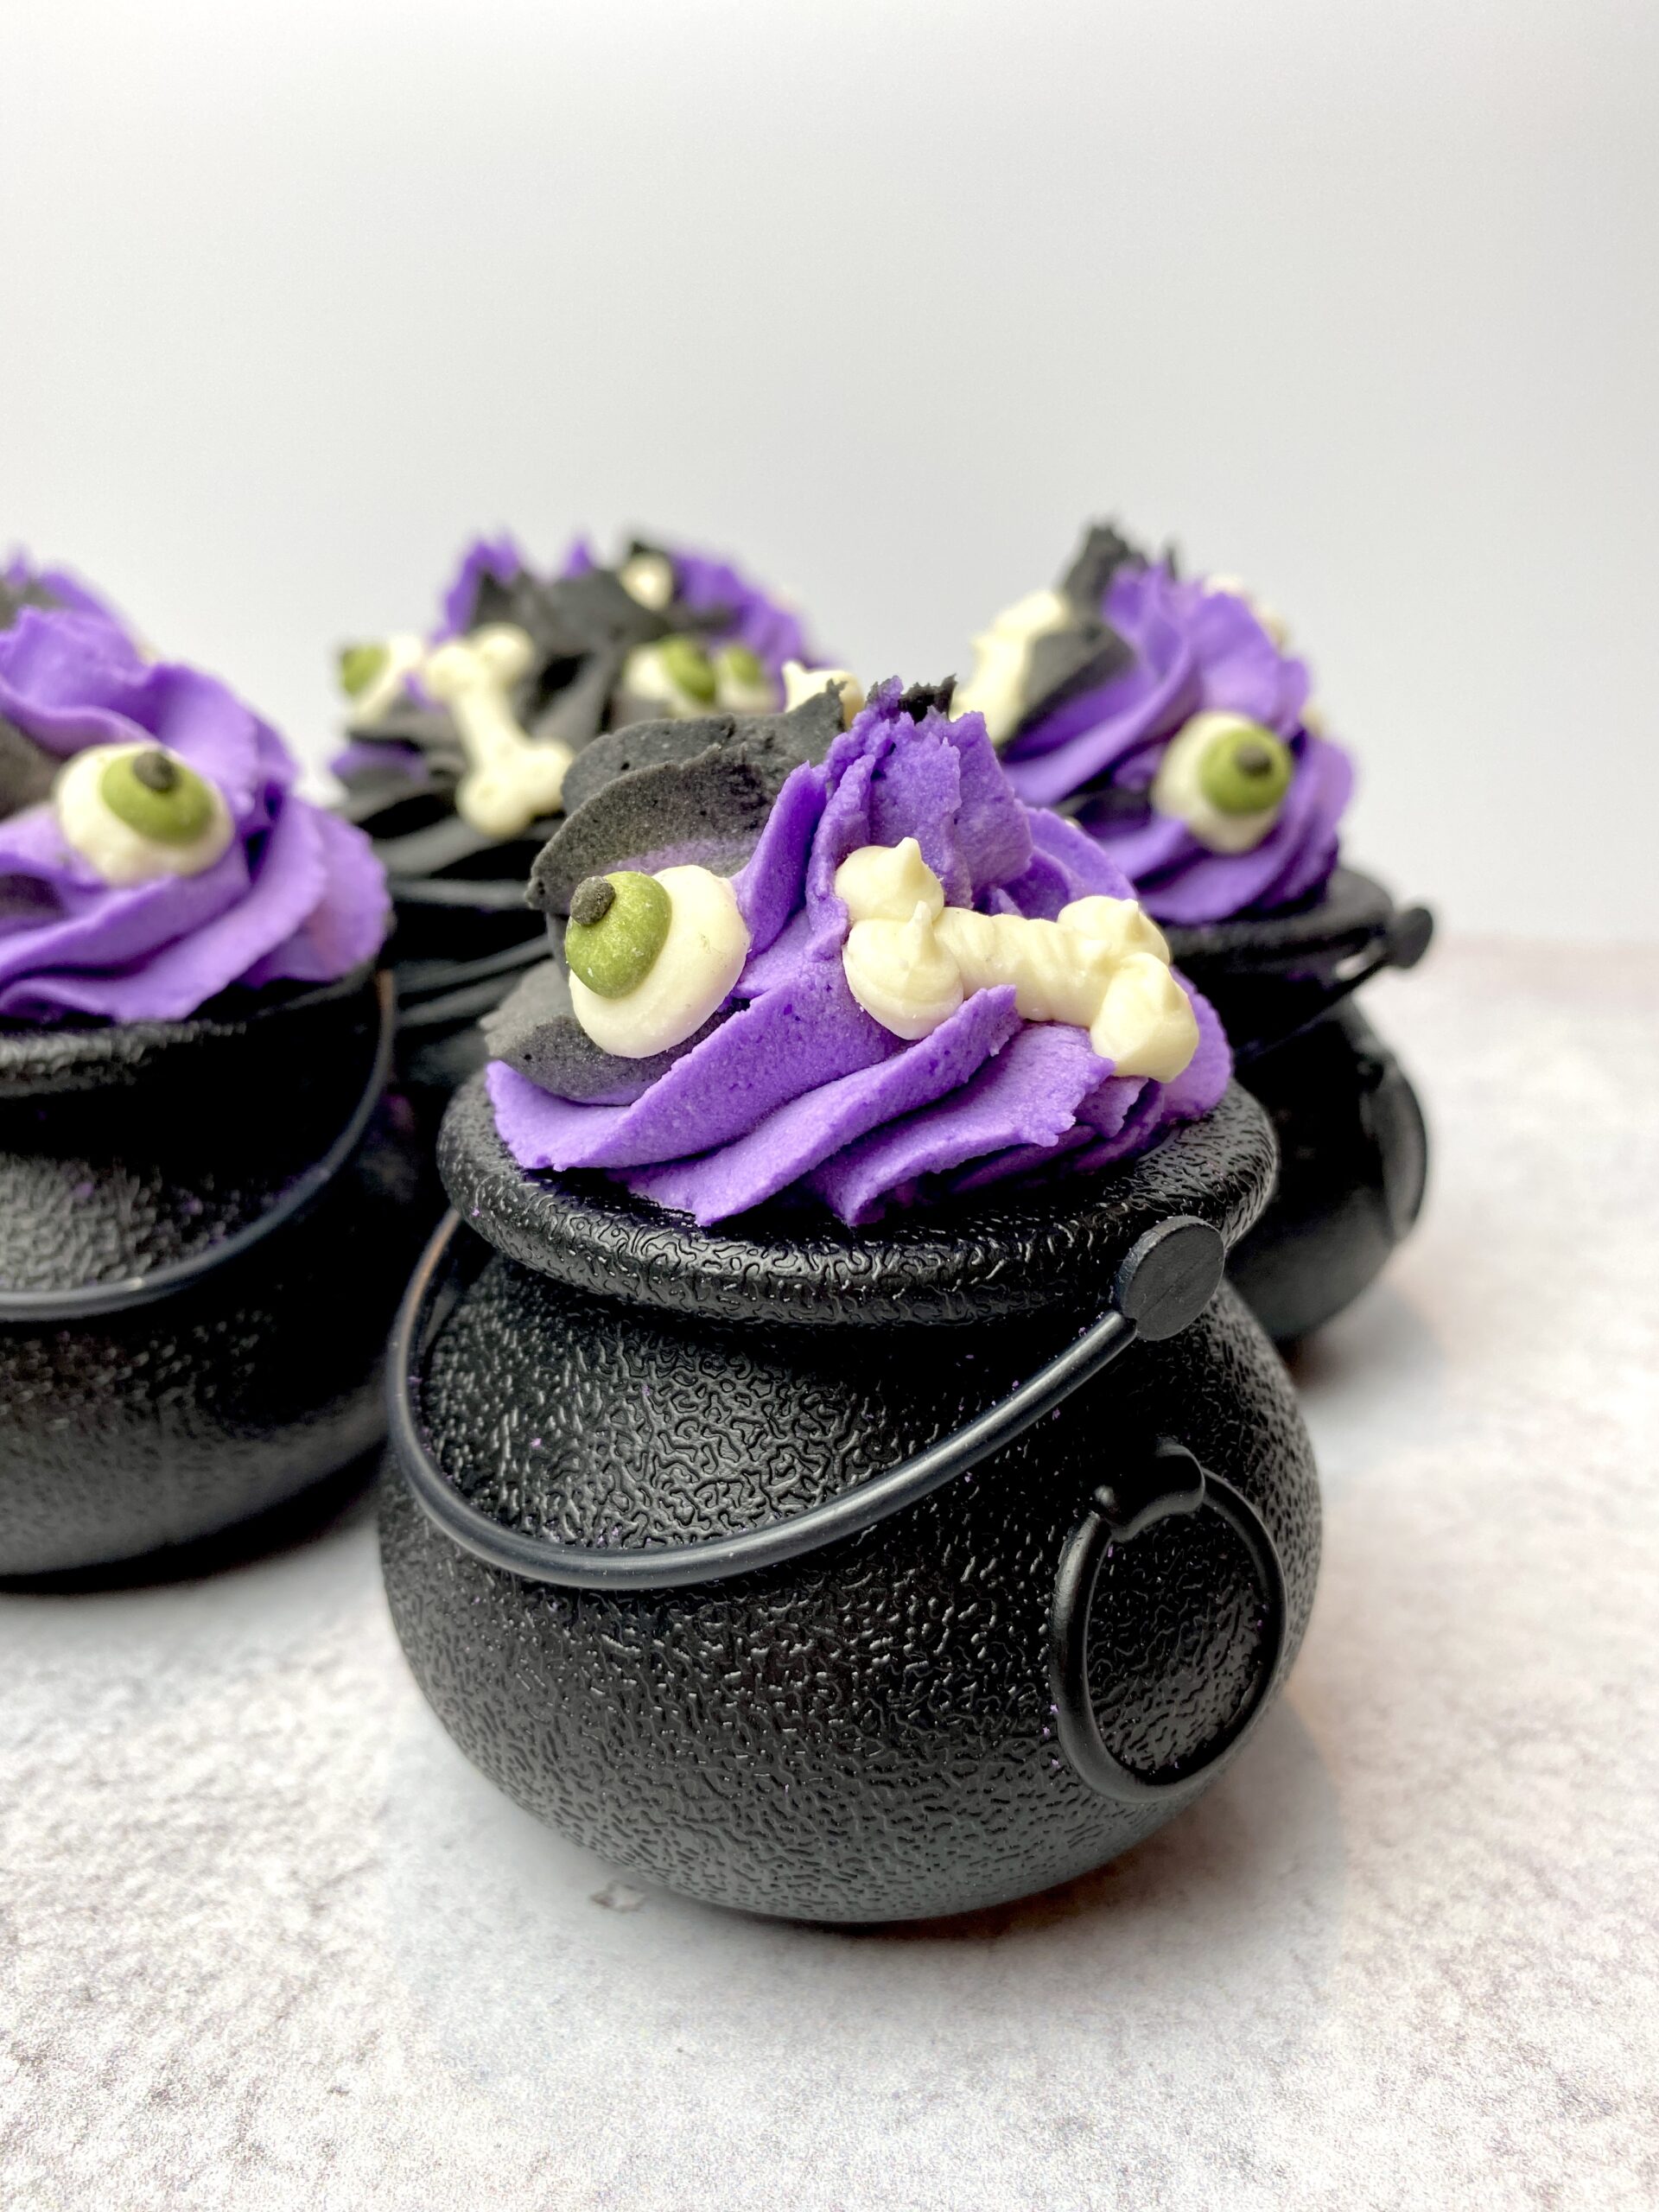
These adorable eyes and bones are made using the Sprinkles recipe! We made them ahead of time.
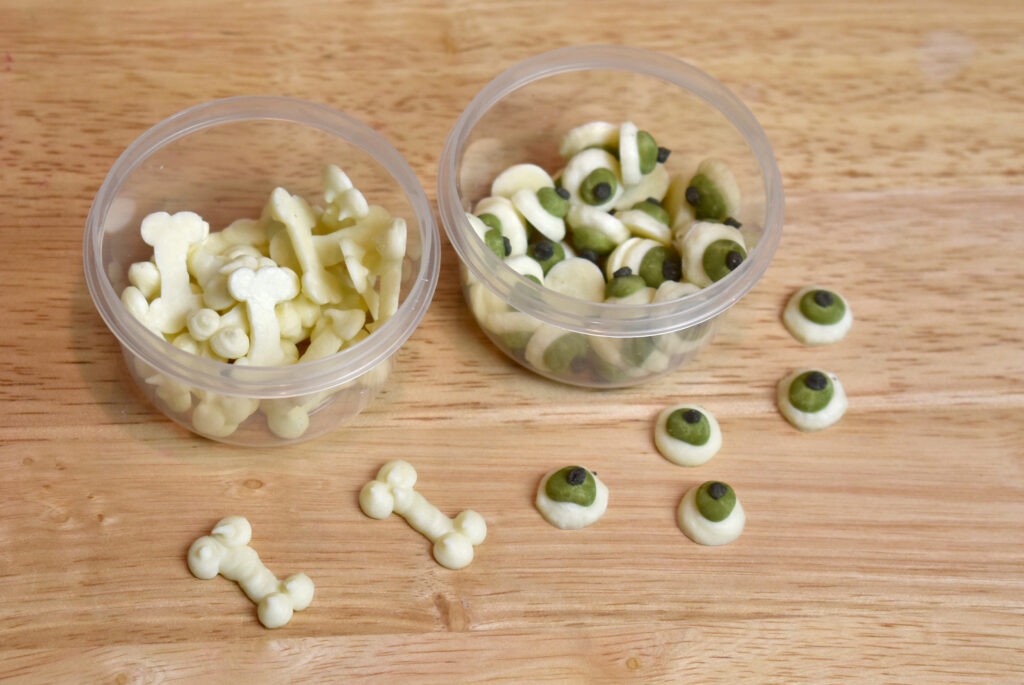
You’ll also need some Wonder Bar to pipe onto the top! You don’t have to make a whole batch, because then you’d have to much left over. You can simply grab some from a masterbatch. Check out this blog post where we talk about how to masterbatch Wonder Bar.
We actually did end up making a whole batch of Wonder Bar, because we knew that we wanted to also pipe some Bubble Wands! Check them out here.
When it comes to piping Wonder Bar, it is ALL about consistency.
Step 1: Mix Wonder Bar until you get a pipeable consistency! It should look like frosting.
TIP: Try a test piping! If your piping is airy and cracking, then add more alcohol!
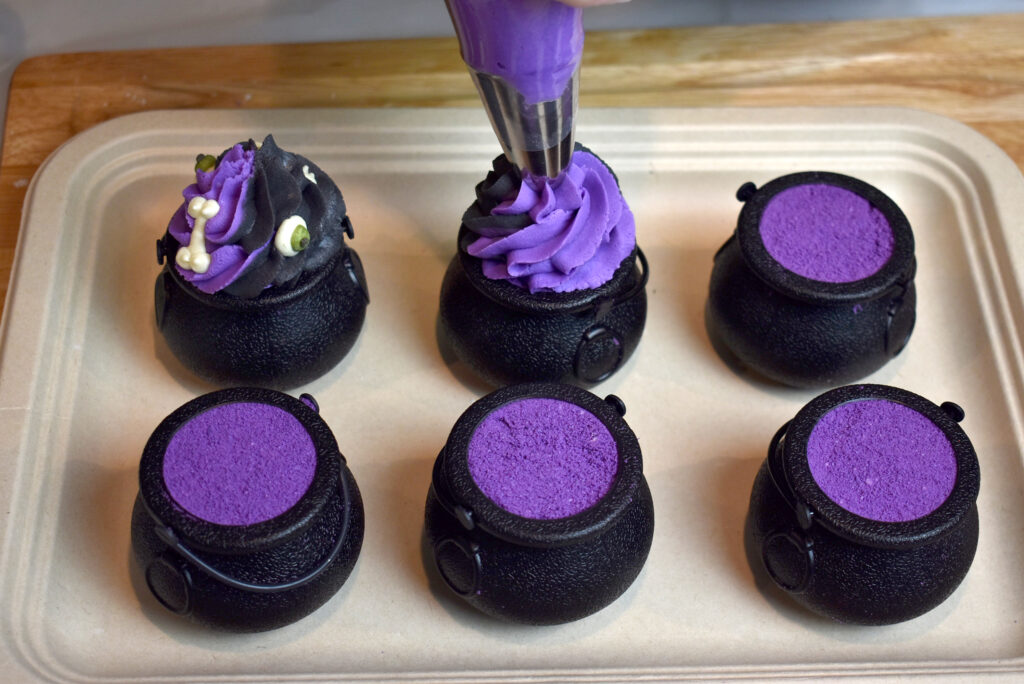
Step 2: Divide your mixture to color. Color one using purple and one using black. If your mixture dried out a bit during the coloring process, simply add more alcohol to get it back to piping consistency!
Step 3: Put each mixture into a bag (don’t cut the bags!).
Step 4: Cut the tip off of each bag as shown. (Notice there are no piping tips!)
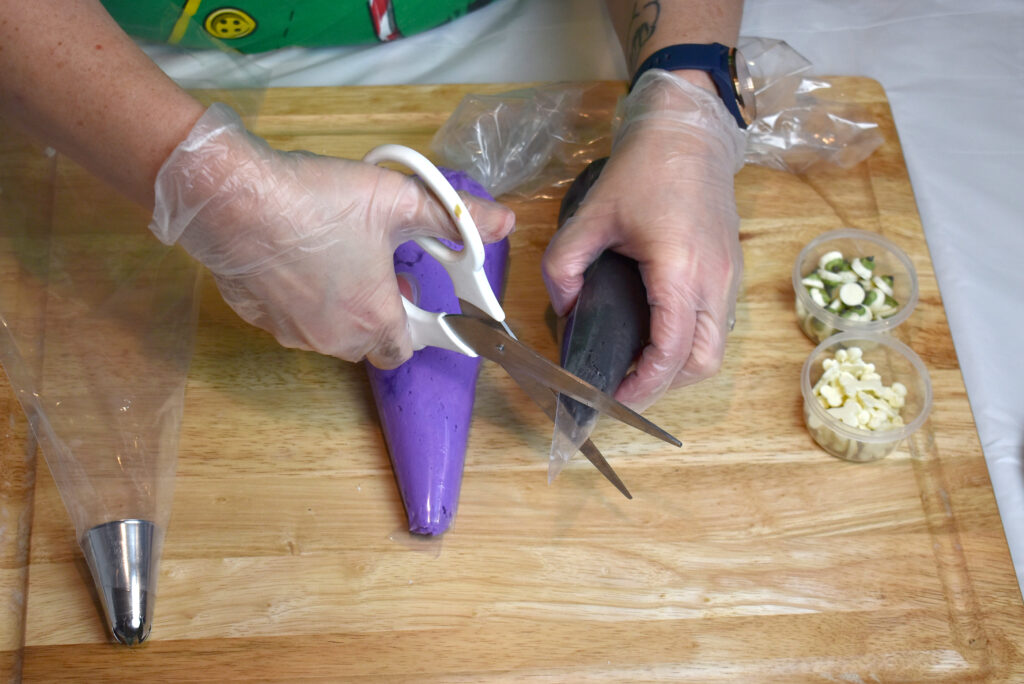
Step 5: Prepare another bag with your tip. We used the Ateco 847 tip.
Step 6: Place both colors into the new bag as shown. Try to keep them evenly inserted so when you squeeze, they’ll both come out at the same time. This will allow you to pipe a double colored swirl.
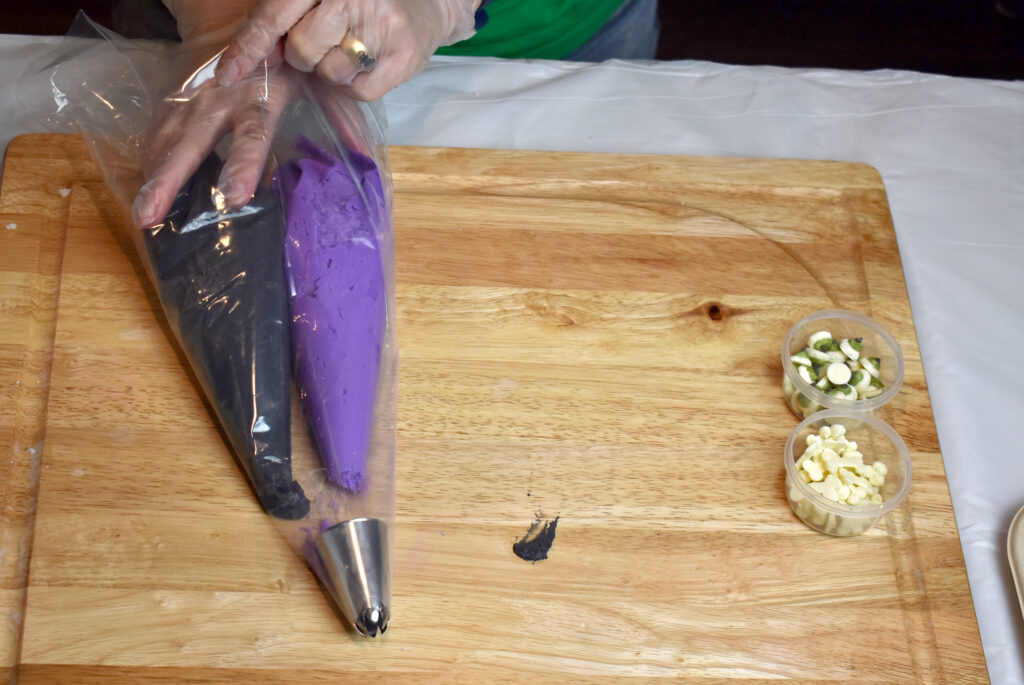
Step 7: Do a test piping to make sure both colors are coming through!
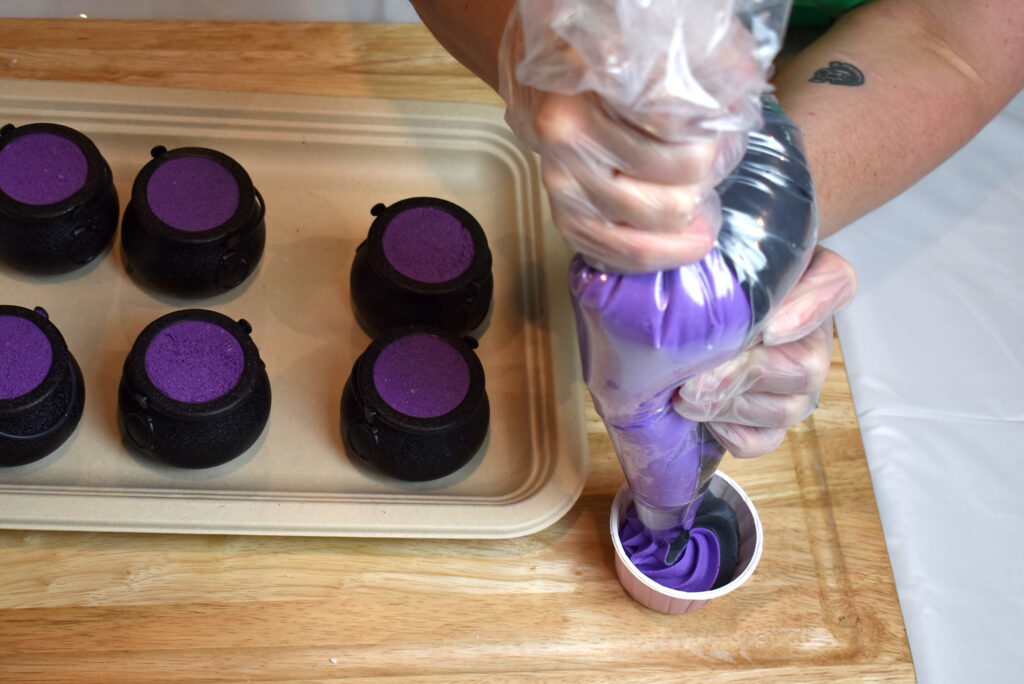
Step 8: Pipe a swirl onto each cauldron and top with fancy sprinkles!
Step 9: Allow your cauldrons to dry completely! Once dry, you can package in shrink wrap. (Yep! Wonder Bar gets hard enough to shrink wrap!)
To use a cauldron, you simply let water run over the bubble bar topping to create a bath full of bubbles and then dip the bath bomb into water, lifting up and out. It is fun to watch the fizzing bath bomb mixture spill out like the cauldron is bubbling over.
TIP: If you want your cauldron to fizz a little faster you can poke some little holes in the bottom of your cauldrons. I haven’t tried this yet as my daughter loves the slowness of it fizzing, but it seems like a good tip!
Happy Bubble Making!
Robyn & Amanda
Wonder Bar Bubble Bar Recipe + Process Guide
Get one recipe to make it all! Make bubble bar scoops, rolls and bubble frosting, using just ONE recipe! Get Wonder Bar here.
Robyn’s Humid Weather Bath Bomb Recipe
Making bath bombs in wet, rainy weather can be so frustrating! If you live in an area with constant high humidity, then you’ll need a recipe that can hang day in and day out without failing, warting, cracking or crumbling. Check out Robyn’s Humid Weather Bath Bomb Recipe!