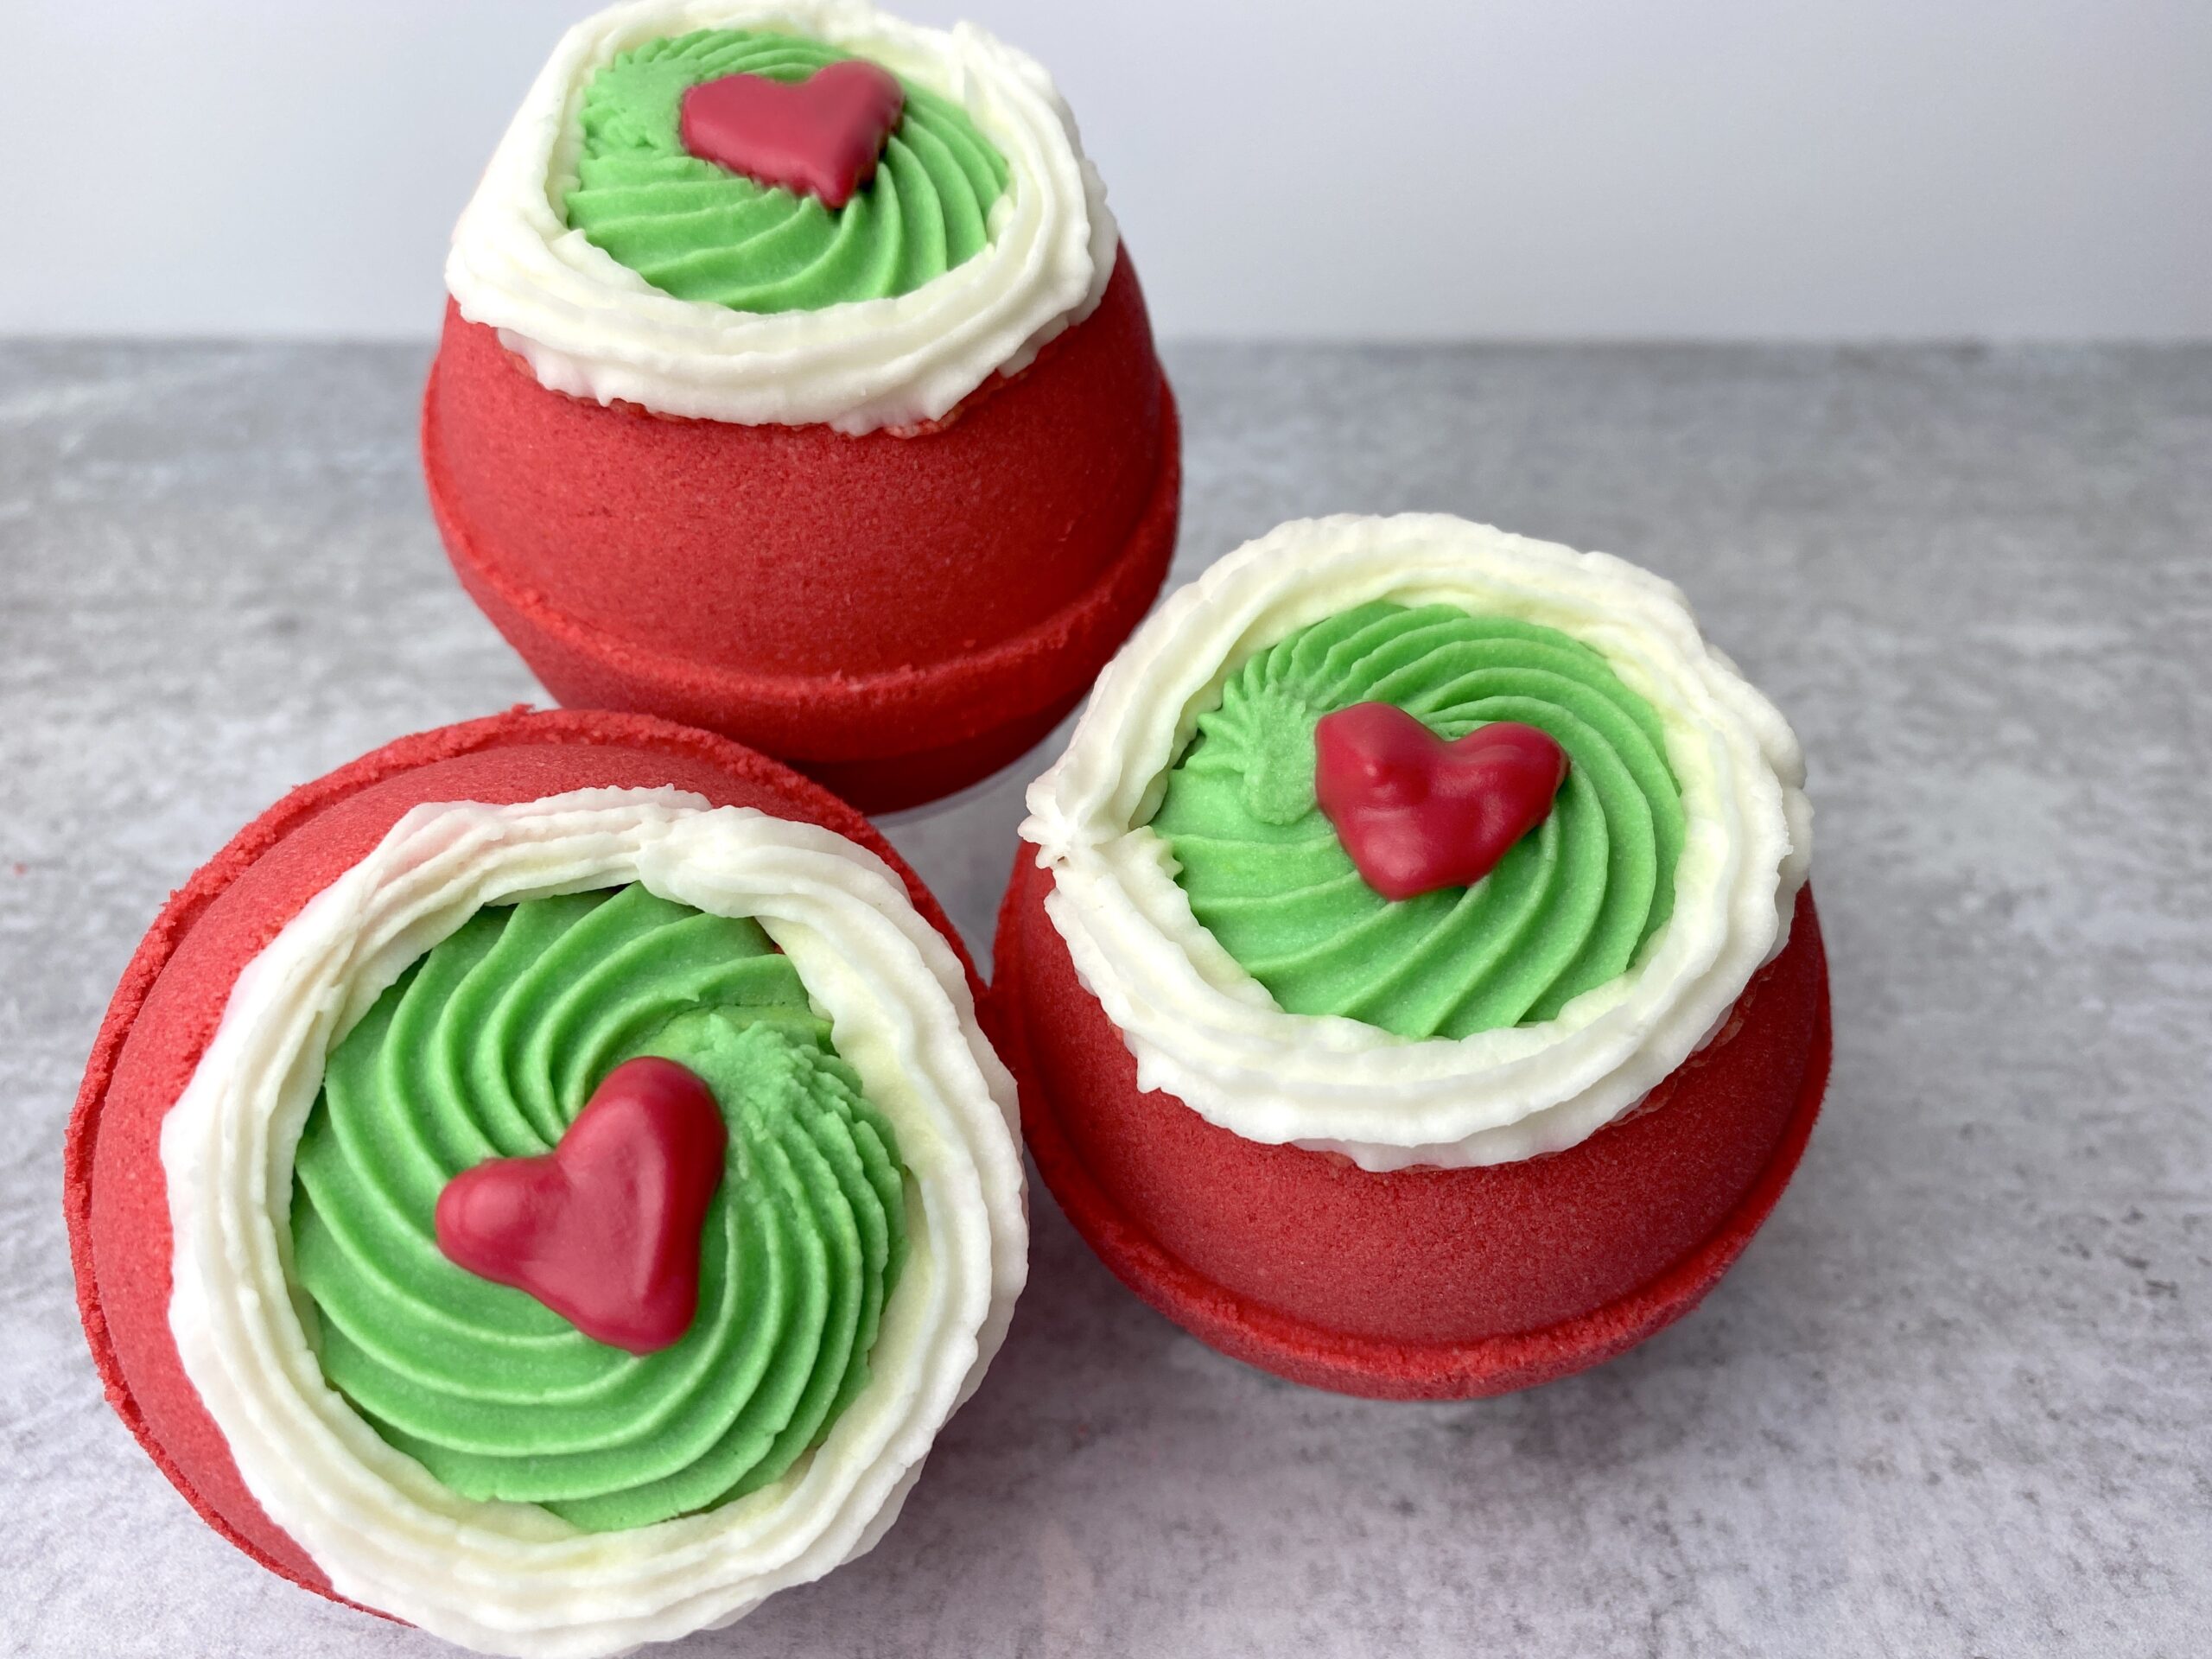
Ahhhh who doesn’t love The Grinch! These Grinch inspired bath bombs were fun to make and make great gifts for the holiday season.
NOTE: The Grinch is copyrighted by Dr. Seuss so you can’t sell Grinch products. We made these for family, friends and personal use. They LOVE to send out copyright infringement notices!
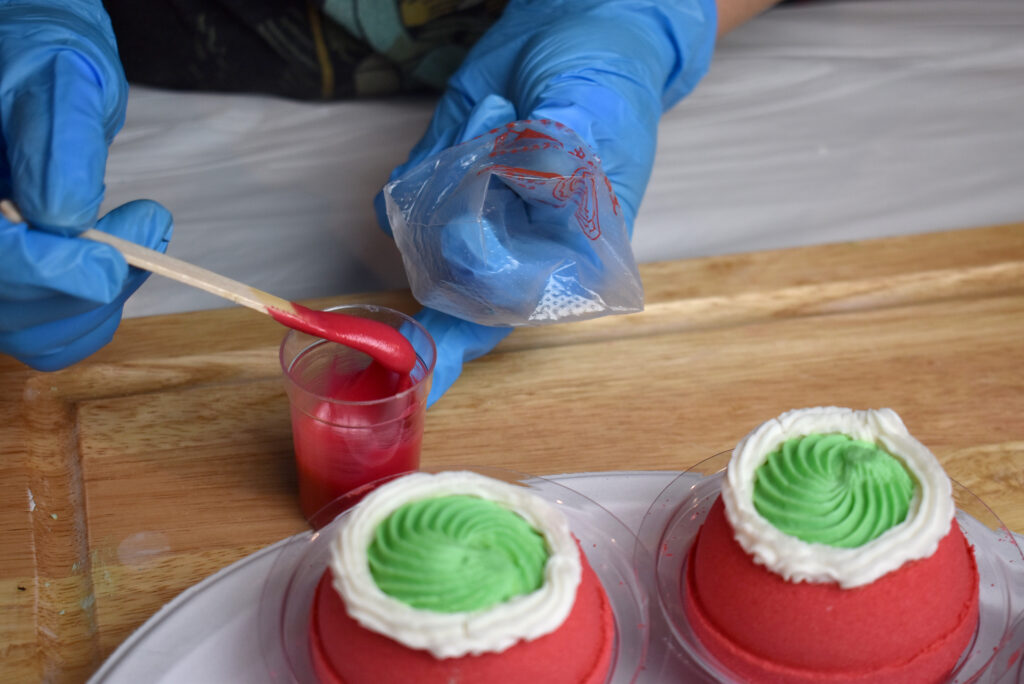
For this project, Robyn and I used Robyn’s Humid Weather Bath Bomb Recipe. We used Wonder Bar for the piping and the Quick and Thick Drizzle recipe for the heart.
This tutorial is all about the design! You can use any bath bomb recipe that you prefer. Let’s jump into it!
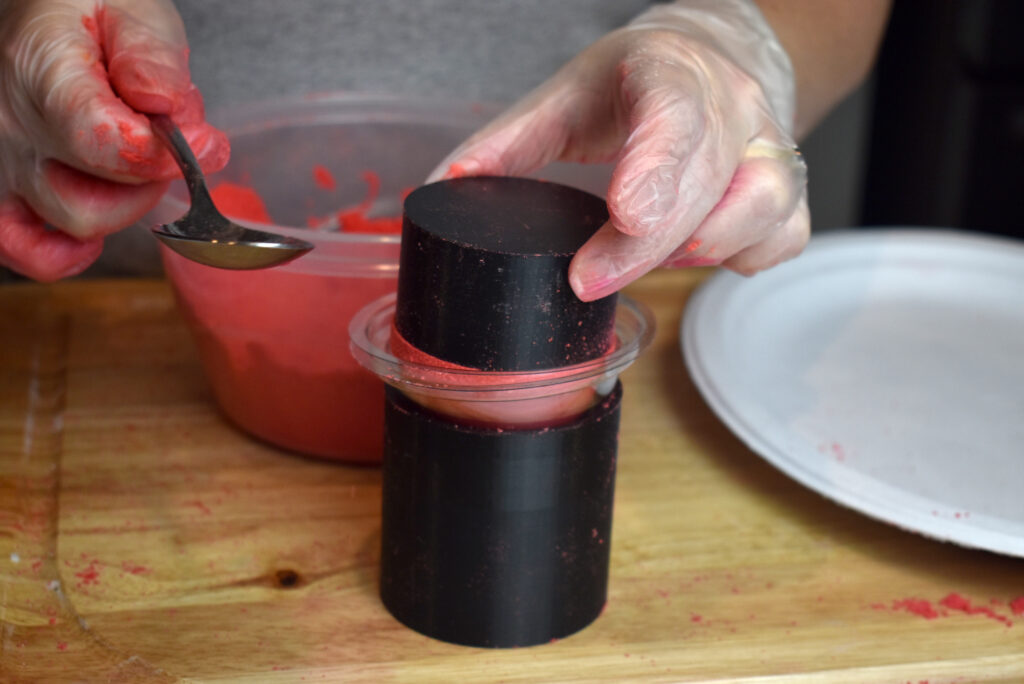
For the mold, we used a Cada indent mold.
We wanted a perfect Christmas red for these bath bombs. Check out Robyn’s Red Color Study for ideas! We used 3/4 teaspoon Red 27, 1/2 teaspoon Red 40 and 1/2 teaspoon Yellow 5. NOTE: We made a 1/4 batch of Robyn’s recipe, so you’ll need to increase your colorant amount to saturate to your liking if you make her full batch. 🙂
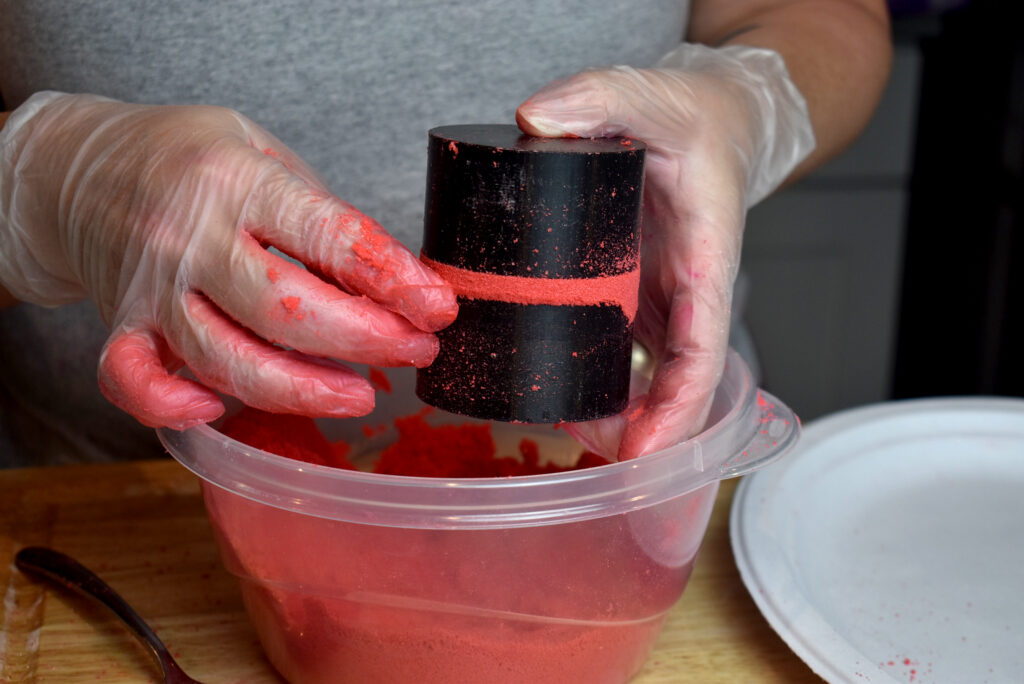
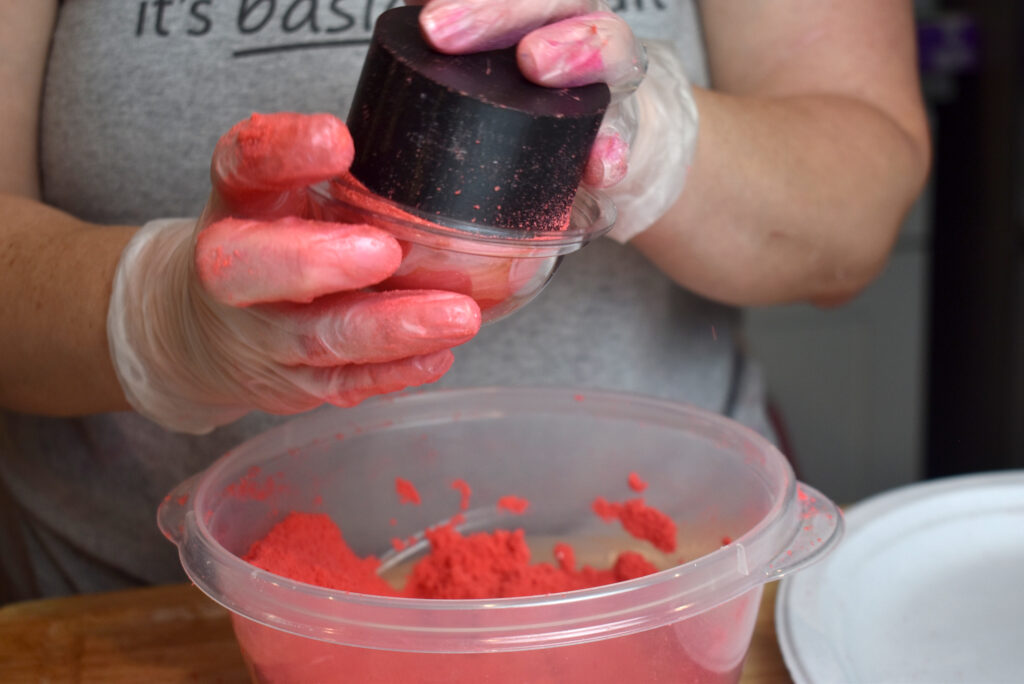
Step 1: Mix up your bath bomb mixture and add color to get that perfect Christmas red!
Step 2: Add binder until your mixture is the perfect consistency for molding your bath bombs.
TIP: Water as a binder: We LOVE water as a binder. It activates the mixture a tiny bit and creates a bath bomb that dries really quickly! You don’t need much! Be sure to mix it well to avoid warting.
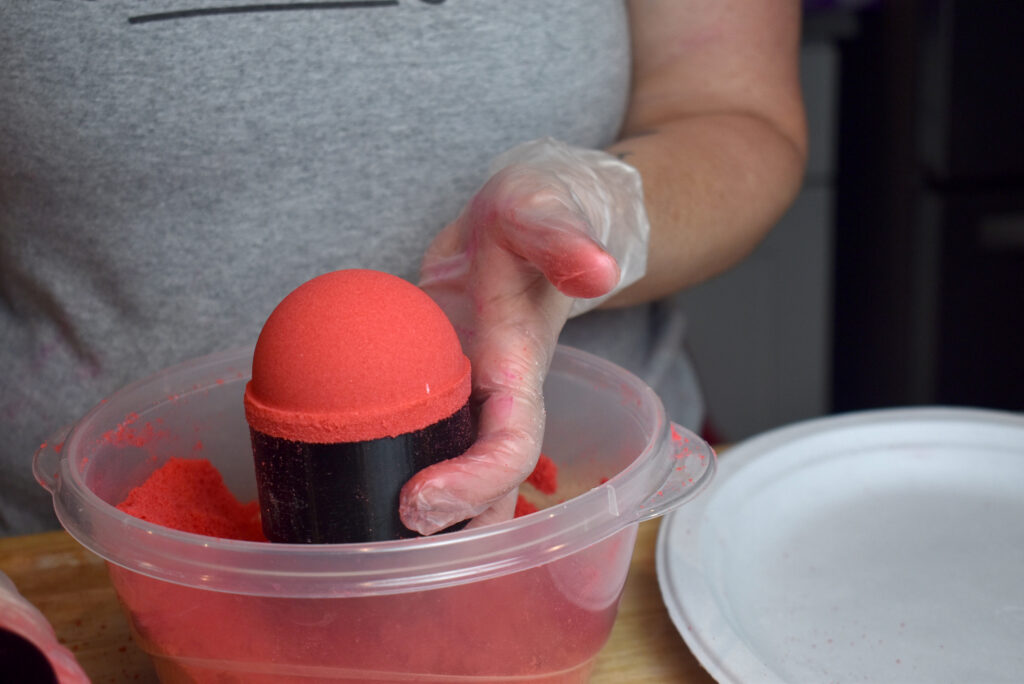
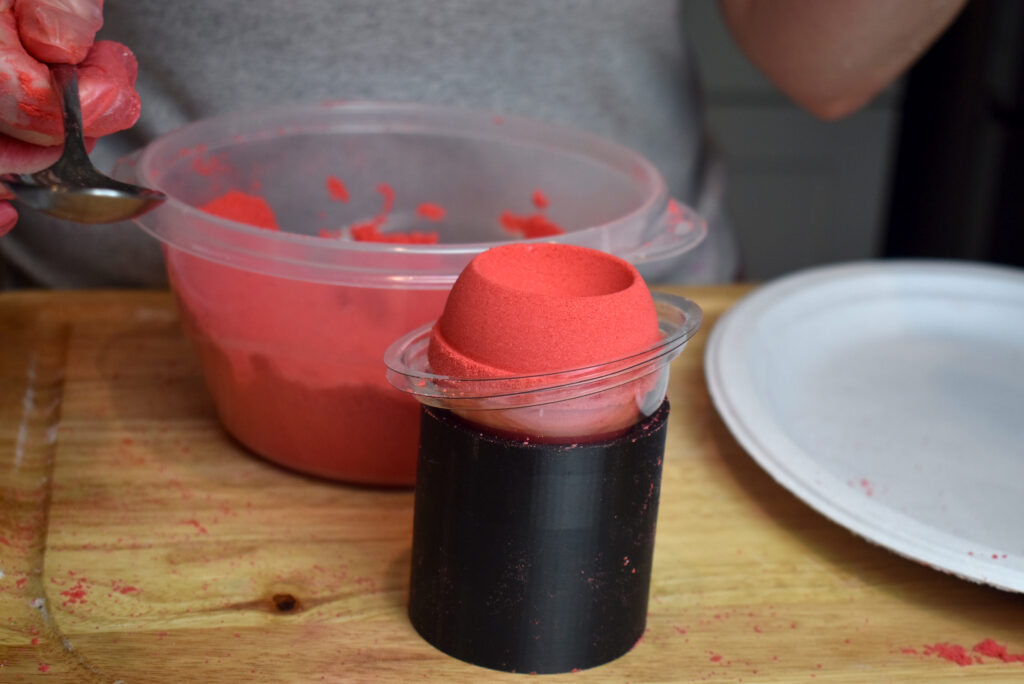
Step 3: Mold your bath bombs! Robyn likes to fill the indent side first.
When unmolding, unmold the solid side first and then unmold the indent side. Tap before removing either side. We unmolded into a plastic bath bomb mold so we could reduce the chance of flat bottoms and help these bombs keep their round shape.
Check out this video that Robyn made of using the Cada Indent Mold.
Step 4: Dry your bath bombs before decorating. Depending on how humid it is where you live, you might need to dry them 1-4 days. I dry in a room with a dehumidifer running and mine only need about 24 hours to dry (even in humid Florida!).
TIP: Drying your bath bombs: The best way to quickly dry your bath bombs is to place them in a room with a dehumidifier running. If you have no humidity where you live, then you probably don’t have to do this. But if you have any humidity, I highly recommend investing in a dehumidifier. Even if you don’t have high humidity, it can help your bath bombs dry quickly so you can decorate and package even faster! I like this dehumidifier from Homelabs on Amazon.
Once dry, you can add your wonder bar piping and drizzle heart.
Let’s do it!
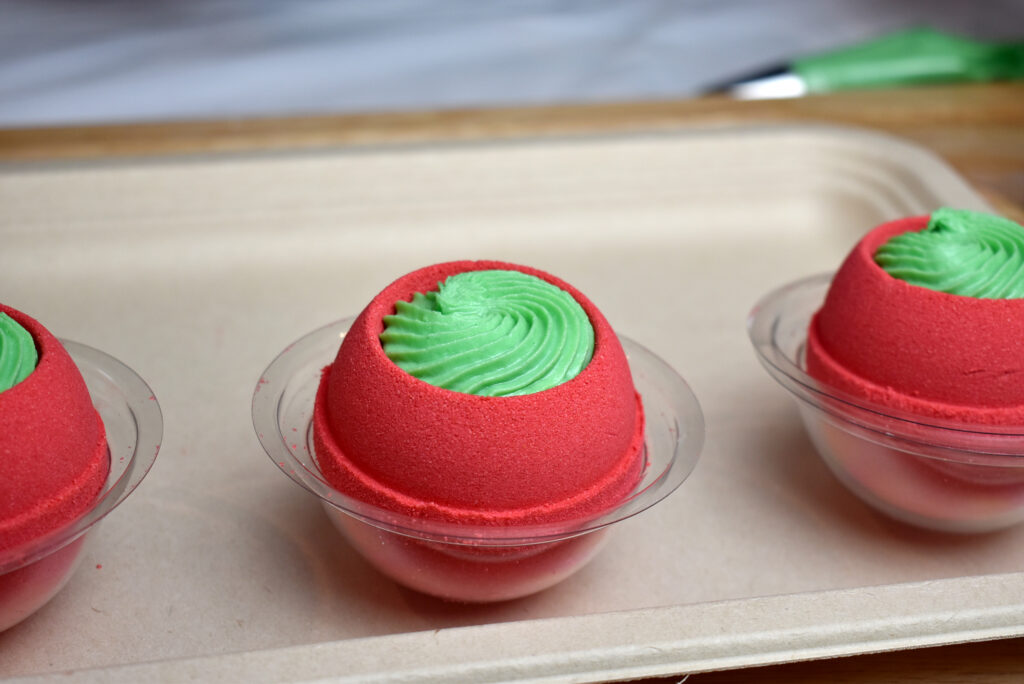
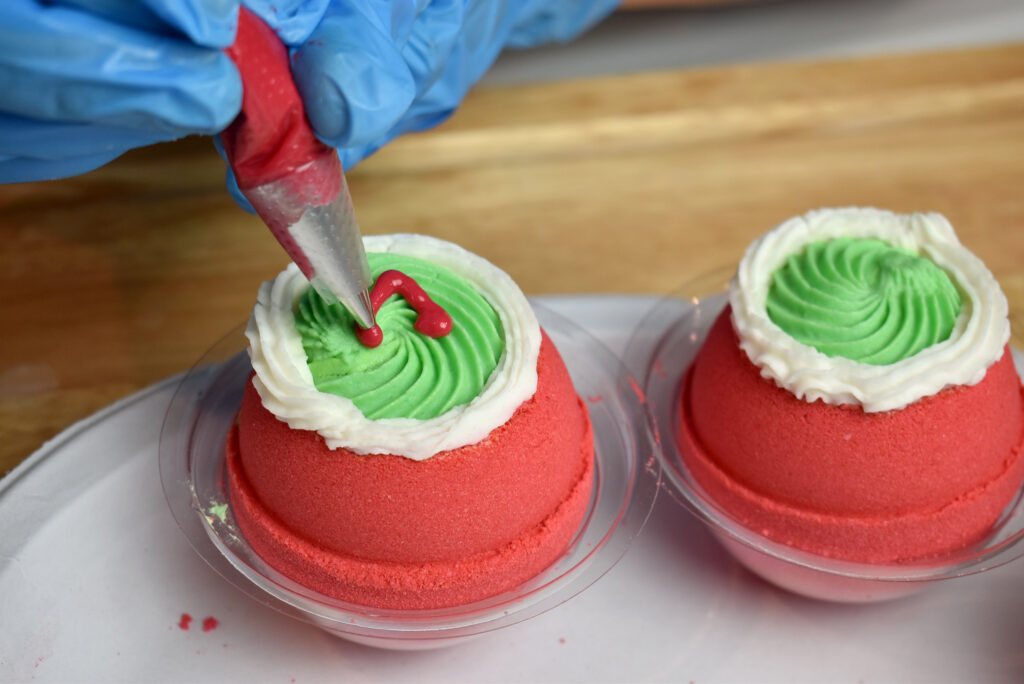
We wanted to add green Wonder Bar piped into the indent
If you want to make just a bit of Wonder Bar for topping your bath bomb project, check out this blog post on masterbatching Wonder Bar! You can simply take out a bit of mixture and add alcohol as needed to get it to that piping consistency.
Or, you could make a whole batch of Wonder Bar and then use the leftovers to pipe bubble wands!
Robyn simply got Wonder Bar to a piping consistency, turned it green using Blue 1 and Yellow 5 and then piped straight from the bag! NOTE: Save a bit uncolored/white so you can pipe the collars. 🙂
TIP: Before piping Wonder Bar onto your bath bombs, be sure to spray bath bombs with 91% alcohol to help it stick!
First we piped the green, filing the indent. You can use any piping tip that you like! We used a French pastry tip.
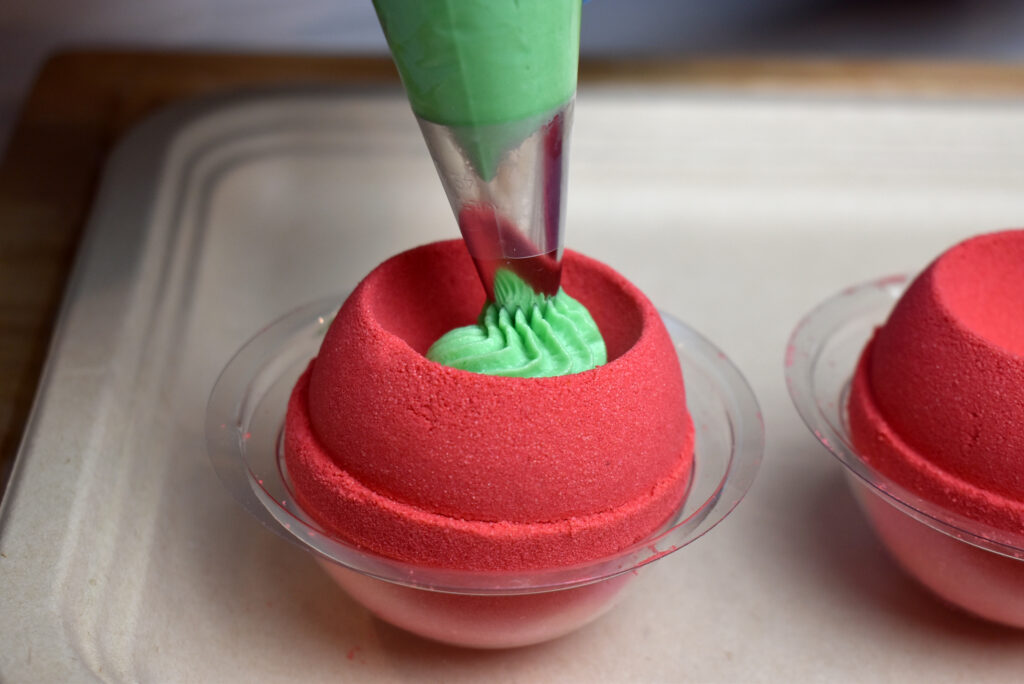
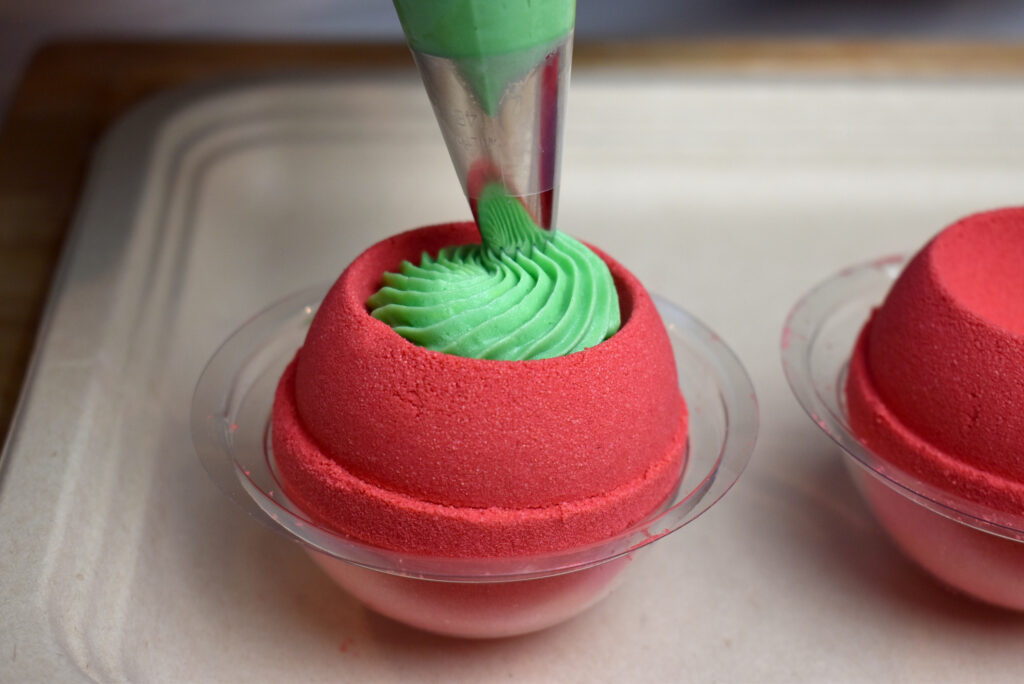
Then we used a wee little tip to pipe the white collar.
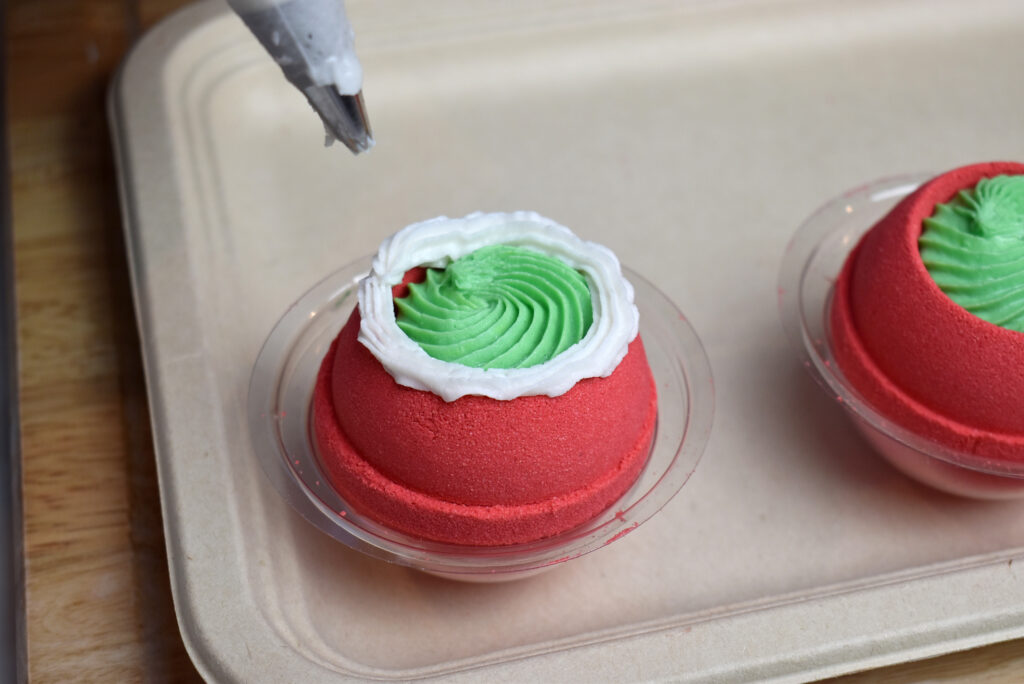
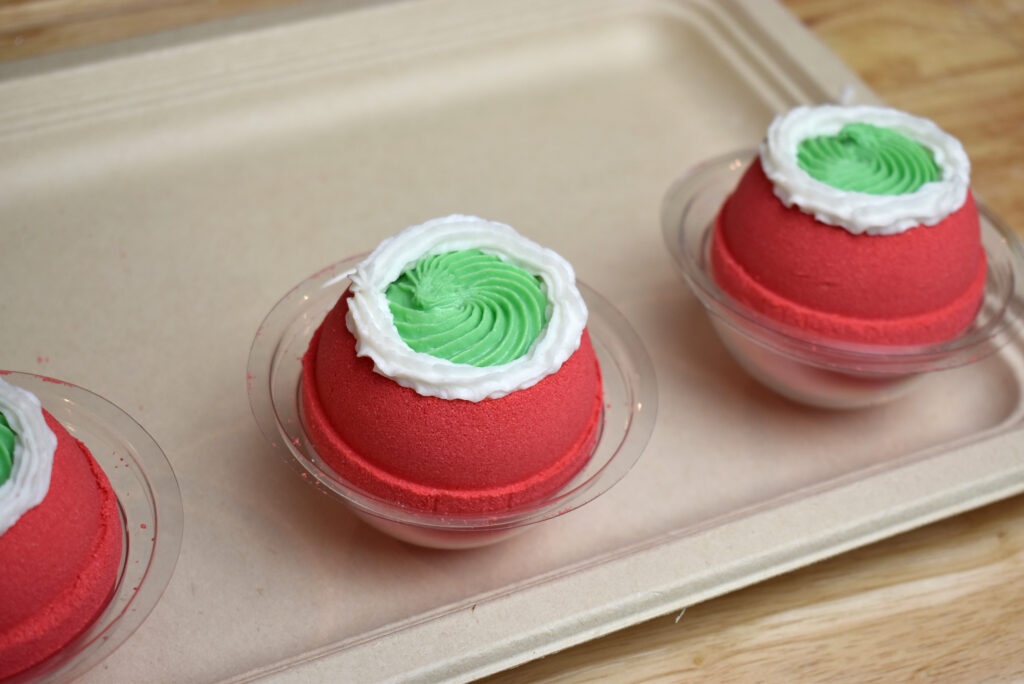
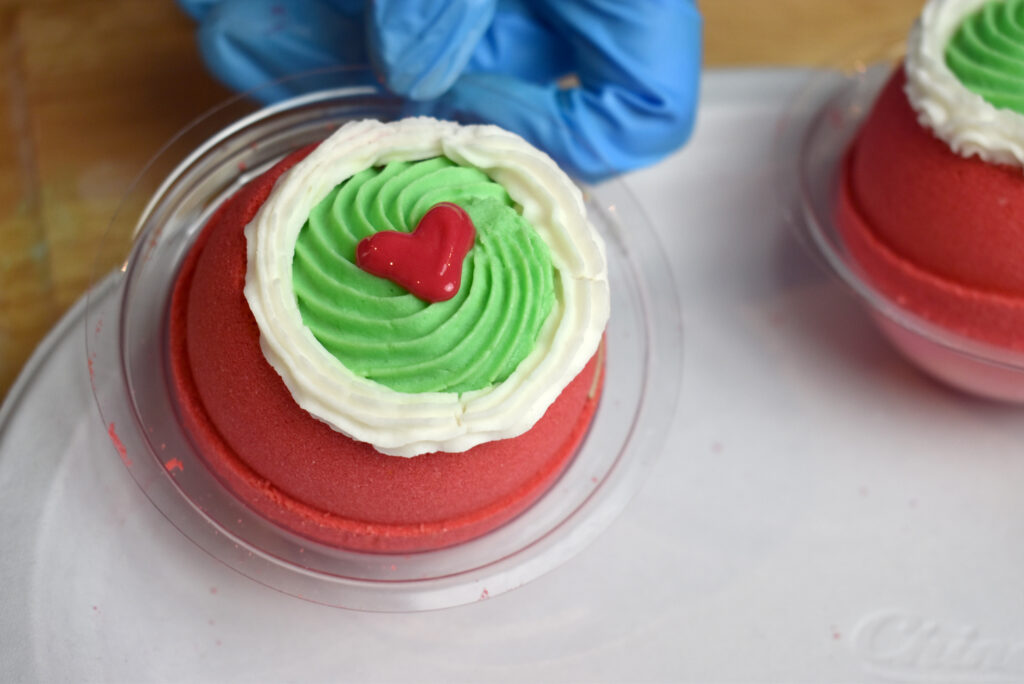
Honestly, the look great like this! But they needed a red heart.
There are a couple of options for adding a heart. You can make some fancy sprinkles in heart shapes ahead of time and put them on when solid. We decided to use Robyn’s Quick and Thick Drizzle Recipe to make a heart directly onto the bomb. It came out so cute!
We hope this inspires you to make your own Grinch Bath Bombs! Please share in the group if you do!
Happy Making!
Amanda & Robyn
Wonder Bar Bubble Bar Recipe + Process Guide
Get one recipe to make it all! Make bubble bar scoops, rolls and bubble frosting, using just ONE recipe! Get Wonder Bar here.
Robyn’s Humid Weather Bath Bomb Recipe
Making bath bombs in wet, rainy weather can be so frustrating! If you live in an area with constant high humidity, then you’ll need a recipe that can hang day in and day out without failing, warting, cracking or crumbling. Check out Robyn’s Humid Weather Bath Bomb Recipe!