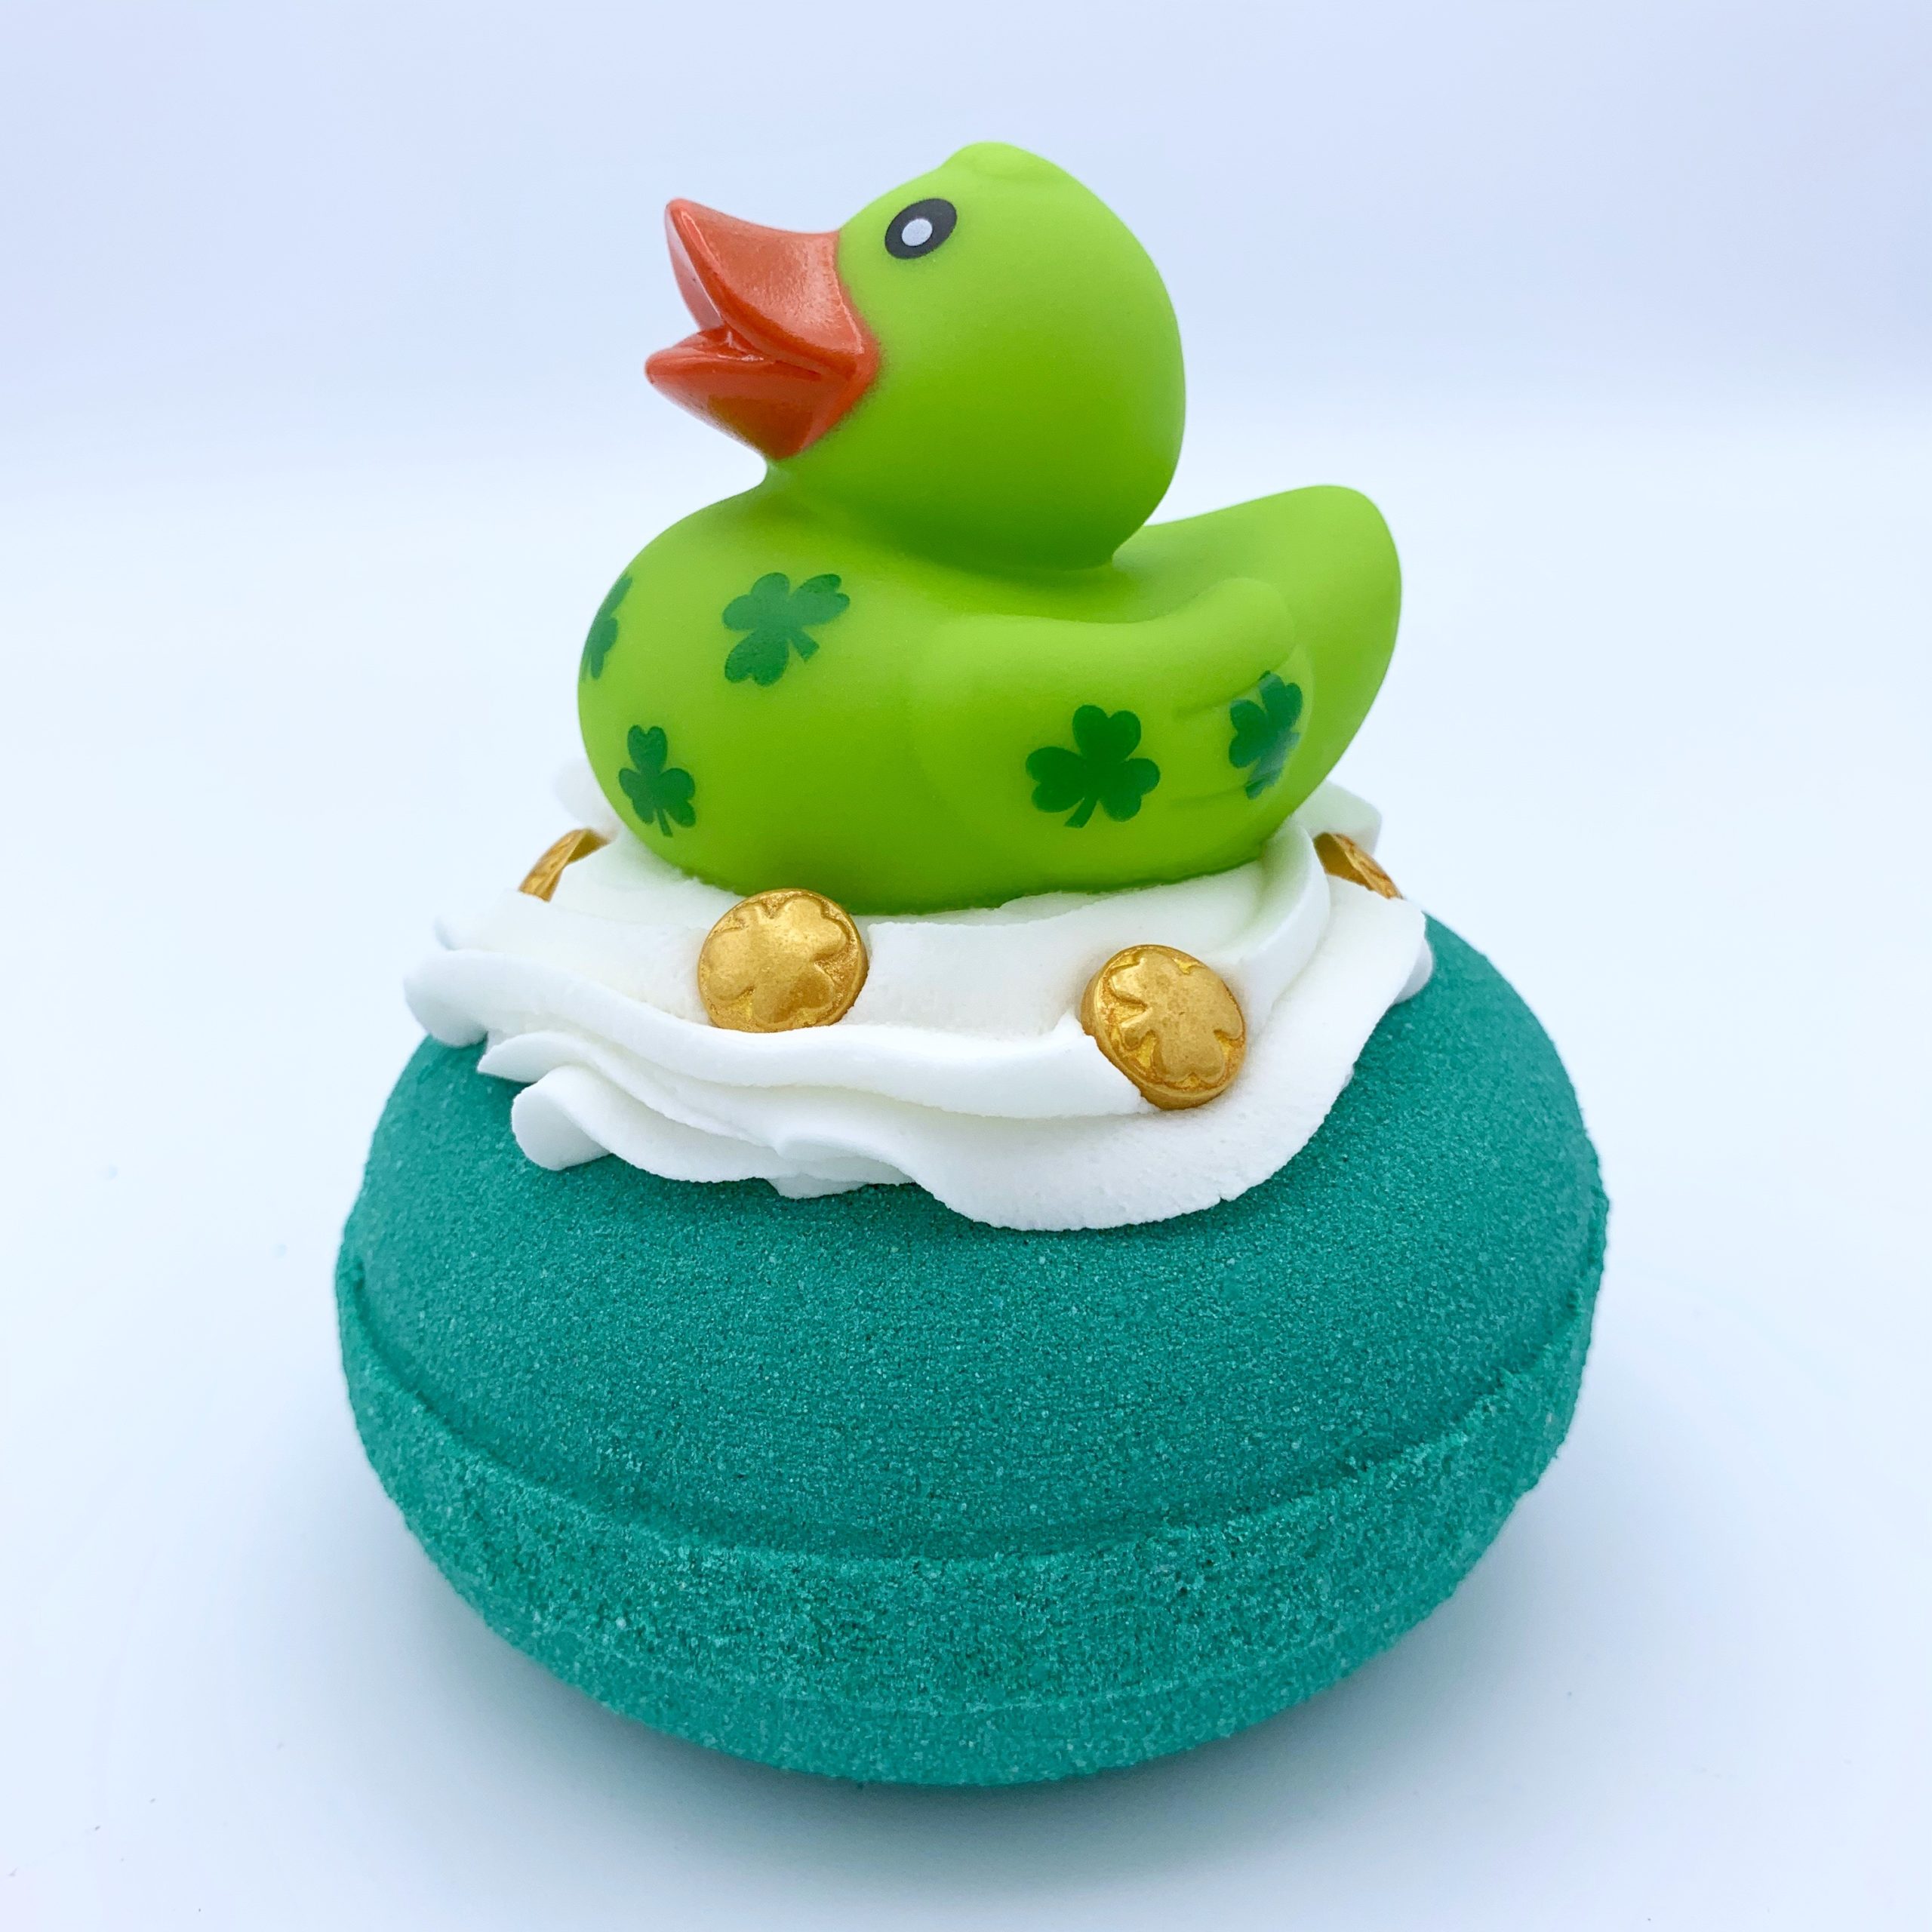
St Patricks Day is right around the corner and it’s a perfect excuse to take a break and make some fun bath bombs! I found adorable green rubber duckies at Party City, but you could use the regular yellow rubber duckies as well.
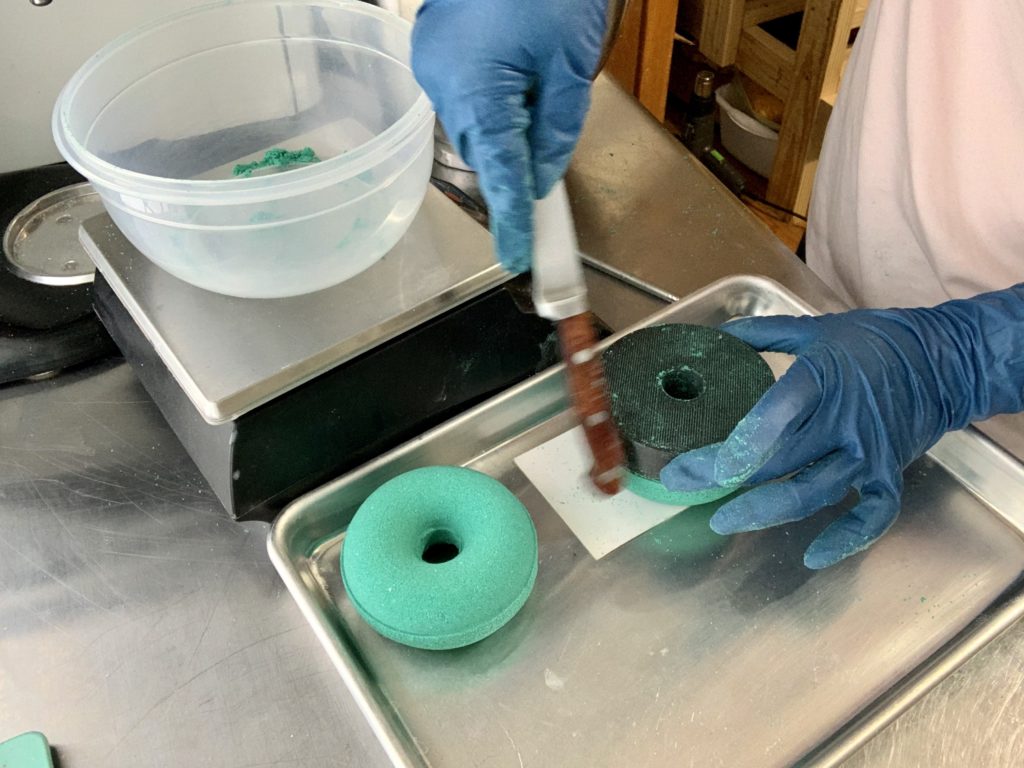
In this project I use a 3-d printed donut mold from Cada Molds. If you don’t have this donut shape on hand, or if a 3-d printed mold seems intimidating, you can try the metal donut mold from Two Wild Hares, or even use a puck mold.
To start with, choose your favorite bath bomb recipe! If you don’t have a personal favorite yet, you can try Amanda’s Basic Bath Bomb recipe. You can use any fragrance that you like as long as it’s skin safe. I chose Sweater Weather Type from Muddy Soap Co. Even though this is a winter type fragrance, I think it’s perfect for St. Patrick’s Day! You’ll also want to use your favorite Bath Bomb colorants–preferably Lakes or Dyes. If you use Lakes make sure you include Polysorbate 80 to prevent staining the bathtub!
Grab Amanda’s Basic Bomb Recipe here!
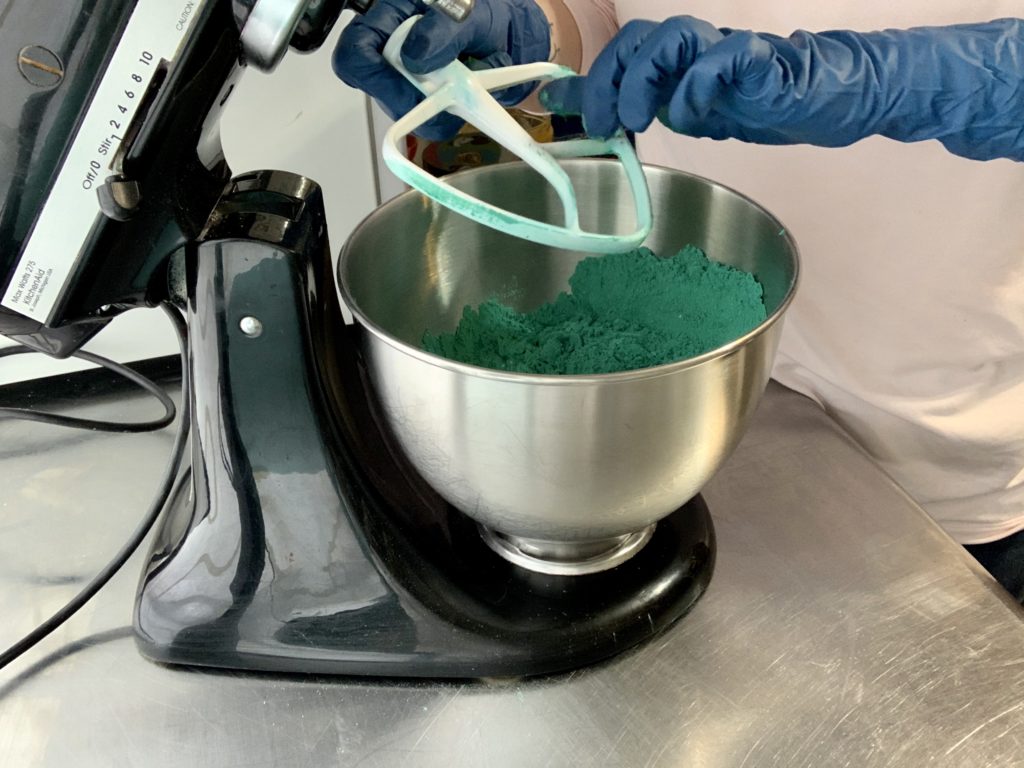
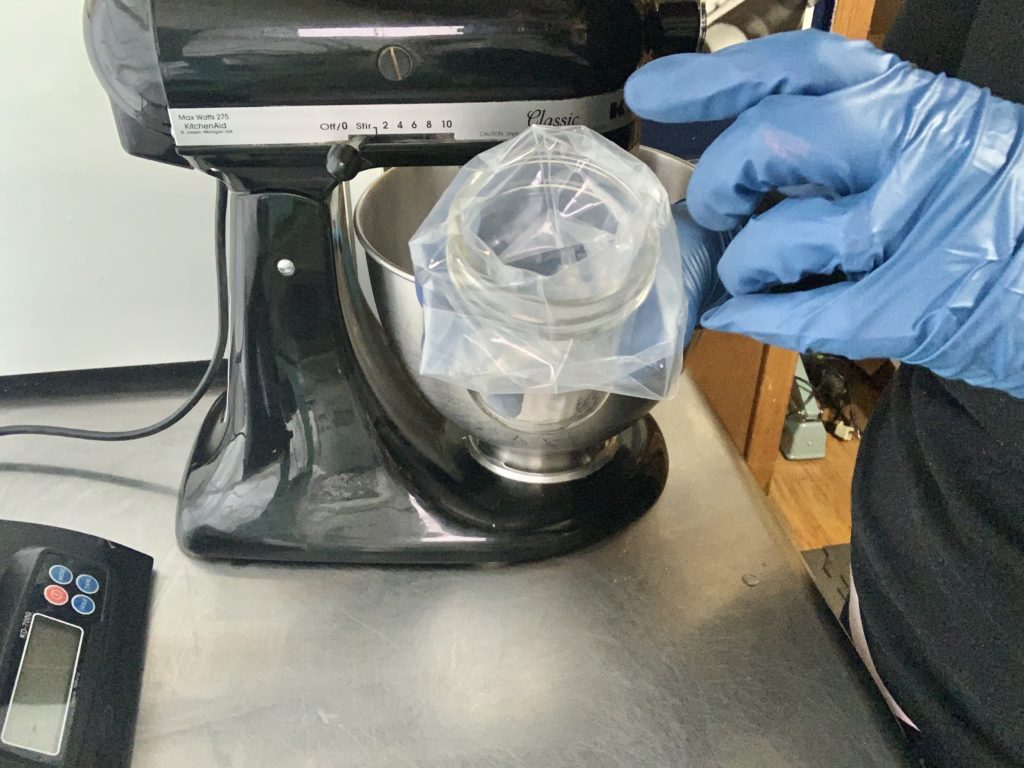
I like to use a stand mixer to blend my ingredients, but you could also mix by hand. If you’re using a stand mixer you’ll want to cover it with a towel until the wet ingredients are fully incorporated to prevent the dry mix getting airborne. Finally, you should always wear gloves, cover and secure your hair, and wear a face mask.
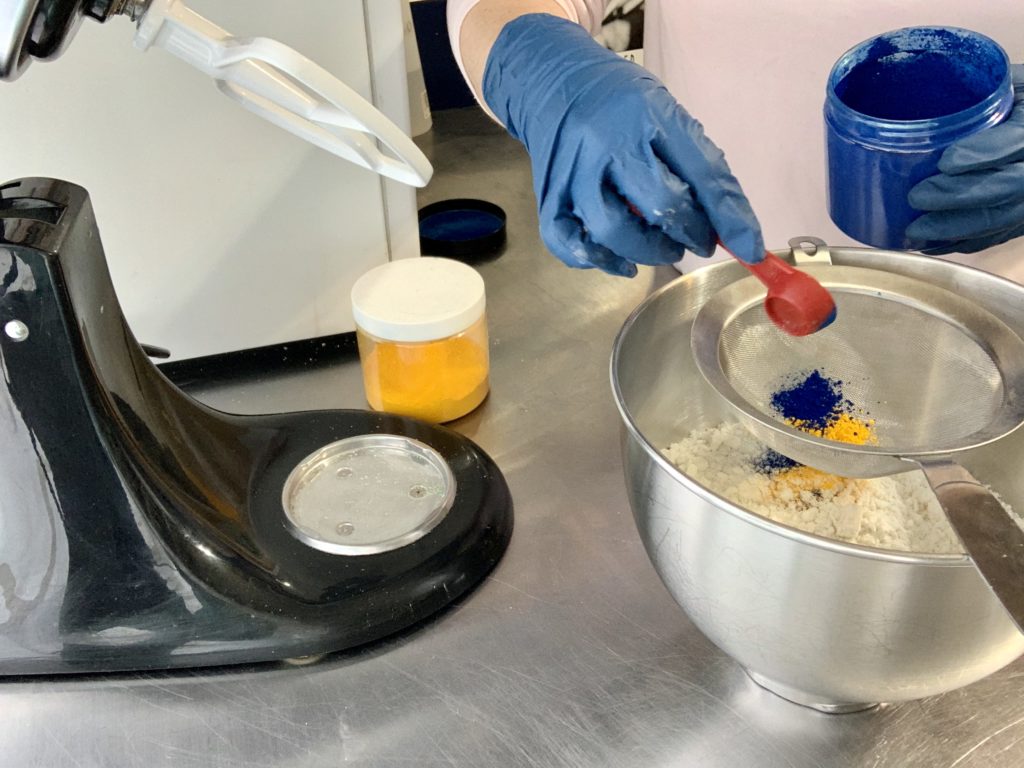
Many people use pre-mixed Lakes and dyes to get custom colors, but I like mixing my own. To make a green with Lakes, I mixed 1 ½ tsp of yellow 5 with ¾ tsp of Blue 1 in a double batch of Amanda’s Recipe. (Check out my blog post on mixing custom greens.) My fragrance contains vanillin, so using a dark green helps mask any spots of discoloration.
Let’s get started!
Making Bath Bombs:
Step 1: Measure out dry ingredients–except Citric Acid–and thoroughly combine. It’s a good practice to sift your ingredients as you add them to your mixing bowl.
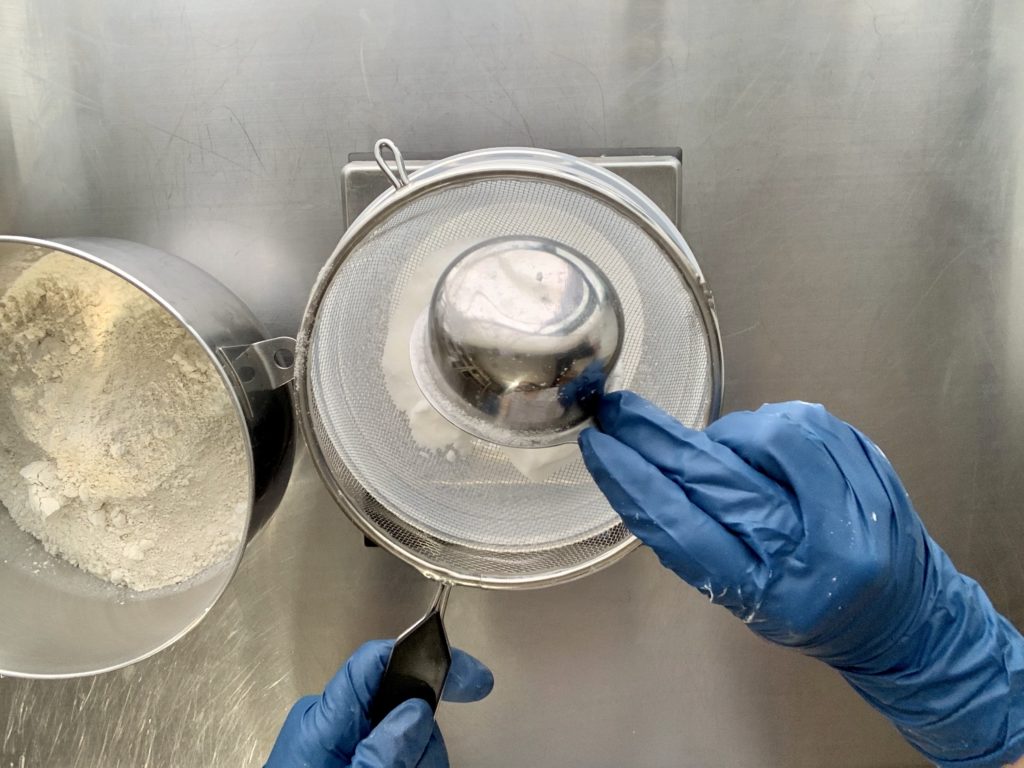
Step 2: Since this batch is a single color, now is a great point to add your Lake or Dye to your dry mix! If you’re using Dyes, you might have already bloomed them in baking soda. If not, incorporate 1-2 microscoops, according to your suppliers recommendations. If you’re using Lakes, press them through a very fine sieve and mix into dry ingredients.
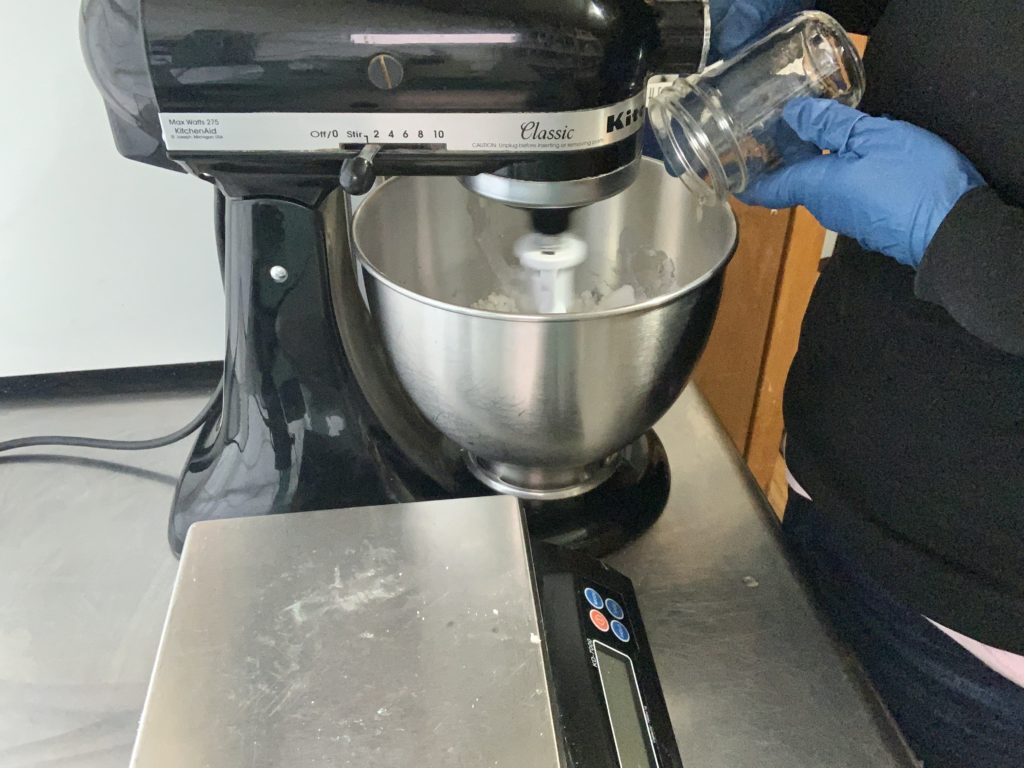
Step 3: In a small, separate container, weigh wet ingredients and blend well before adding to dry mix.
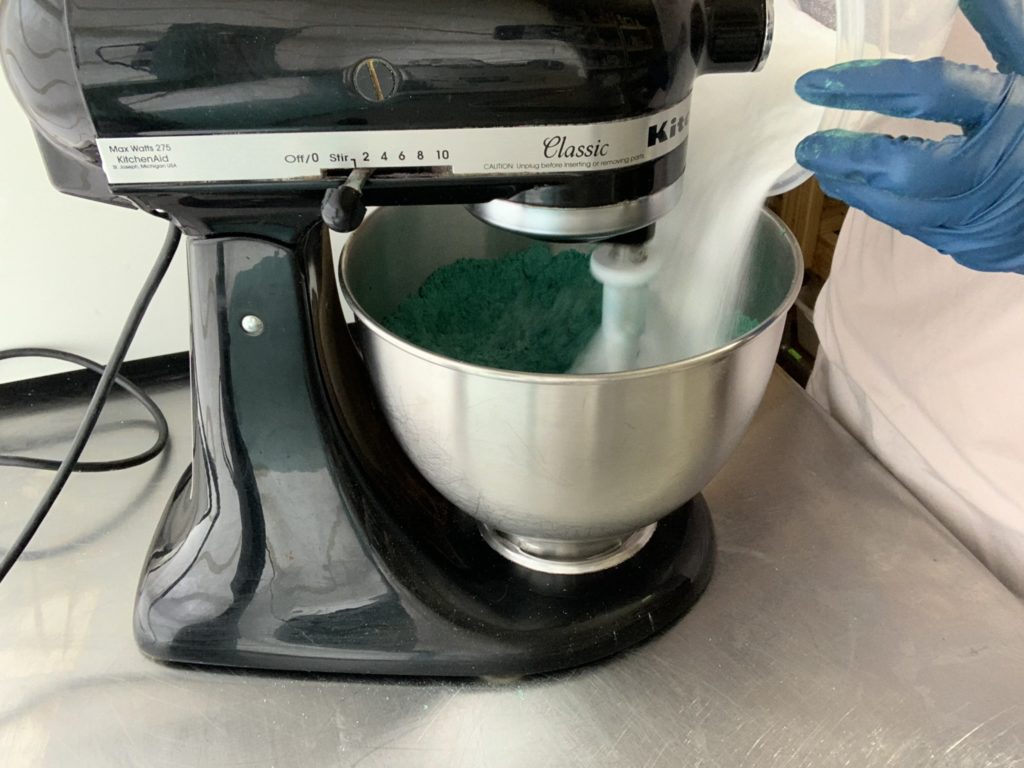
Step 4: If you’re using a stand mixer you can use a paddle attachment to fully incorporate the wet and dry. If you’re hand mixing, then make sure to continually sift the ingredients, breaking up clumps as you find them. Use a spatula to scrape the sides of your bowl as needed.
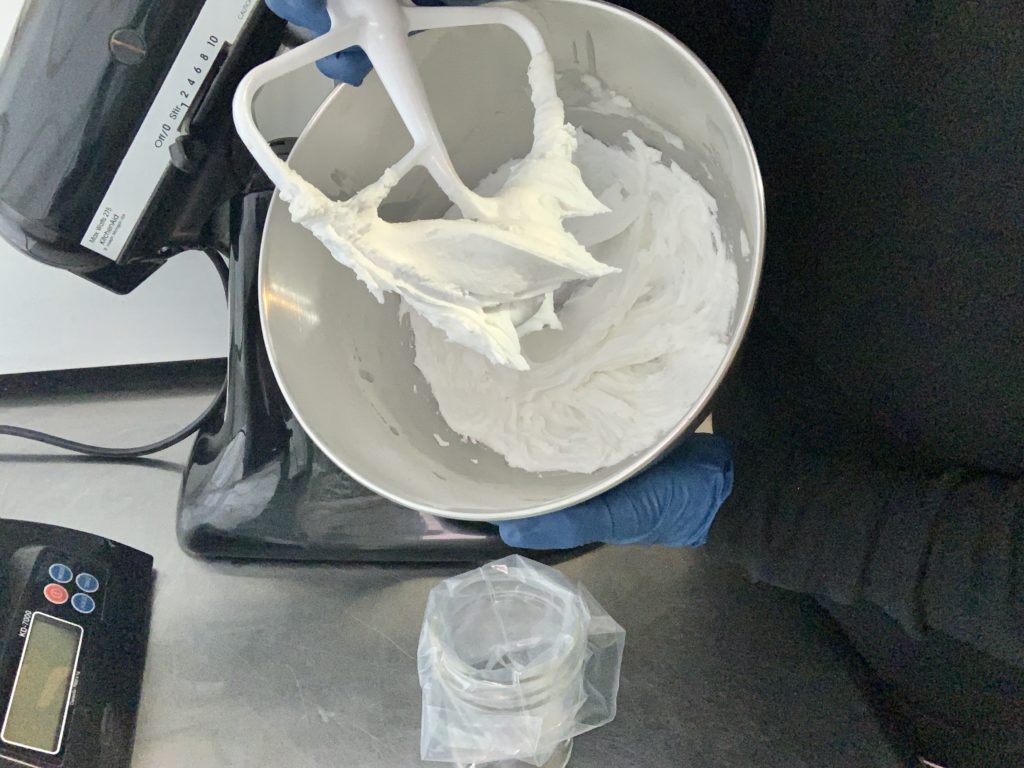
Step 5: Once the wet and dry are combined, you can incorporate the Citric Acid. Doing this last helps prevent any accidental reactivity, and helps prevent spotted colors. A good mix will hold its shape when squeezed and dropped.
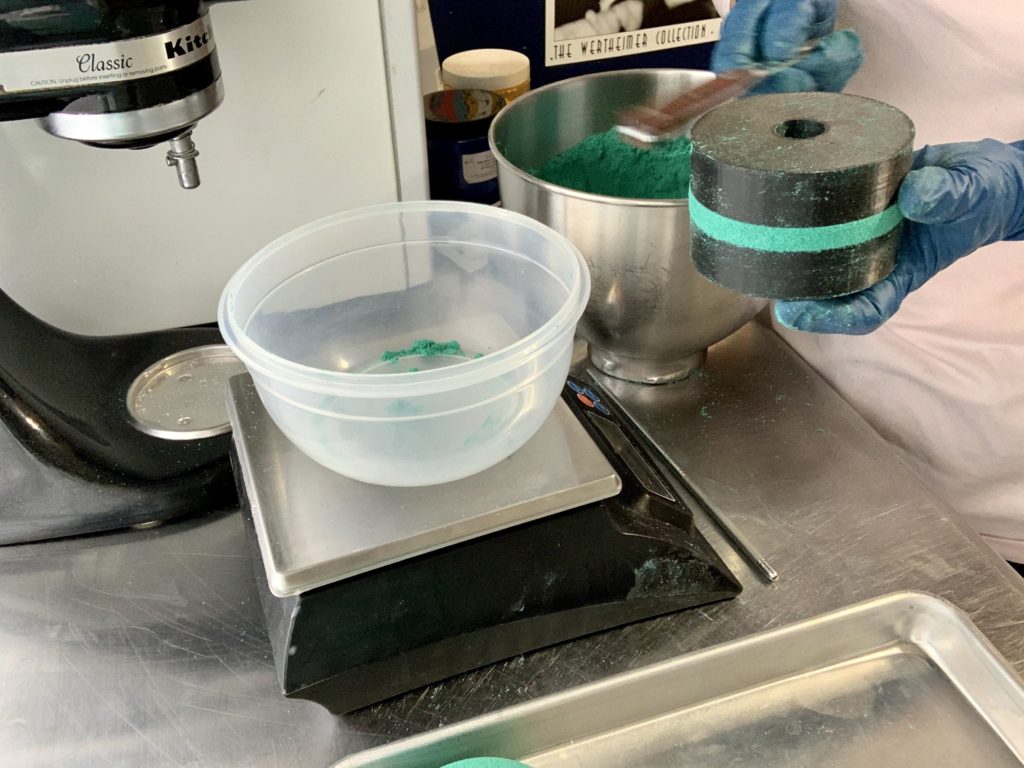
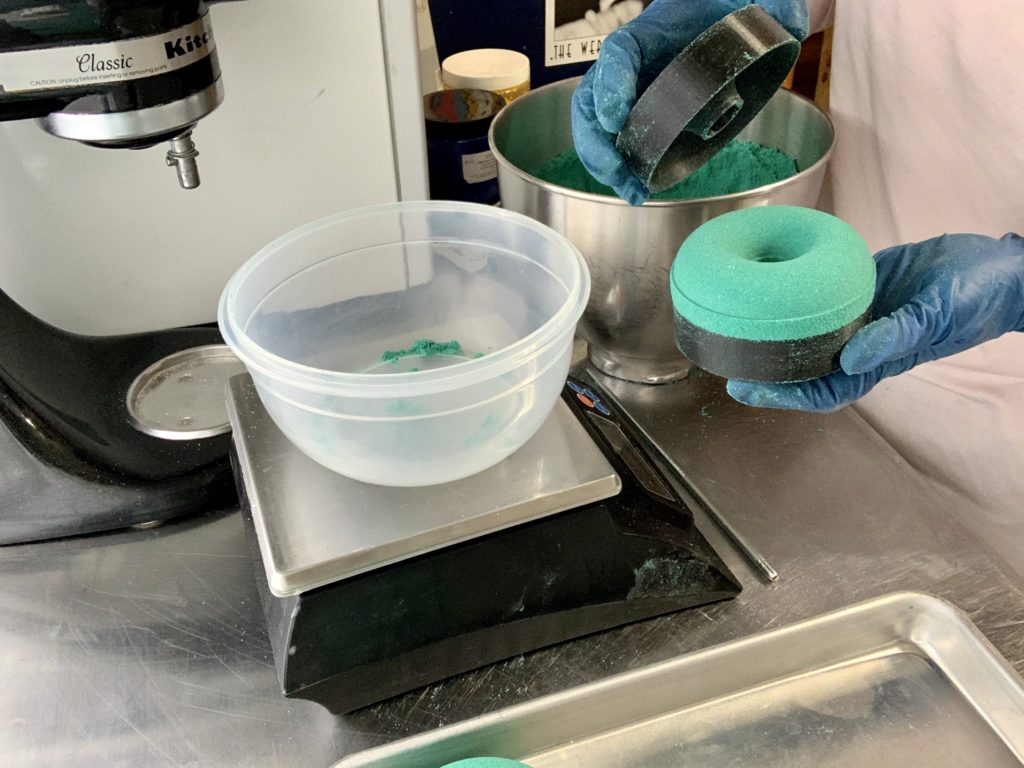
Step 6: Begin adding bath bomb mix to your mold. Fill and pack it evenly, then press the mix in until it’s firm. Clean any edges, tap your mold with a spoon, and unmold by placing the bath bomb on a pan or tray.
You’ll want to make sure your bath bombs are fairly dry before continuing to the next step, preferably 1-2 days. If you live in a humid area, or have storms coming through, you can set up a rice box to help dry your fizzies.
ICING & DECORATE:
When the Bath Bombs are dry it’s time to add the Bubble Bath Frosting. If you don’t have a favorite recipe there are many amazing recipes out there, but here is a bubble bath frosting my friend Jamie Kirby from Fabulous Fizz Bath Co and I affectionately call our Frankenstein recipe. It’s a mash up of both our recipes and is made with just a few ingredients. It doesn’t have color or fragrance, but makes a perfectly smooth white bubble frosting. You will definitely want to use a mixer for this because it’s very difficult to blend by hand.
Bubble Bath Frosting Recipe
Note: This size batch of bubble bath frosting gives you enough time to pipe! You can try doubling it, but that is pushing it. Keep the batch size small, even if you have lots of bath bombs to pipe. Make it in small batches.
Dry Ingredients
- 297g Baking Soda
- 24g Cornstarch or Kaolin Clay
- 10g Cream of Tartar
- 10g SLSA or SCI
Wet Ingredients #1
- 35g Coco betaine
- 9g Avocado Oil
Wet Ingredients #2
- 33g Cocoa Butter
Spray bottle with Rubbing alcohol (91% or higher)
Step 1: Before you begin, prep a piping bag with your choice of a wide tip. Fold the bag over a cup to make it easier to fill. Take a minute to clean and dry your ducks if you haven’t already done so! Also, you should always wear gloves, cover and secure your hair, and wear a face mask.
Step 2: Thoroughly mix the dry ingredients with a mixer, then add wet ingredients #1.
Step 3: Use a paddle attachment on a stand mixer, or hard beaters on a hand mixer (wire beaters will not be strong enough),and blend on low until the mixture has begun to ball up.
Step 4: Melt cocoa butter and add in, beating until the mixture comes together and is smooth like cake fondant.
Step 5: Continue beating and give your mix a few sprays of rubbing alcohol until it becomes wet and tacky.
Step 6: Fill up your piping bag. Push the Bubble Frosting all the way down to the tip and twist the bag closed at the edge of the frosting so it doesn’t squeeze out the top!
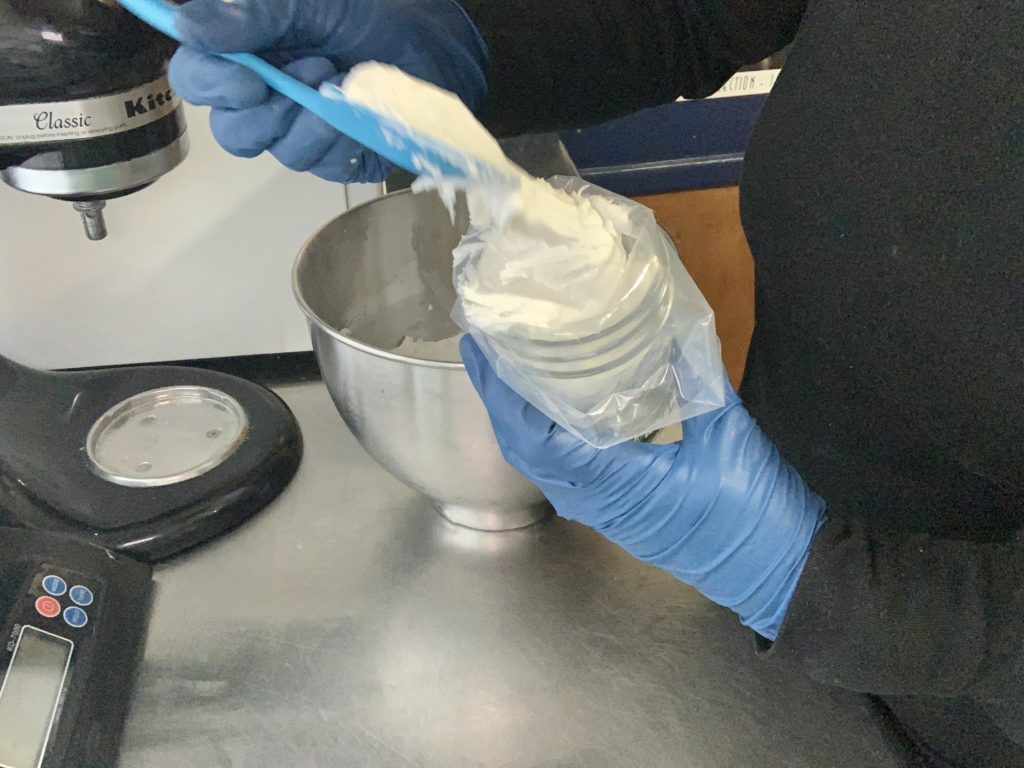
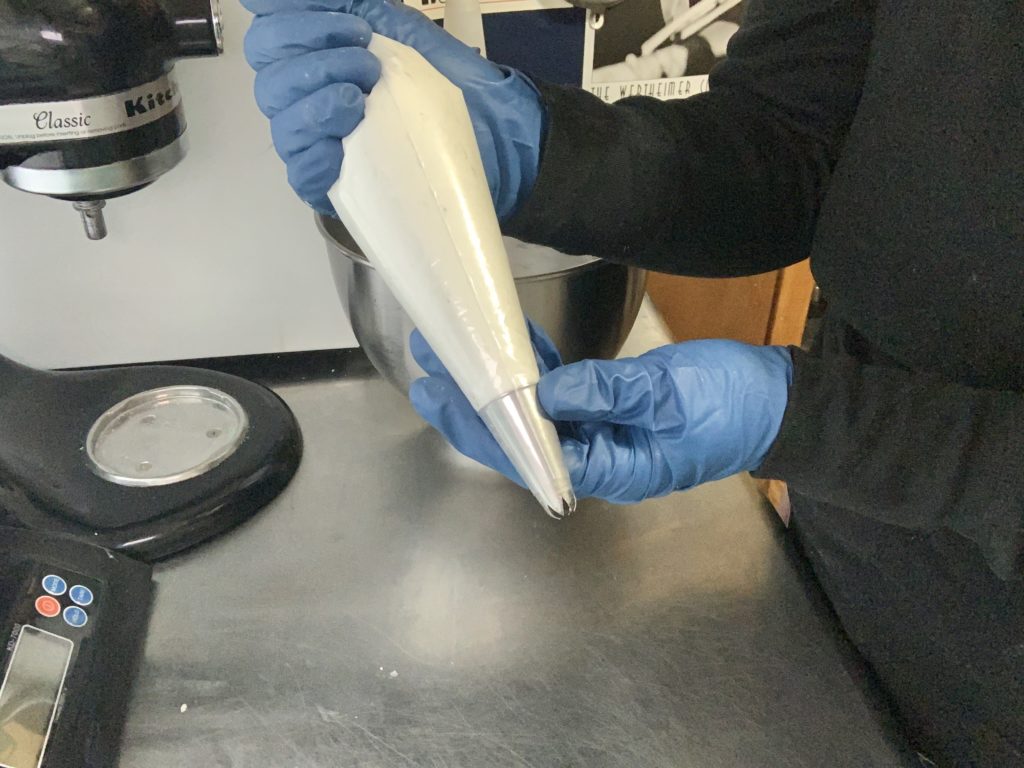
Step 7: Get piping!
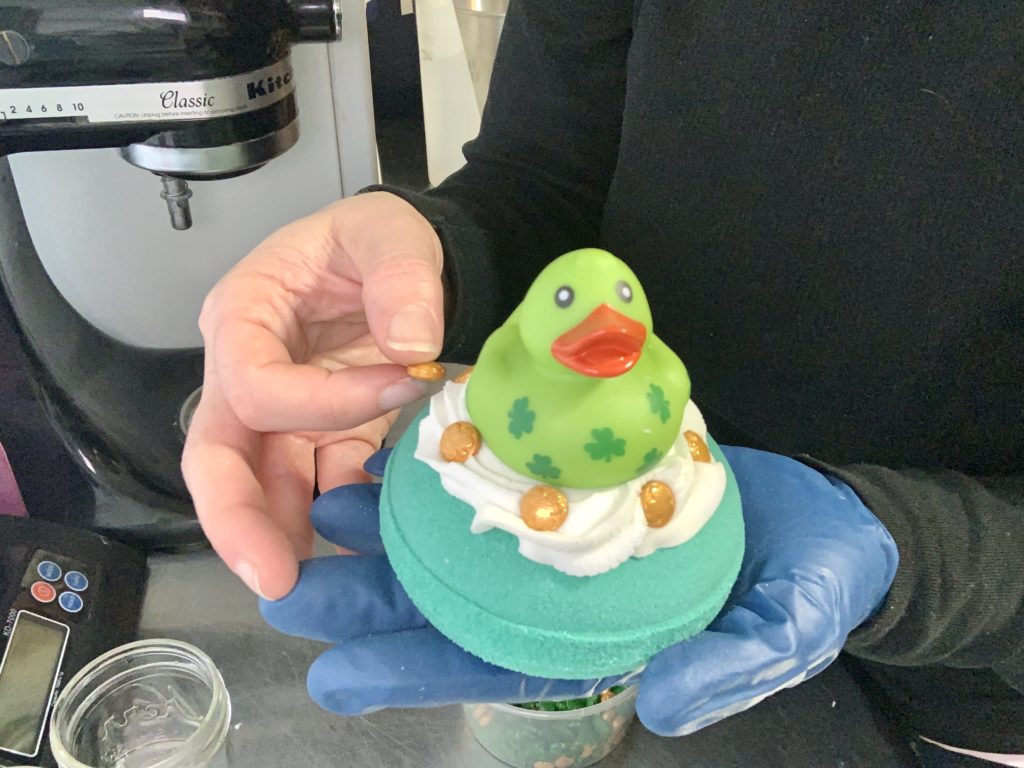
For a donut, you’ll want to fill in the hole a bit, then make a few passes around the area where the will duck sit so he has a nice cushion to rest on! Spray your duck’s bottom with some rubbing alcohol to make sure he sticks, then place him on. If the frosting is pulling off the bath bomb, then try spraying your bath bomb with 91% rubbing alcohol. It often helps!
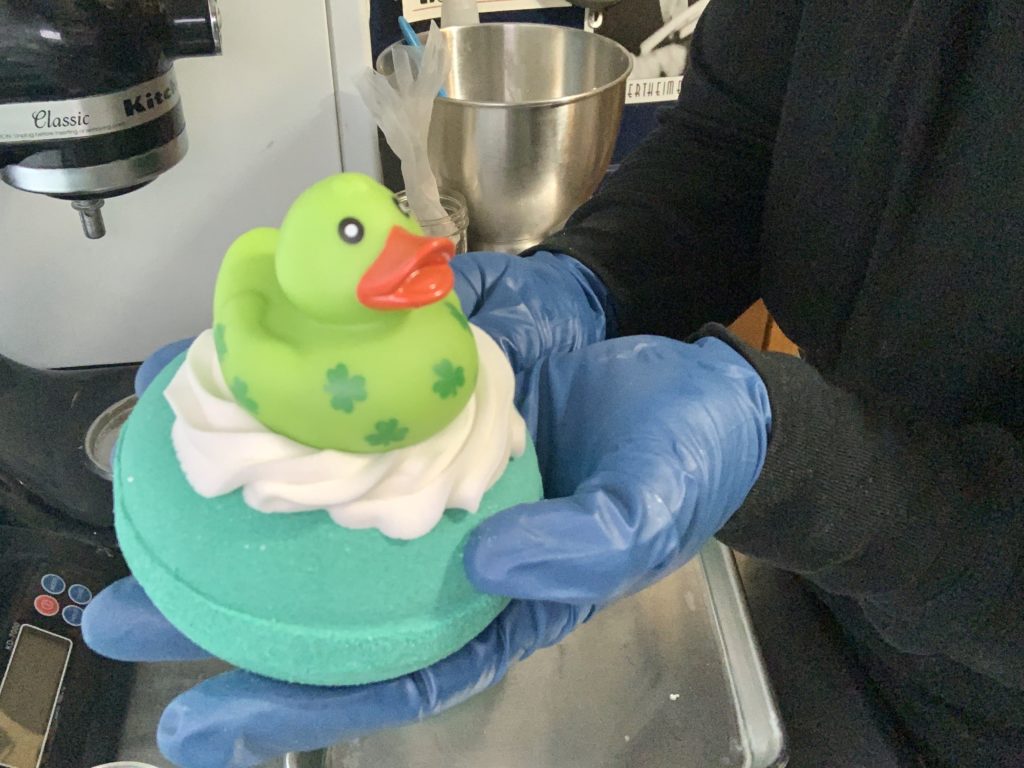
I added a couple of St. Patrick’s day themed sprinkles I found at Michales, but these ducks are pretty perfect on their own, so it’s not necessary!
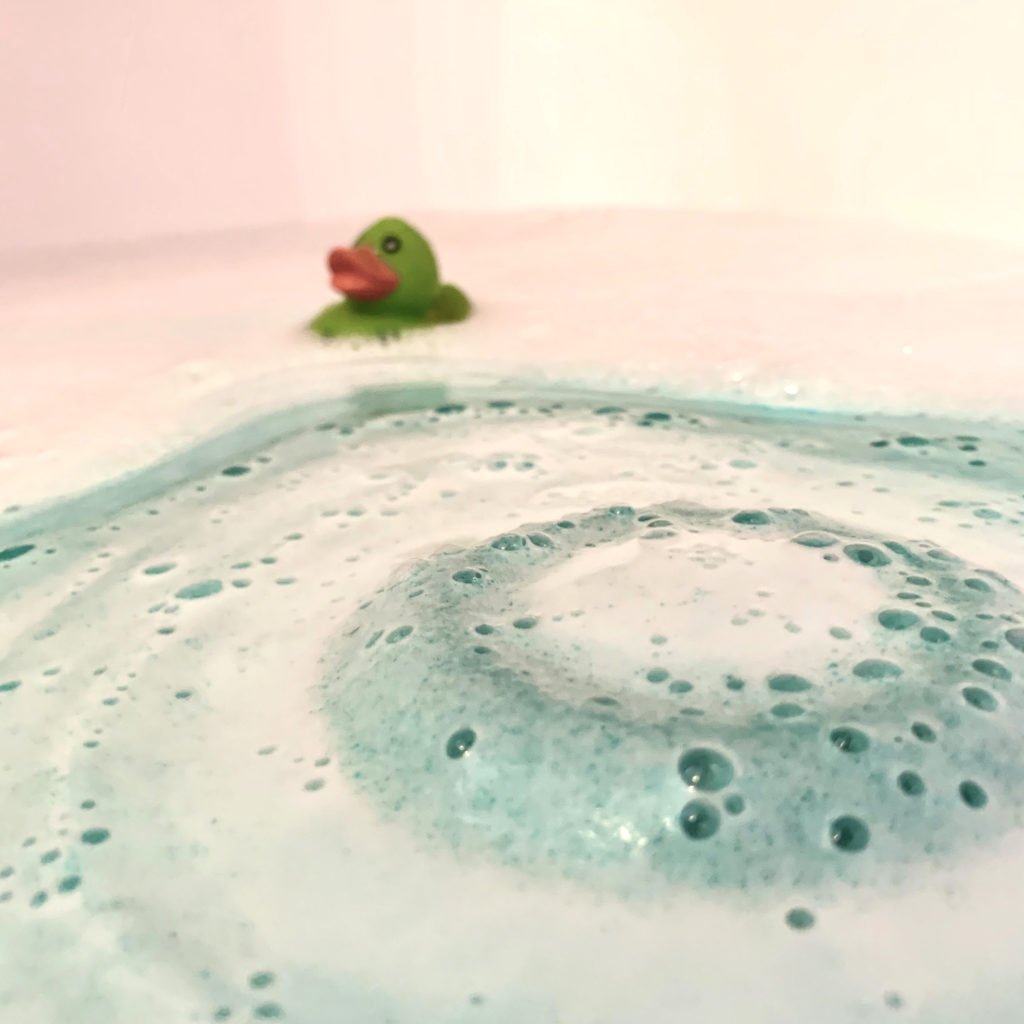
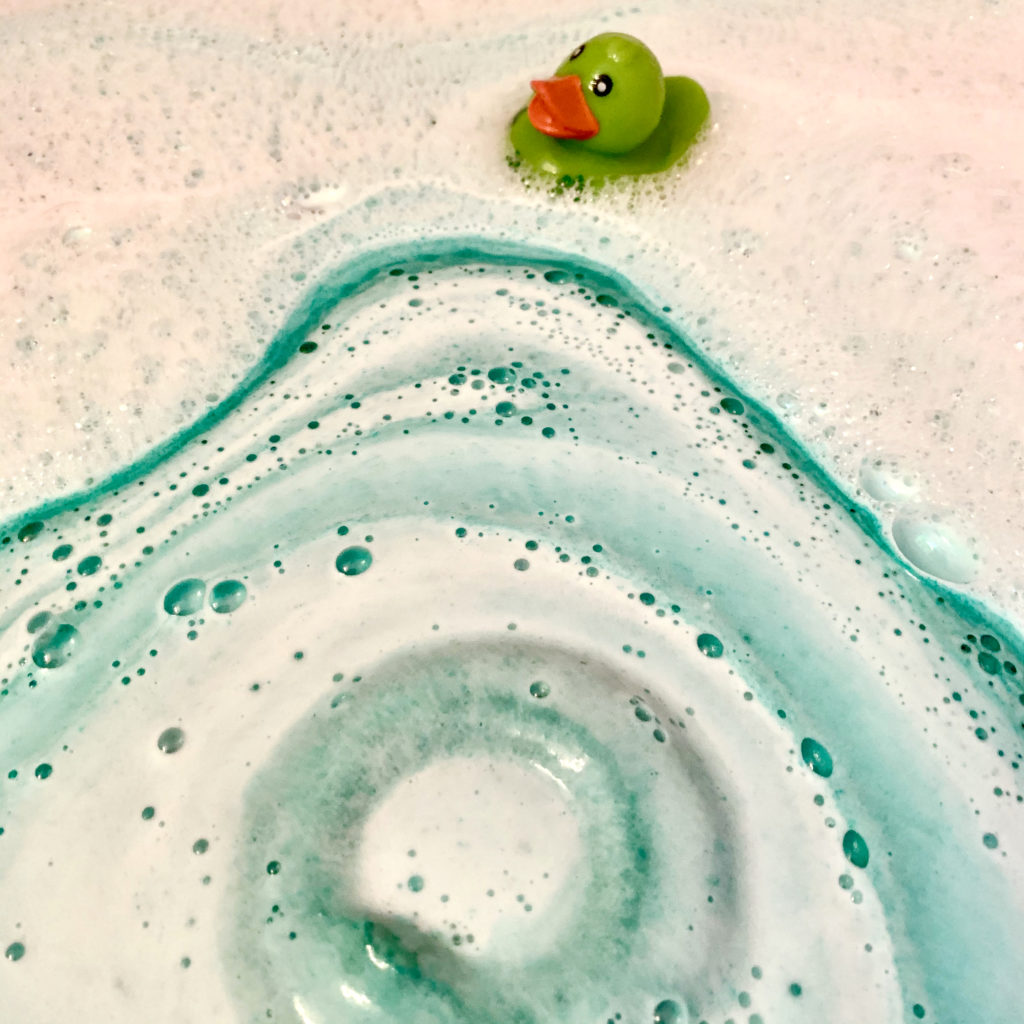
Allow these to dry for an additional 3-4 days. The bubble frosting will harden overnight, but will need that extra time to dry all the way through. When you’re ready to use your Duck of the Irish Bath Bomb, scrape the frosting into a fine mesh sieve and hold under running water. Place your bath bomb in the tub and set your duckie free! Aren’t you lucky to enjoy such a wonderful bath treat?
About Robyn French Smith

My name is Robyn French Smith! I studied fine art at the University of St Thomas and the Glassell School of Art in Houston TX, and graphic design at The Art Institute of Houston. I started dabbling in DIY bath and body products over 10 years ago after moving to Alaska. While I knew how to make basic soap for several years, I didn’t start looking at it as an art form until about 4 years ago when a neck and shoulder injury made it almost impossible for me to draw and paint. I needed a place for all that creativity to go, and I found it in soap. I received my Basic Soapmaker Certification from the HSCG in 2019 and plan on pursuing further levels of certification.
Find me online at scandaloussoap.com and Facebook!
Trackbacks/Pingbacks