Every Monday at 1PM CST I host a Make With Me Monday in our Facebook support group. People love being able to log in and hang out with me, and honestly it’s the highlight of my week. Being able to connect and learn from each other is such a wonderful experience!
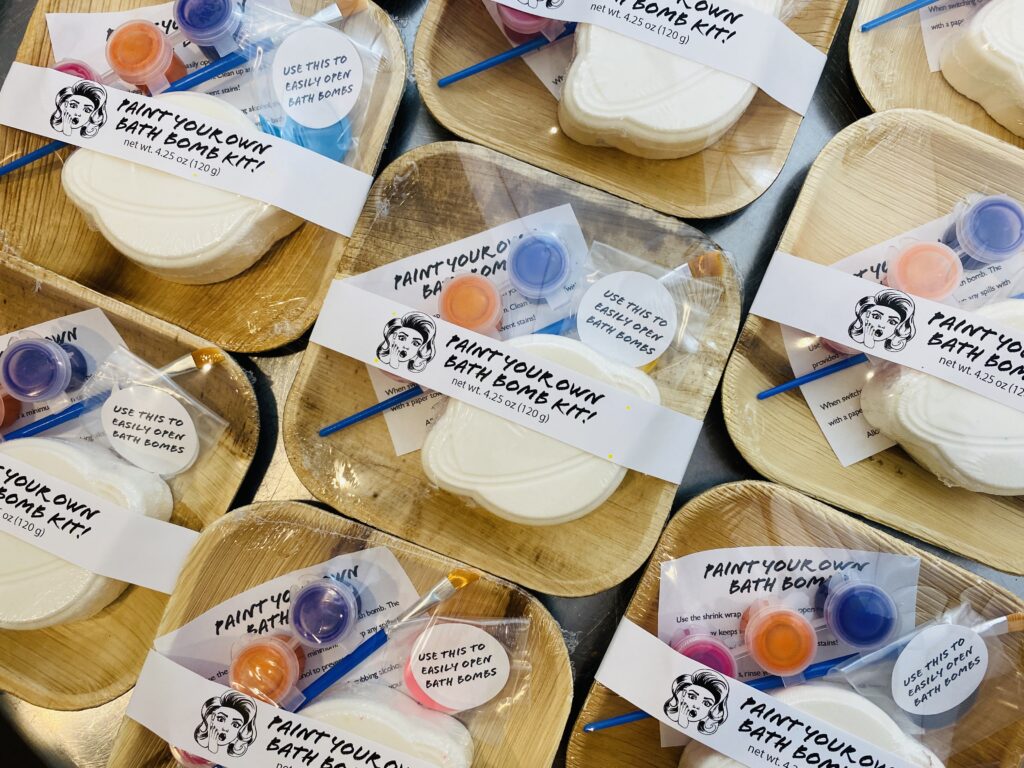
One of our most popular Make With Me Monday’s was when I showed our FB group how to build PYO (Paint Your Own) Kits, and you can watch that replay here if you want!. The premise of a PYO kit is simple! The bath bomb maker supplies their customer with a blank bath bomb, a paintbrush, some bath bomb safe paint, and instructions! The customer gets to enjoy a fun, creative experience and when they’re through, they get to take a bath with their unique bath bomb!
The best part about PYO kits is that they are super simple for us makers to put together once we’ve collected all the pieces. However, the worst part about PYO kits is–collecting all the pieces! We get asked questions all the time about what trays to use, what paint brushes to buy and how to fill the paint pots. The option anxiety is REAL, so let me show you how I build PYO kits so you can get some ideas for how you want to build yours!
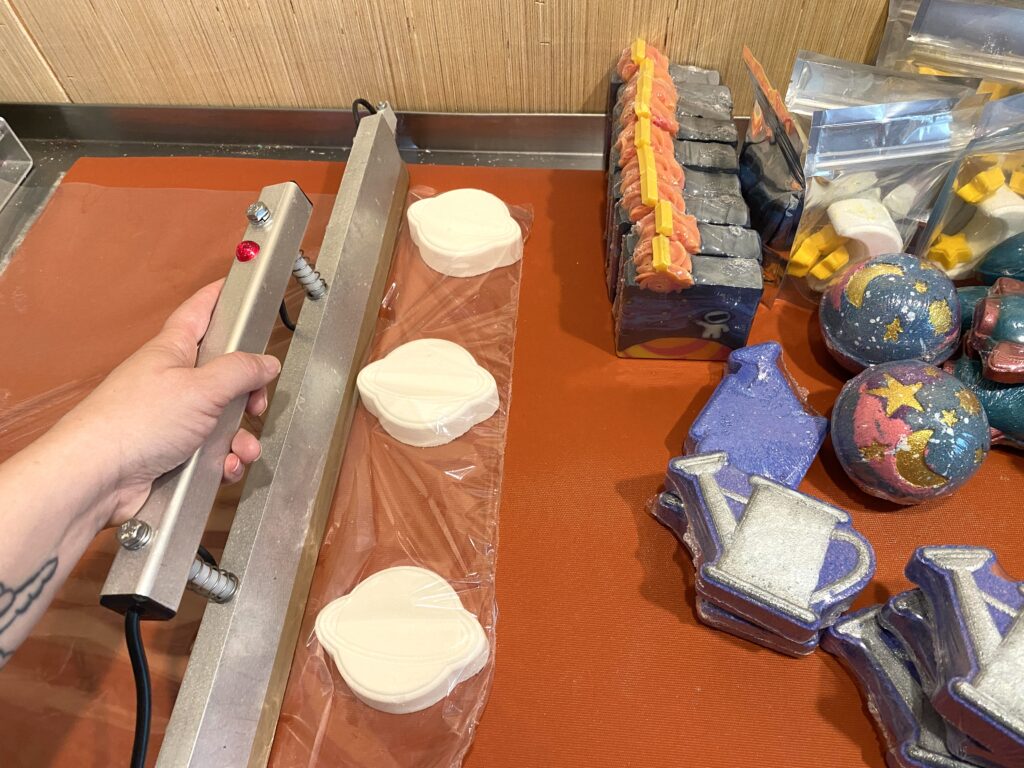
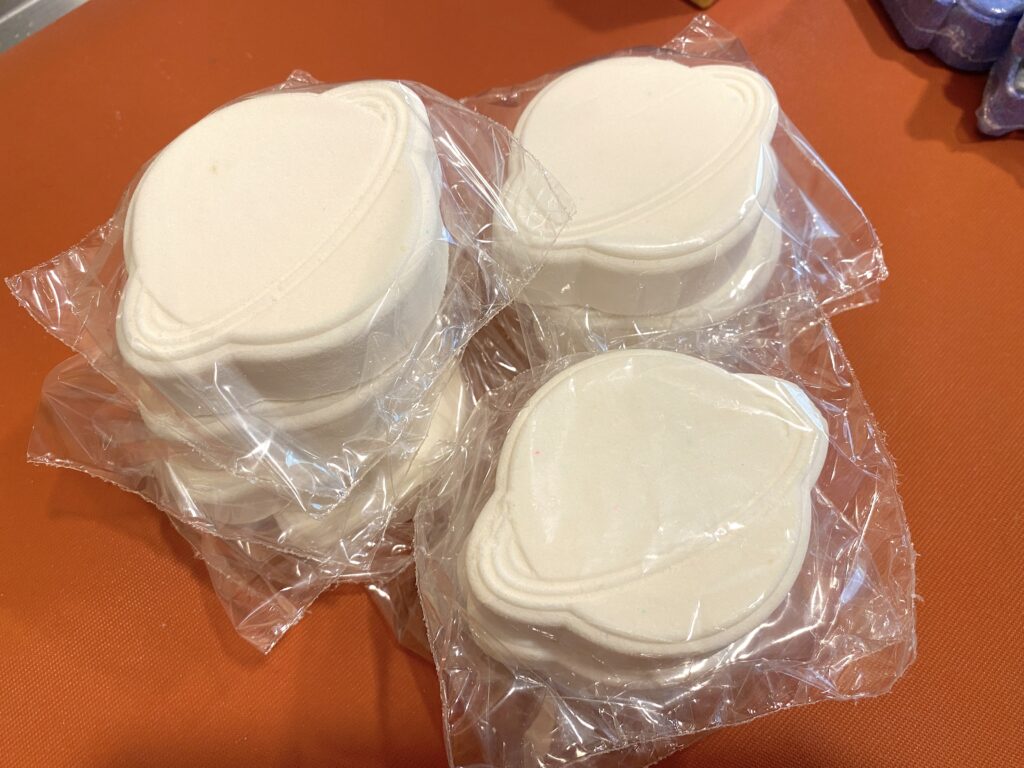
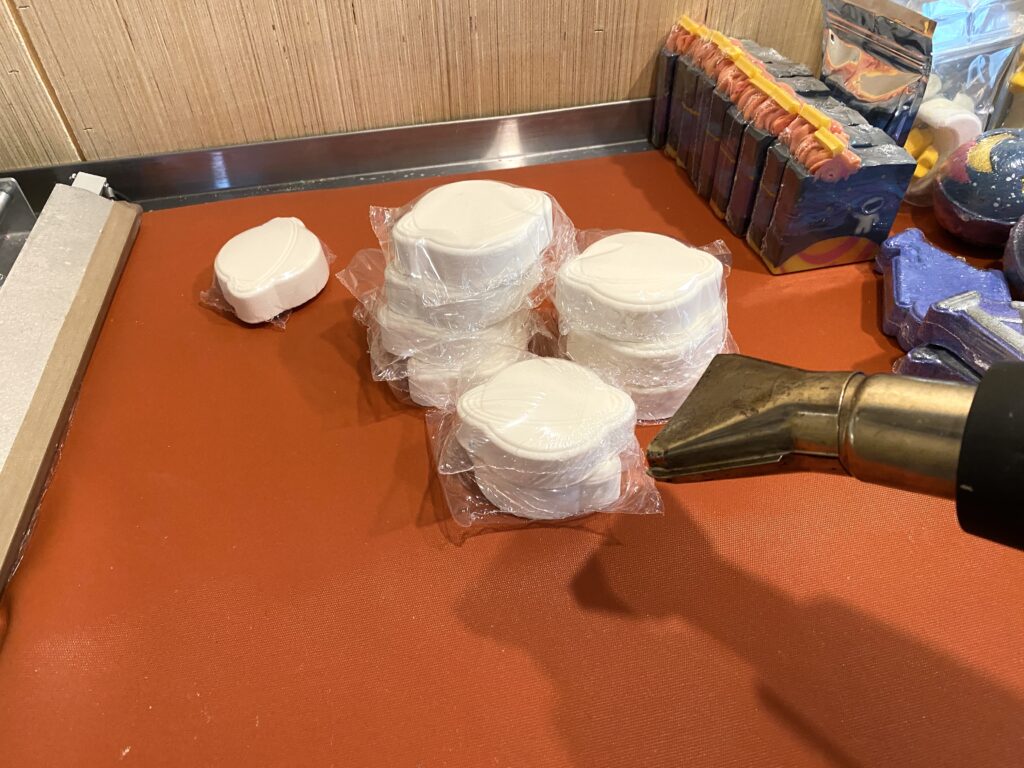
The first thing you’ll need are blank bath bombs! I like for my PYO bath bombs to look crisp and clean, so I don’t use Kaolin clay or milk powder in these. I also make sure to avoid bakery scents, or fragrances that have vanillin in them, to prevent discoloration. If you’re looking for a low cost option you can use our free bath bomb recipe.
wrapping bath bombs
I prefer to shrink wrap the bath bomb before placing it into the PYO kit. This not only helps prevent damage to the bath bomb, but it also helps reduce bath bomb crumbs from getting all over the place inside the kit.
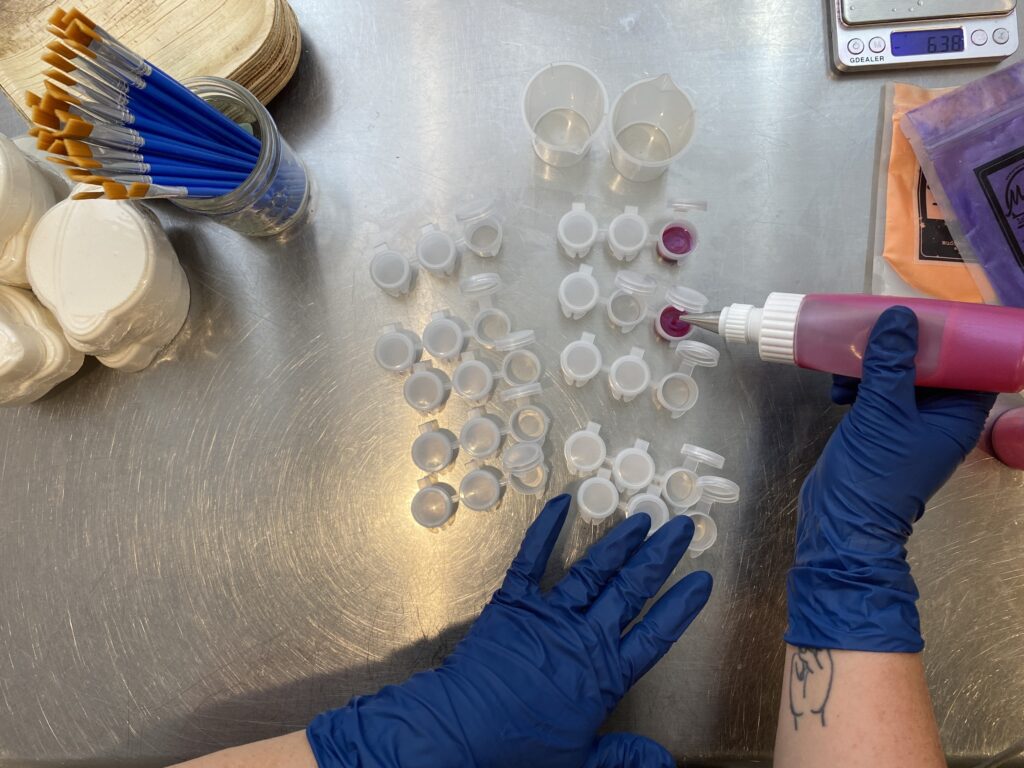
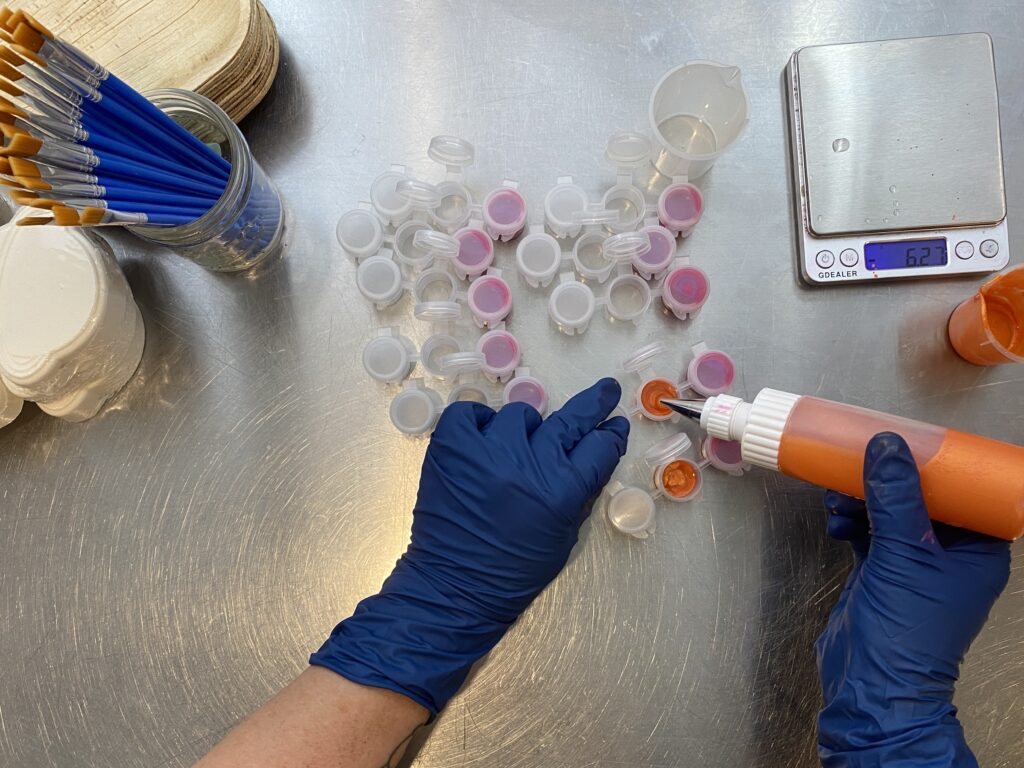
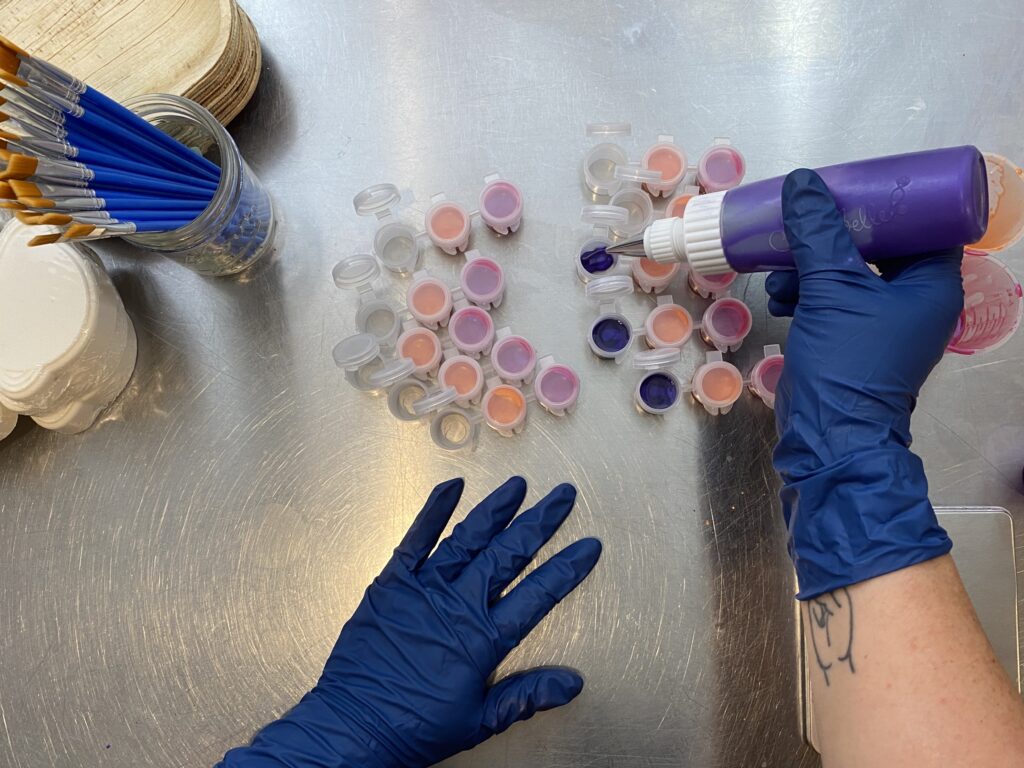
I’ve found that most paint pots come in rows of 6, so I cut them in half which gives each customer 3 colors to choose from. I have seen kits that included more colors though, so if you want to include more colors, go for it!
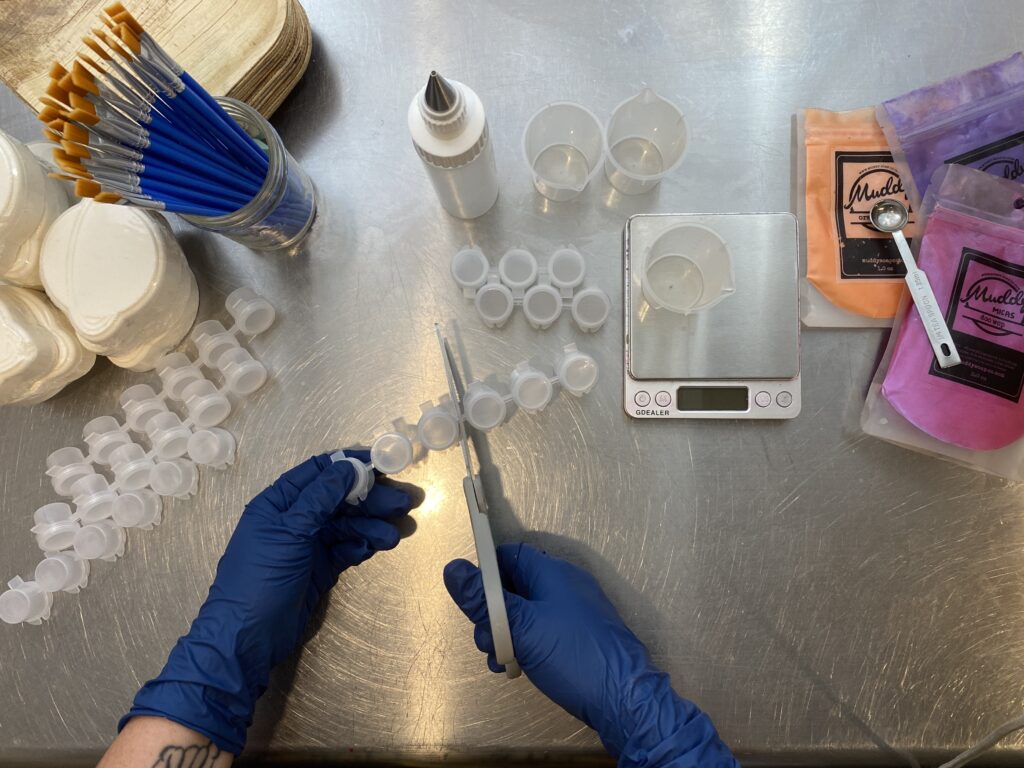
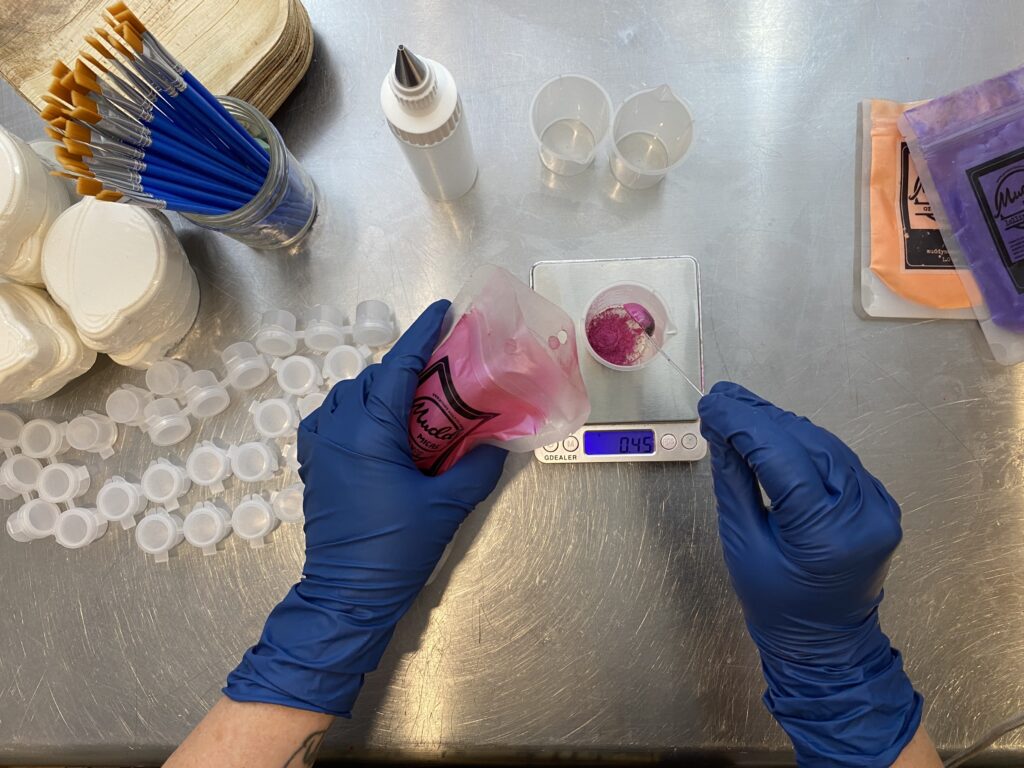
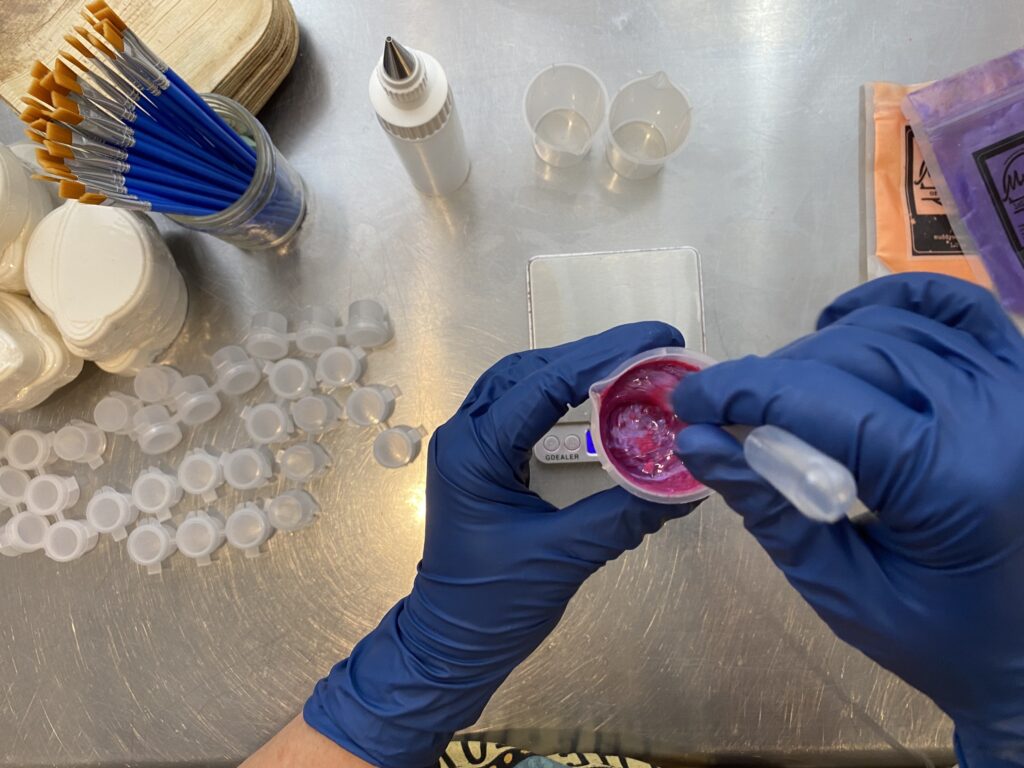
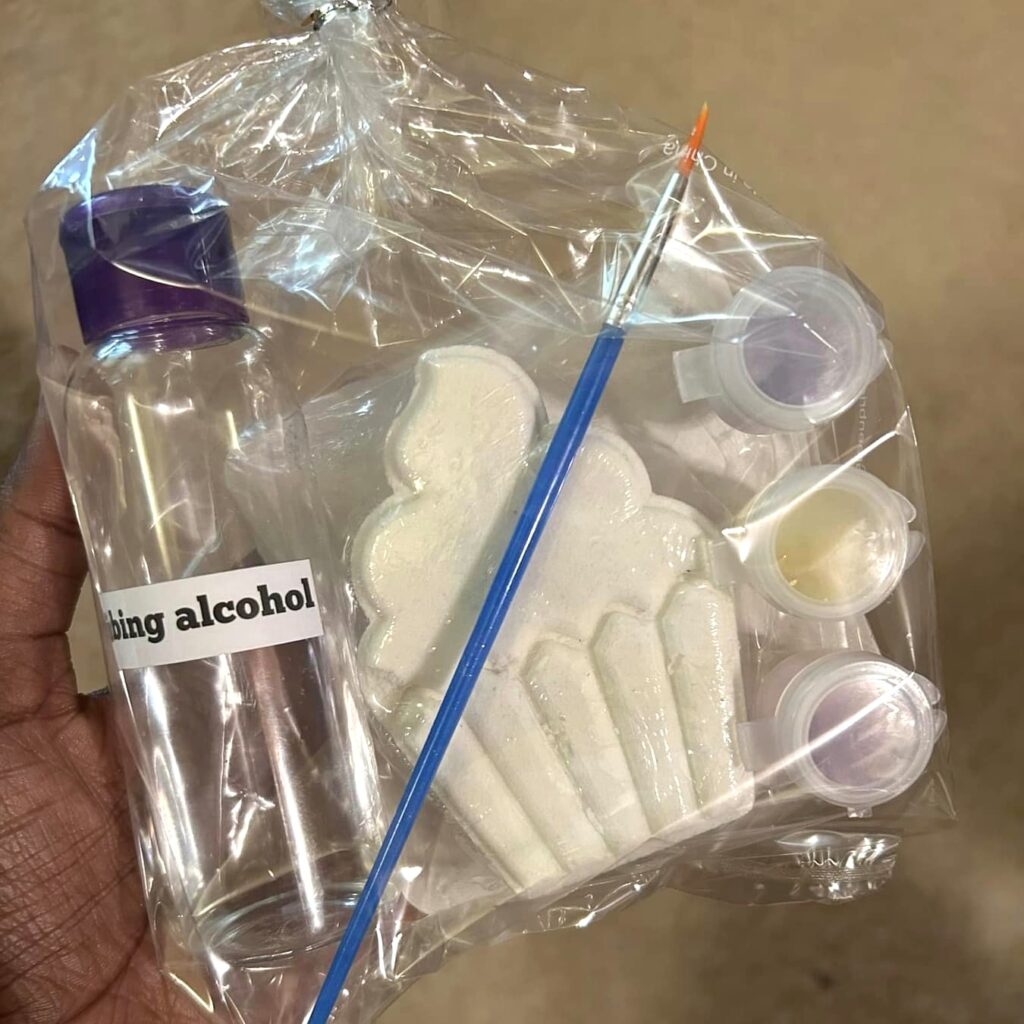
After the pots are trimmed I prepare the paint. I like to use Polysorbate 80 because I don’t have to worry about spills or leaks the way I would with rubbing alcohol. I use a ratio of 1:40 mica to polysorbate 80, which means that for every 1 gram of mica, I use 40 grams of Polysorbate 80. You can also use 90% or higher isopropyl (rubbing) alcohol.
Once the paint is mixed I used a squeeze bottle to fill my paint pots! I’m using the Sweet Sugarbelle bottles, but condiment bottles also work great and are super affordable. Check your local Walmart or dollar store and I bet you’ll find squeeze bottles! They help prevent messes and you can even store extra paint in them as long as you properly label the bottle!
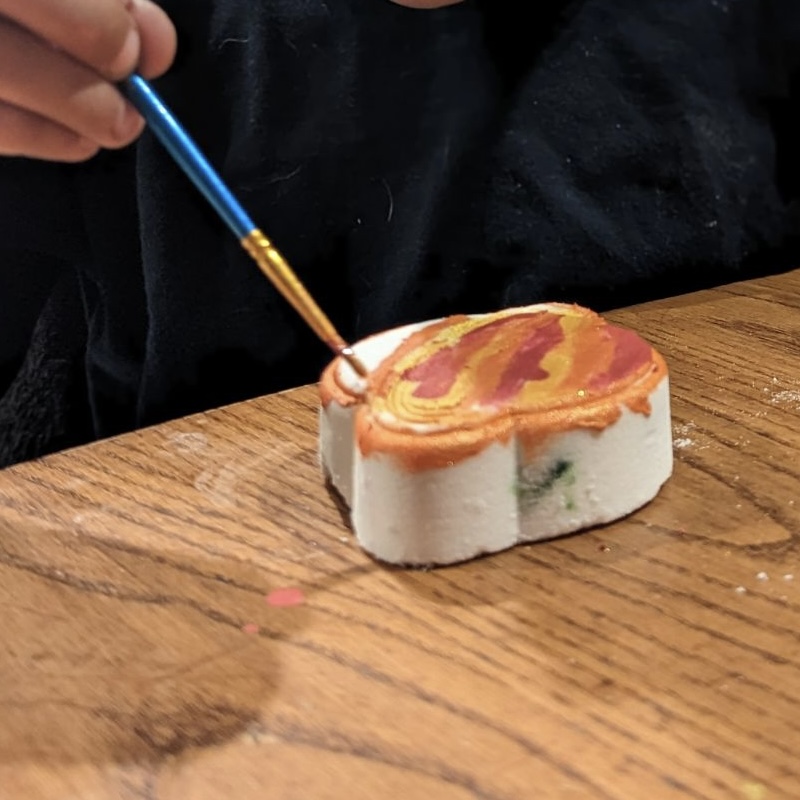
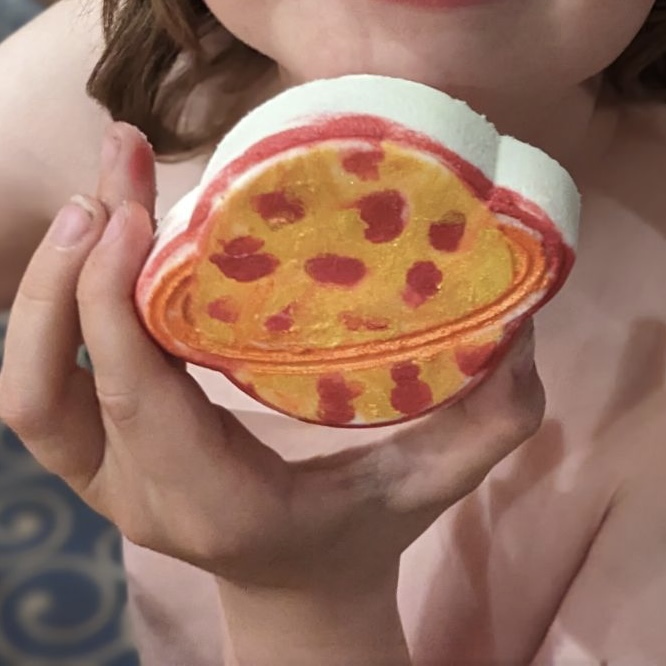
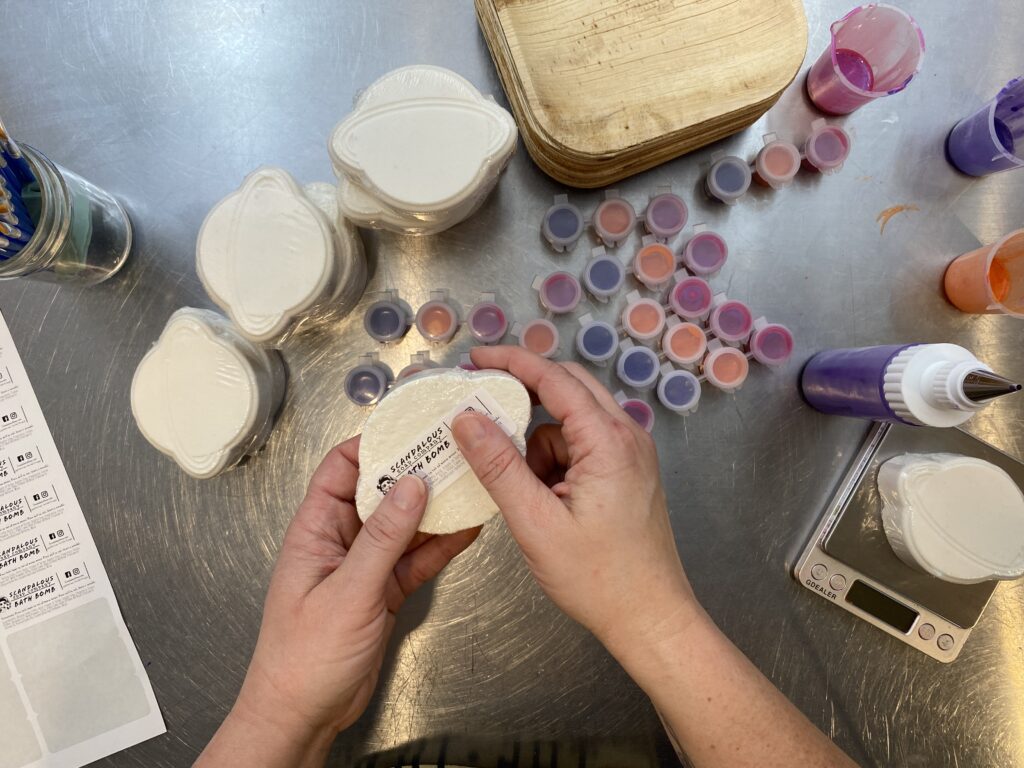
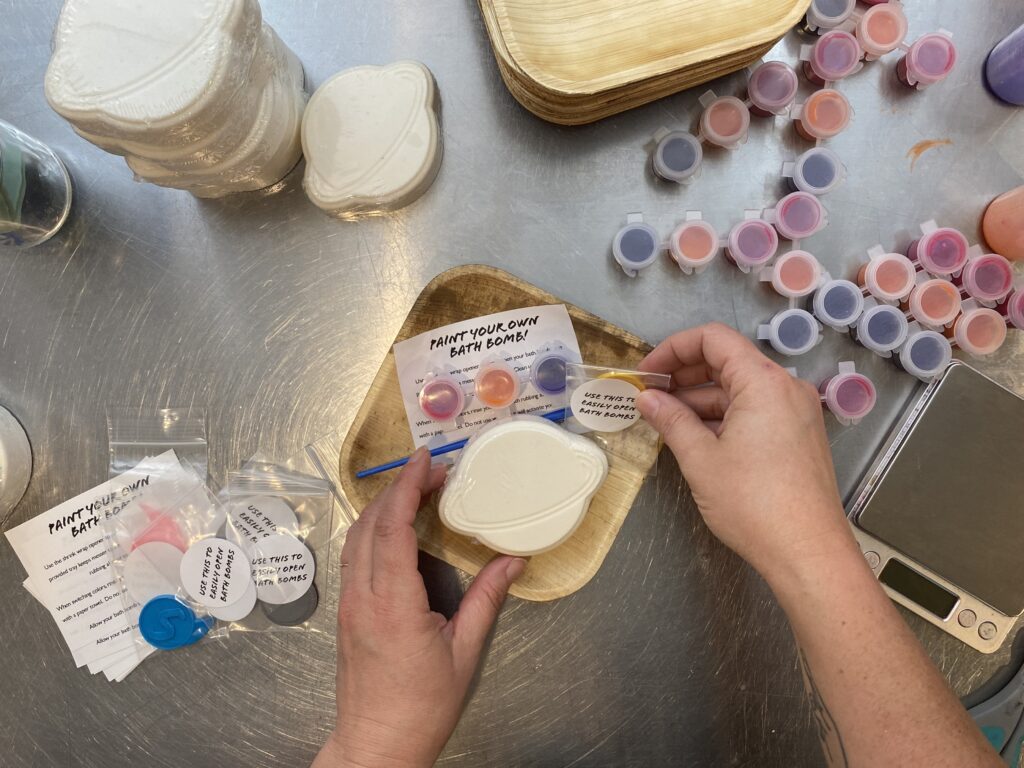
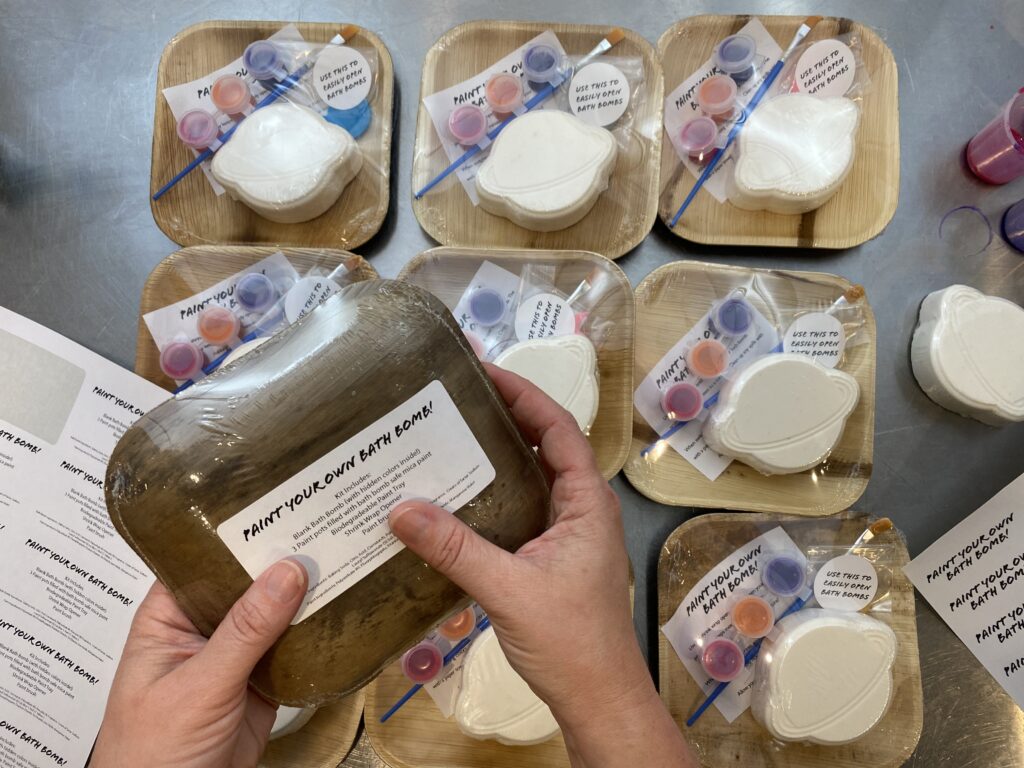
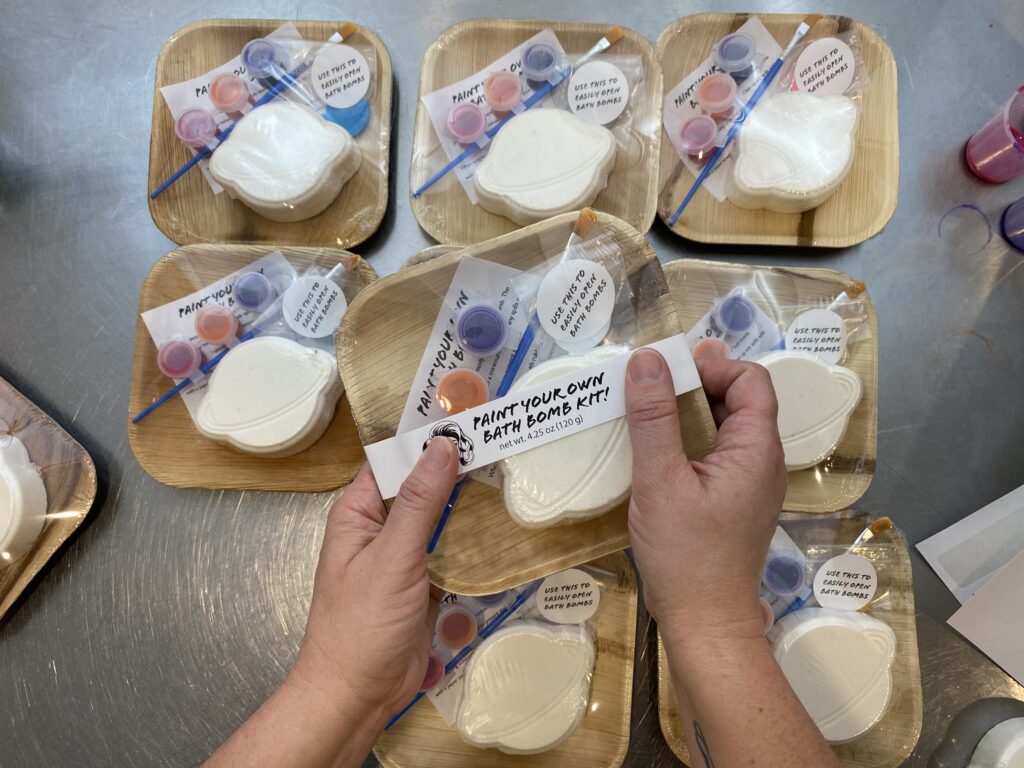
When the pots were filled and safely closed back up I added a label to the individual bath bomb, and started to assemble the bath bomb kits. I included simple instructions, the paint pots, a single paint brush, and the blank bath bomb.
As an added bonus I decided to include some 3D printed shrink wrap openers. While it’s definitely not necessary, customers always seem to have issues opening shrink wrap so I thought it was a nice touch.
Once I was happy with the layout, I set up the rest of the trays to streamline the process. These bamboo trays are a nice biodegradable option, but you could also use paper trays, compostable trays, sturdy paper plates, mylar bags and more!

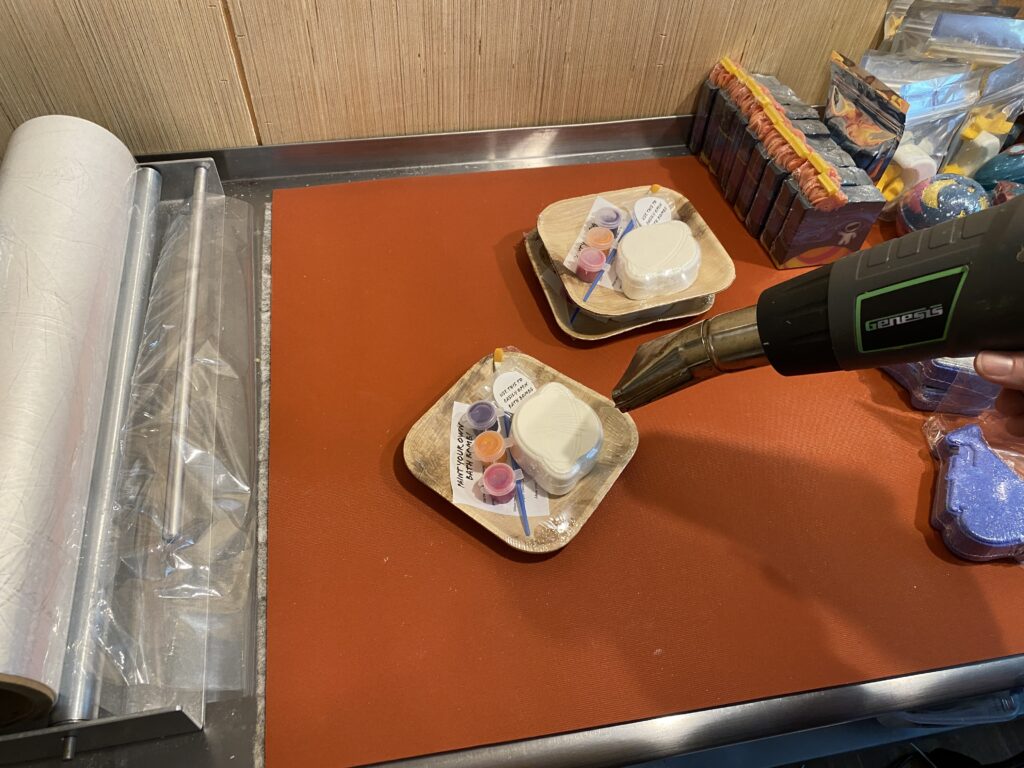
I then wrapped the whole tray. If you need to, feel free to use tape to keep everything together before wrapping. For shrink wrap I use Biolefin from National Shrinkwrap. This material will degrade in a landfill 2-3 years after being discarded and leaves no discernable plastic particulate!
I finished these kits out by adding a sticker to the back of the kit which lists everything inside. This label also has the full ingredients of the bath bomb and mica paint listed so my customers can be sure the bath bombs and paint don’t include ingredients they’d either prefer to avoid or have allergies to. A branded cigar band across the front of the kit is the final touch and these are all done!
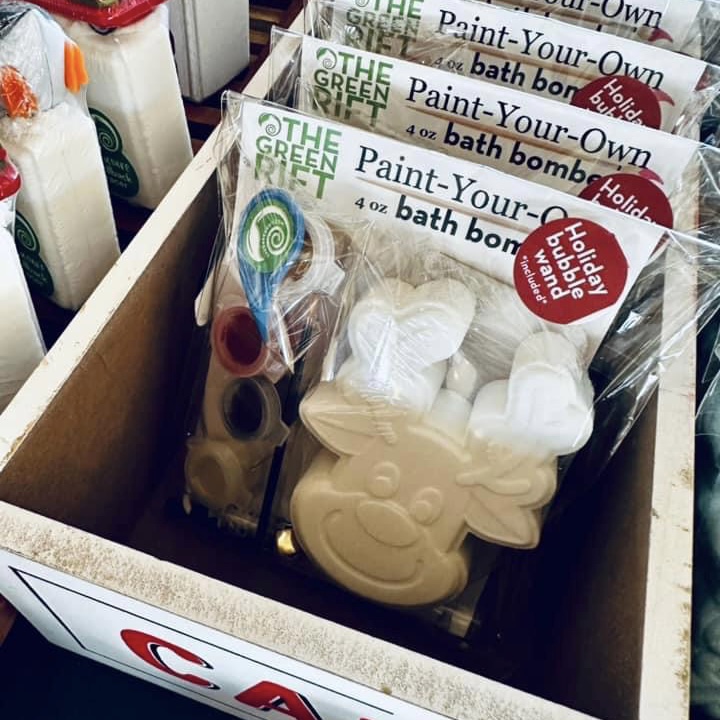
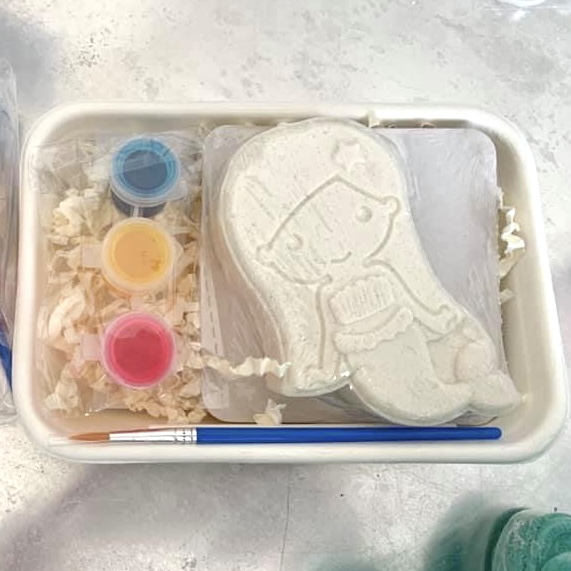
Here are some other PYO kits from makers in our Facebook group! Jen from The Green Rift used flat bags with cardboard coasters to keep the bath bomb from being damaged. Nectaria from Soapfistication used compostable trays with some crinkle paper in her kits. Astaire from Astaire Apothecary used rubbing alcohol instead of Polysorbate 80 for her paint. As you can see there are tons of different ways you can build these kits, so find what works for you!
This month our Patreon BFFs in our Bonus Tier received label assets for making their own PYO kits. These templates are pre-designed, available on Canva and use free elements–all they need to do is add their own info and they will be ready to go. The sticker (and sticker templates) are from Online Labels and they can use their design program, Maestro to perfectly place labels before printing! If you’re interested in learning more about Patreon, follow the link above!
We’d love to see how you build your PYO kits! Don’t forget to share them in our Facebook support group, or tag us on social media when you complete them! And as always, happy making!