King Cake is a traditional New Orleans treat, but you’ll also find it in many parts of the South, especially in areas where Mardi Gras is celebrated! The cake is generally a round or oval-shaped, spiced coffee-cake topped with icing and purple, yellow and green sprinkles. The real fun with a king cake, however, is the hidden trinket inside! Usually this is a plastic baby. Whoever gets the slice with the baby inside has to host next year’s celebration! These bath bombs all have a hidden baby trinket, along with colorful embeds for a fun and exciting way to celebrate Mardi Gras.

To start with, choose your favorite bath bomb recipe! If you don’t have a personal favorite yet, you can try Amanda’s Basic Bath Bomb recipe. I have scaled it up x5 because I need to make enough for an upcoming festival. I chose a Brown Sugar and Fig Type as my fragrance because it smells just like real coffee cake to me, but you can use any skin safe fragrance that you like. You’ll also want to use your favorite Bath Bomb colorants–preferably Lakes or Dyes. If you use Lakes make sure you include Polysorbate 80 to prevent staining the bathtub!
Because my batch size is so large, I’m using a stand mixer to blend my ingredients, but you could just as easily mix by hand. If you’re using a stand mixer you’ll want to cover it with a towel until the wet ingredients are fully incorporated. This will help prevent the dry mix getting airborne. Finally you should always wear gloves, cover and secure your hair, and wear a face mask.
Supplies:
- Bath Bomb Ingredients of your choice
- Mixing bowls
- Gloves
- Hairnet or hat
- Plastic Baby Trinkets (I got mine from the baby shower section of Party City)
Making Bath Bombs
- Measure out all dry ingredients–except Citric Acid–and thoroughly combine. It’s a good practice to sift all your ingredients as you add them to your mixing bowl.
- In a small, separate container, weigh wet ingredients and blend well before adding to dry mix.
- If you’re using a stand mixer you can use a paddle attachment to fully incorporate the wet and dry. If you’re hand mixing, then make sure to continually sift the ingredients, breaking up clumps as you find them. Use a spatula to scrape the sides of your bowl as needed.
- Once the wet and dry are combined, you can incorporate the Citric Acid. Doing this last helps prevent any accidental reactivity. A good mix will hold its shape when squeezed.


These King Cake Bath Bombs will be white on the outside. Inside they will have the three traditional colors of Mardi Gras–green, purple and yellow. My green color will come from embeds I made several weeks ago rather than a color pocket. It is possible to use either embeds, color pockets or both depending on what you have ready and available!
Once your mix is ready, separate out the portions to color, then cover up your main mix to keep it from drying out. My batch size was a total of 2,220 grams. I separated 1-cup portions and used Lakes to color. Consider the scale of your project, when separating out your mix and keep the following ratios in mind for your color pockets.
- PURPLE: 2:1– Red 28 Lake:Blue 1 Lake
- GREEN: 2:1– Yellow 5 Lake:Blue 1 Lake
- YELLOW: 2:1– Yellow 5 Lake:Yellow 6 Lake. (This will appear orange when dry, but in the water it will look yellow)
Remember that if you’re using dyes, then you don’t need nearly as much colorant. Always make sure your colorants are approved for use in bath bombs!


The mold I used is a vintage gelatin parfait tin. I’ve had this set for ages, but there are several individual tins, vacuum formed molds, or 3-d printed molds that could work just as well. Don’t feel that you need a special mold to make this project work!
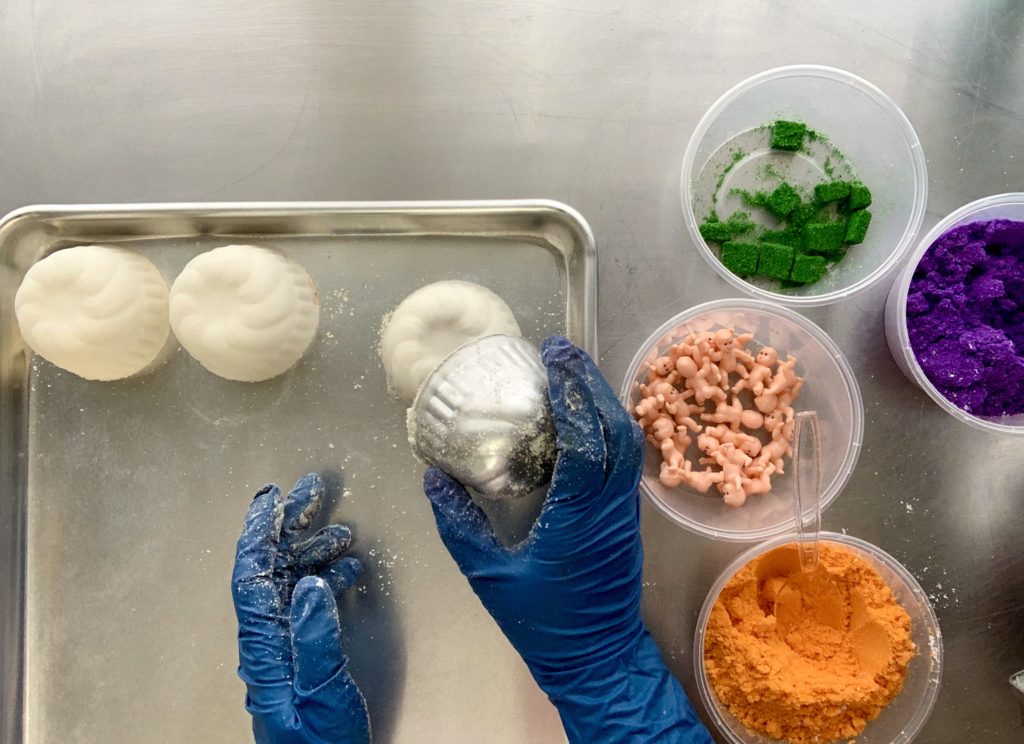
Start by scooping uncolored mix into the mold and pressing it firmly into the bottom and sides. You are essentially creating a shell. Next place the plastic baby (or other trinket) into the mold, and scoop in your color pockets or embeds. Use plastic spoons to avoid getting color on your gloves and having it transfer to the white mix.

Once that is done, top off the mold with the uncolored mix and press it in firmly. Use a scraper, spatula or the back of a knife to make sure the bottom of the bath bomb is flat. This will help prevent cracking once you set it on the pan. Quickly flip the mold onto a cookie sheet or pan, and gently tap or squeeze its sides to release the bath bomb. Continue on until you’ve used all your mix.
You’ll want to make sure your bath bombs are nice and dry before continuing to the next step, preferably 2-3 days. If you live in a humid area, or have storms coming through, you can set up a rice box to help dry your fizzies. If you drizzle too soon your bath bombs might react a little, but it won’t ruin them! Trust me I’ve done it before! If this happens you can keep adding sprinkles or salts to cover any cosmetic flaws.
Creating a Drizzle and Decorating your Mardi Gras Bath Bombs
Ingredients:
- Cocoa butter – 15g
- Cornstarch – 15g
- Table Salt – 3 tbsp
- Mica – ¼ tsp each of Yellow, Green and purple
- Nonpareil sprinkles
This will be enough drizzle for approximately 7 bath bombs, and can easily be scaled up or down depending on your needs.
When the Bath Bombs are completely dry set them on a pan or cooling grid and prepare your drizzle. If you have a recipe you like you can use that, or for a nice basic drizzle you can use equal parts cocoa butter and cornstarch as indicated above.
Step 1: First create colored salts by combining 1 tbsp of table salt, and 1/4 tsp of mica in a container and stirring thoroughly. Do this for all three colors (yellow, green and purple.) These will imitate the sanding sugar used on King Cakes.
Step 2: Gently melt cocoa butter in a heat safe container. Stir frequently and be careful to not overheat and burn your cocoa butter.

Step 3: When the butter is fully melted add the same amount of cornstarch by weight and stir thoroughly, making sure there are no lumps.

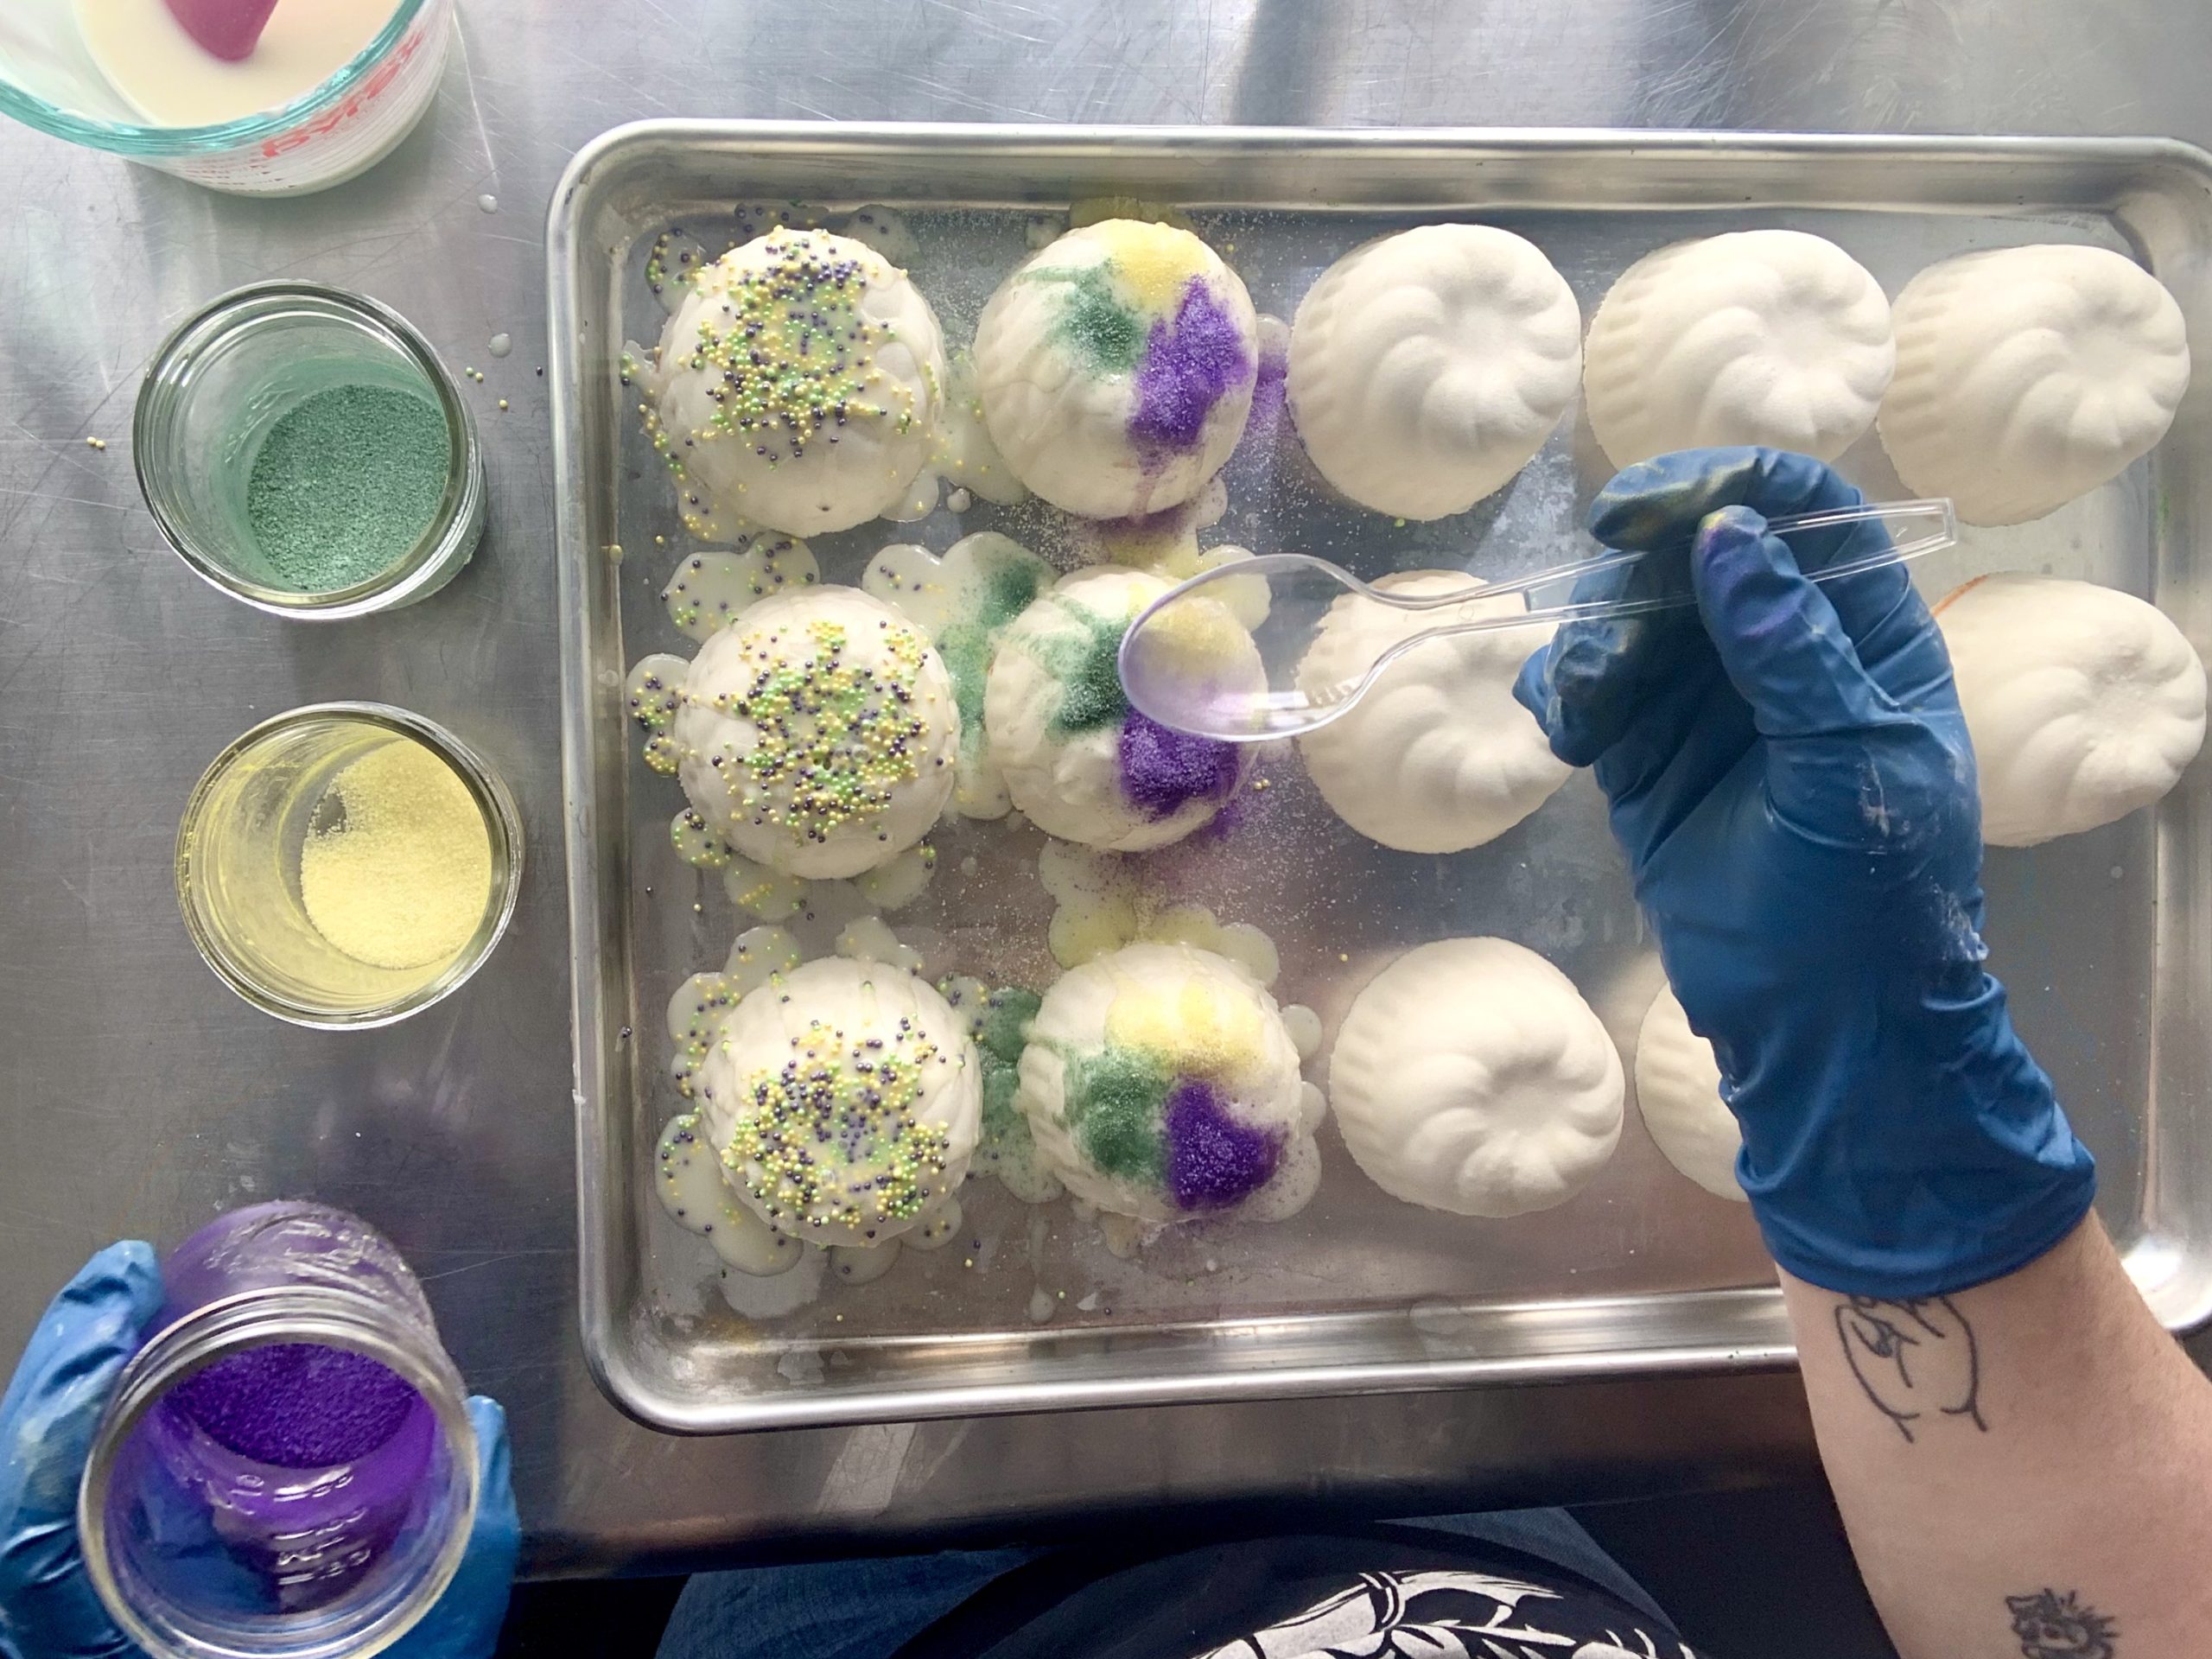
Step 4: When the drizzle is thick enough to have a dense creamy body, but still thin enough to easily flow from a spatula or spoon, you can use it to gently cover your bath bombs.

Step 5: While the drizzle on your bath bombs is still wet, sprinkle on your colored salts and nonpareils. I tried a few different versions, but liked the combination of salts and nonpareils best.


Step 6: Allow your drizzled bath bombs to dry for 2-3 hours, then move them to a new pan or cooling grid to make sure they don’t become stuck as the cocoa butter hardens. Viola! Enjoy your Mardi Gras with King Cake themed bath bombs!

About Robyn French Smith

My name is Robyn French Smith! I studied fine art at the University of St Thomas and the Glassell School of Art in Houston TX, and graphic design at The Art Institute of Houston. I started dabbling in DIY bath and body products over 10 years ago after moving to Alaska. While I knew how to make basic soap for several years, I didn’t start looking at it as an art form until about 4 years ago when a neck and shoulder injury made it almost impossible for me to draw and paint. I needed a place for all that creativity to go, and I found it in soap. I received my Basic Soapmaker Certification from the HSCG in 2019 and plan on pursuing further levels of certification.
Find me online at scandaloussoap.com and Facebook!