It’s an open secret that we love Wonder Bar! In all my years of working with handmade cosmetics I’ve never come across anything as versatile as this solid bubble bath recipe. It can be used to create pressed, rolled, scooped or piped bubble bath, and the recipe is really easy to tweak.
But the best thing about Wonder Bar, in my humble opinion, is that it can always—and I do mean always—be rebatched. It doesn’t matter if you’re working with an older batch of Wonder Bar that’s out of season, or some fresh Wonder Bar that didn’t go as planned—you can rework it.
Recently I made a double batch of rolled Wonder Bar on a Facebook Live. While the colors and fragrance were fine, the roll itself wasn’t nicely spiraled and didn’t turn out as I’d hoped. Rather than just settle on a design I wasn’t happy with I thought it would be a great opportunity to show you guys different ways you can rebatch!
THINGS TO KEEP IN MIND
- How wet is your wonder bar?
The secret to achieving different textures in Wonder Bar is to use 91% Isopropyl (rubbing) alcohol. If the batch you want to fix is fresh and still wet from the rubbing alcohol, then you won’t have to use as much the second time around. If the batch has dried out then you’ll want to crush it up and add more rubbing alcohol. For a great visual aid on how to recognize the different textures you watch this video on our YouTube channel. - Expiration dates
The expiration datesof your ingredients determines the expiration date of your product. If your oil has a 1 year shelf life and has been sitting in your shop 3 months before you add it to product, then that product has a 9 month shelf life. If you rebatch the mix, it still has the original shelf life minus the time it sat waiting to be sold. Always keep this is mind when reworking product. - Colors
Some colors that look great in layers won’t look good when blended—and they will be blended. I tried to rebatch some rainbow bubble bath rolls and they looked like… poop. They turned brown and were completely unappealing to me. So try to keep our color studies in mind when you’re blending these up. You can find our free color studies here. - Mixer
You don’t need a stand mixer to blend use Wonder Bar, but it does make it a lot easier. If you don’t have a kitchenaid-type mixer you can use a hand mixer in a large bowl.
DIG THESE SCOOPS


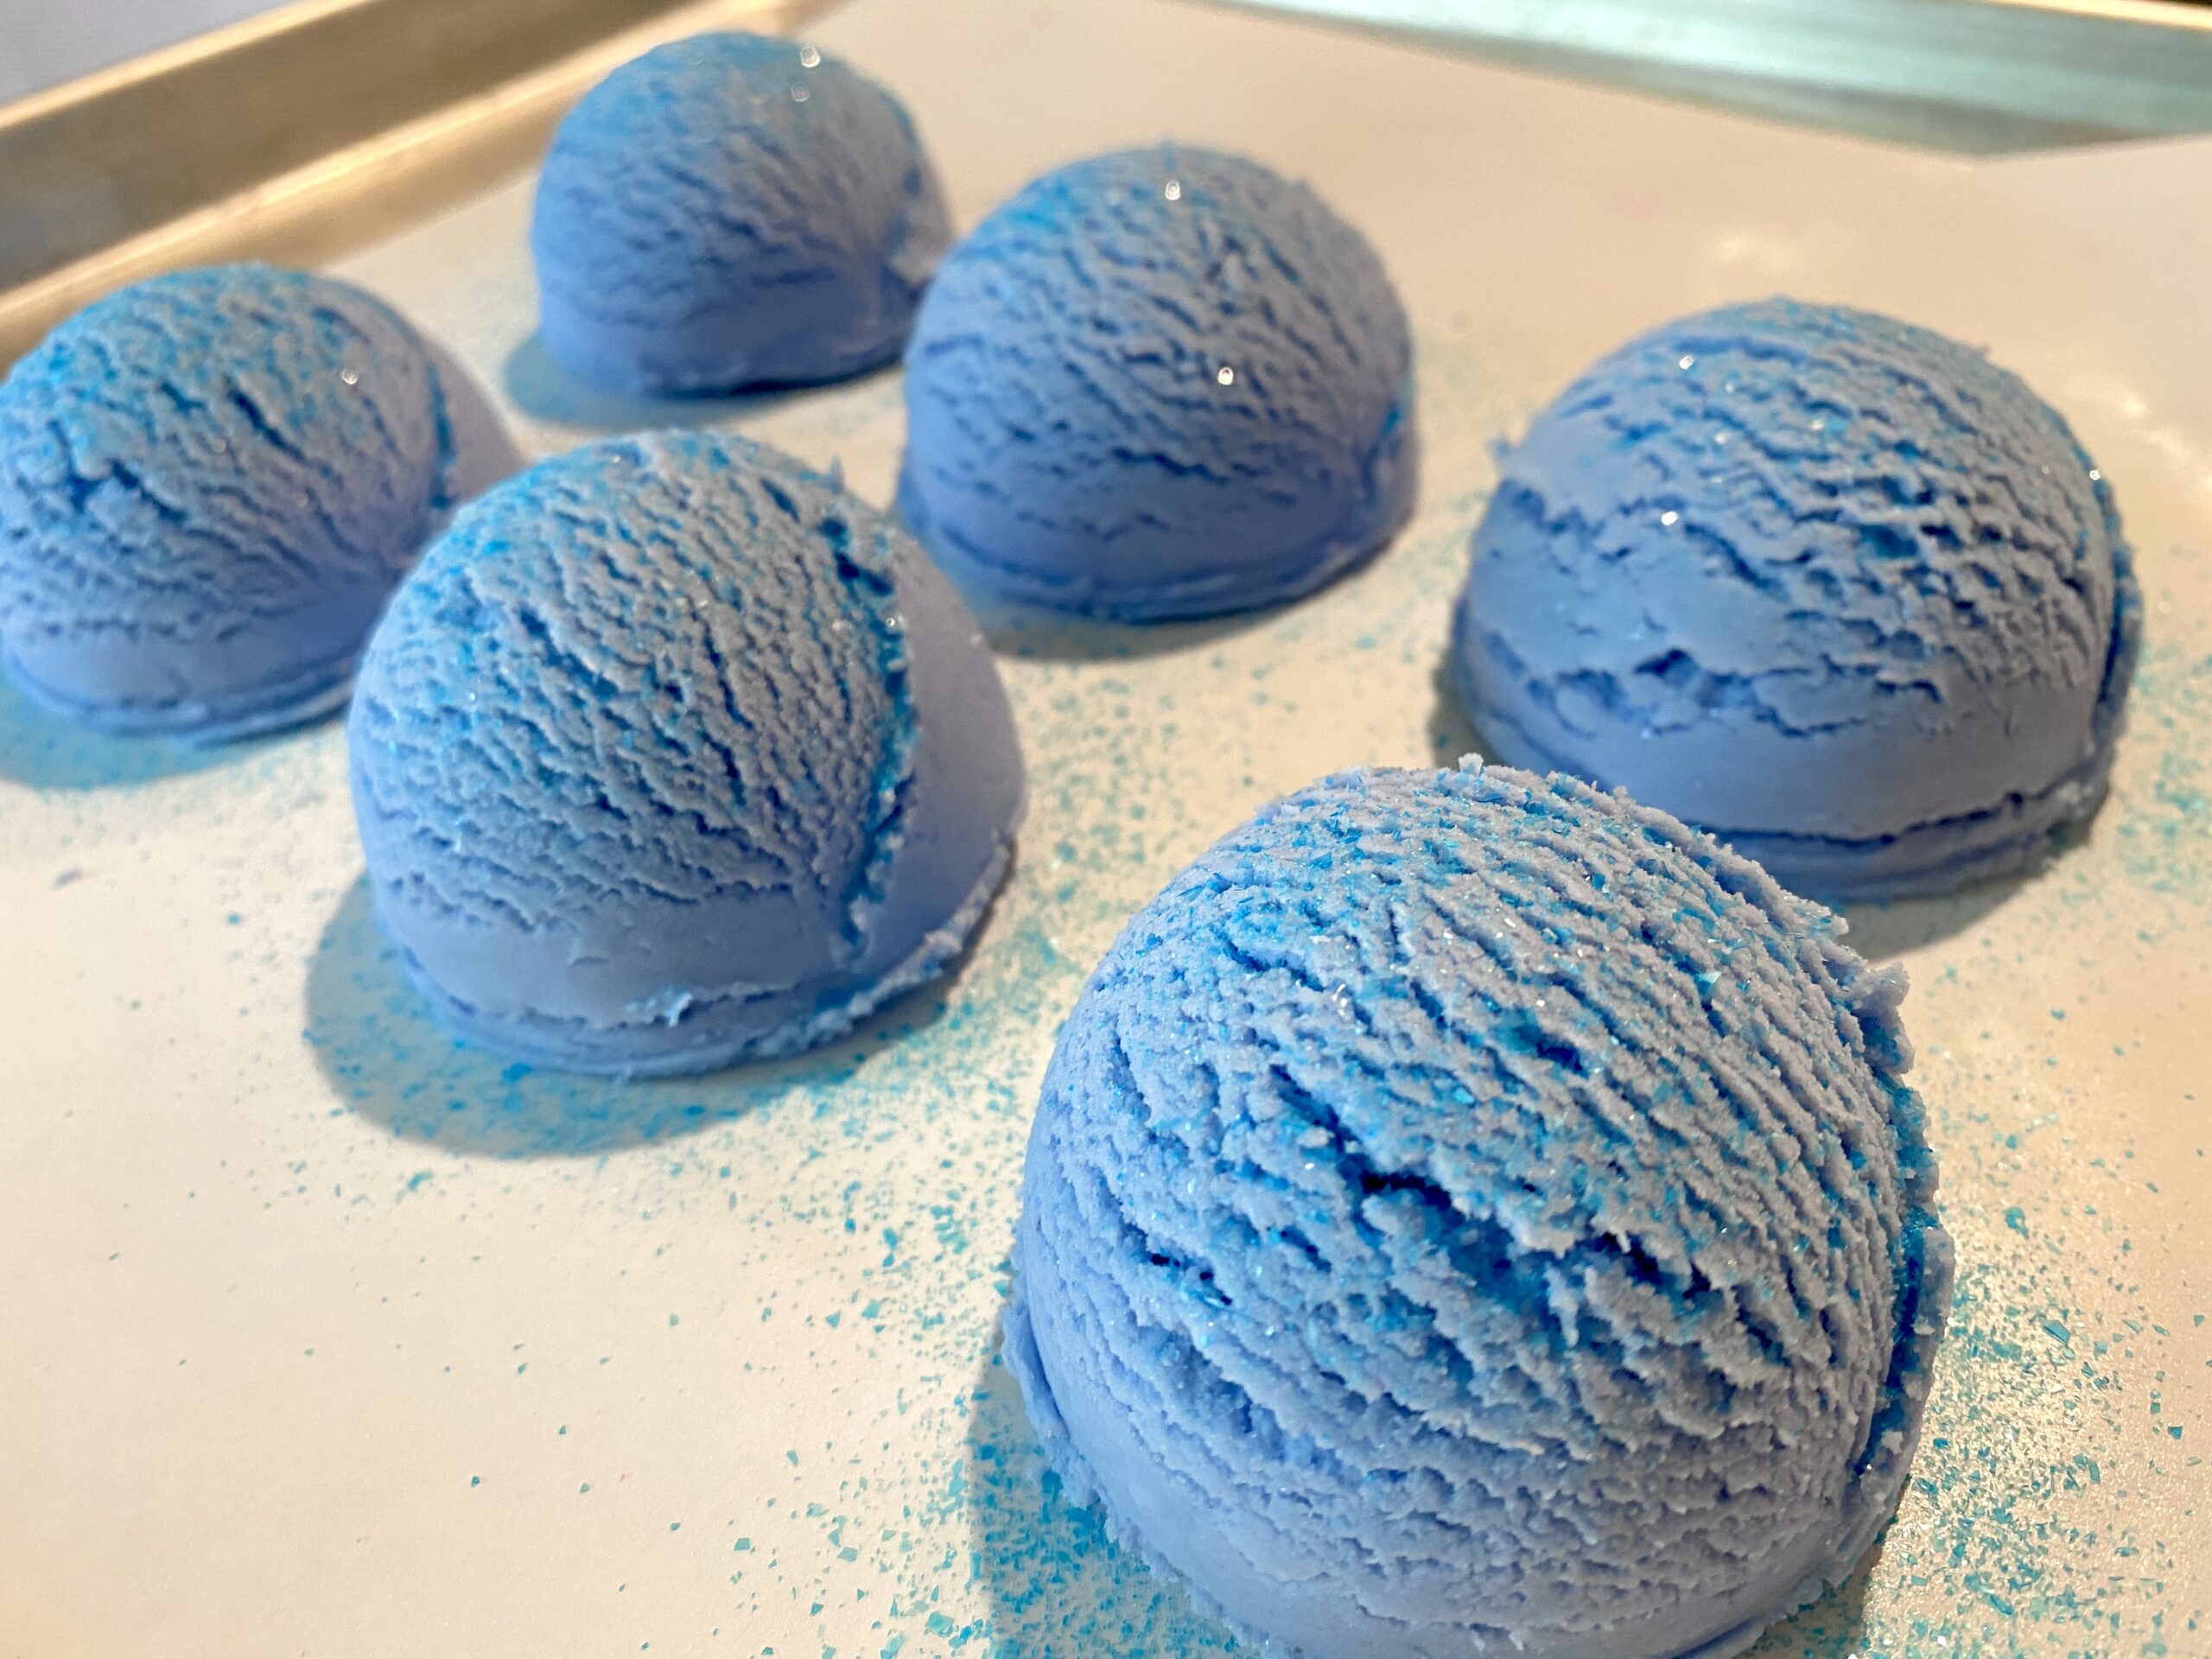
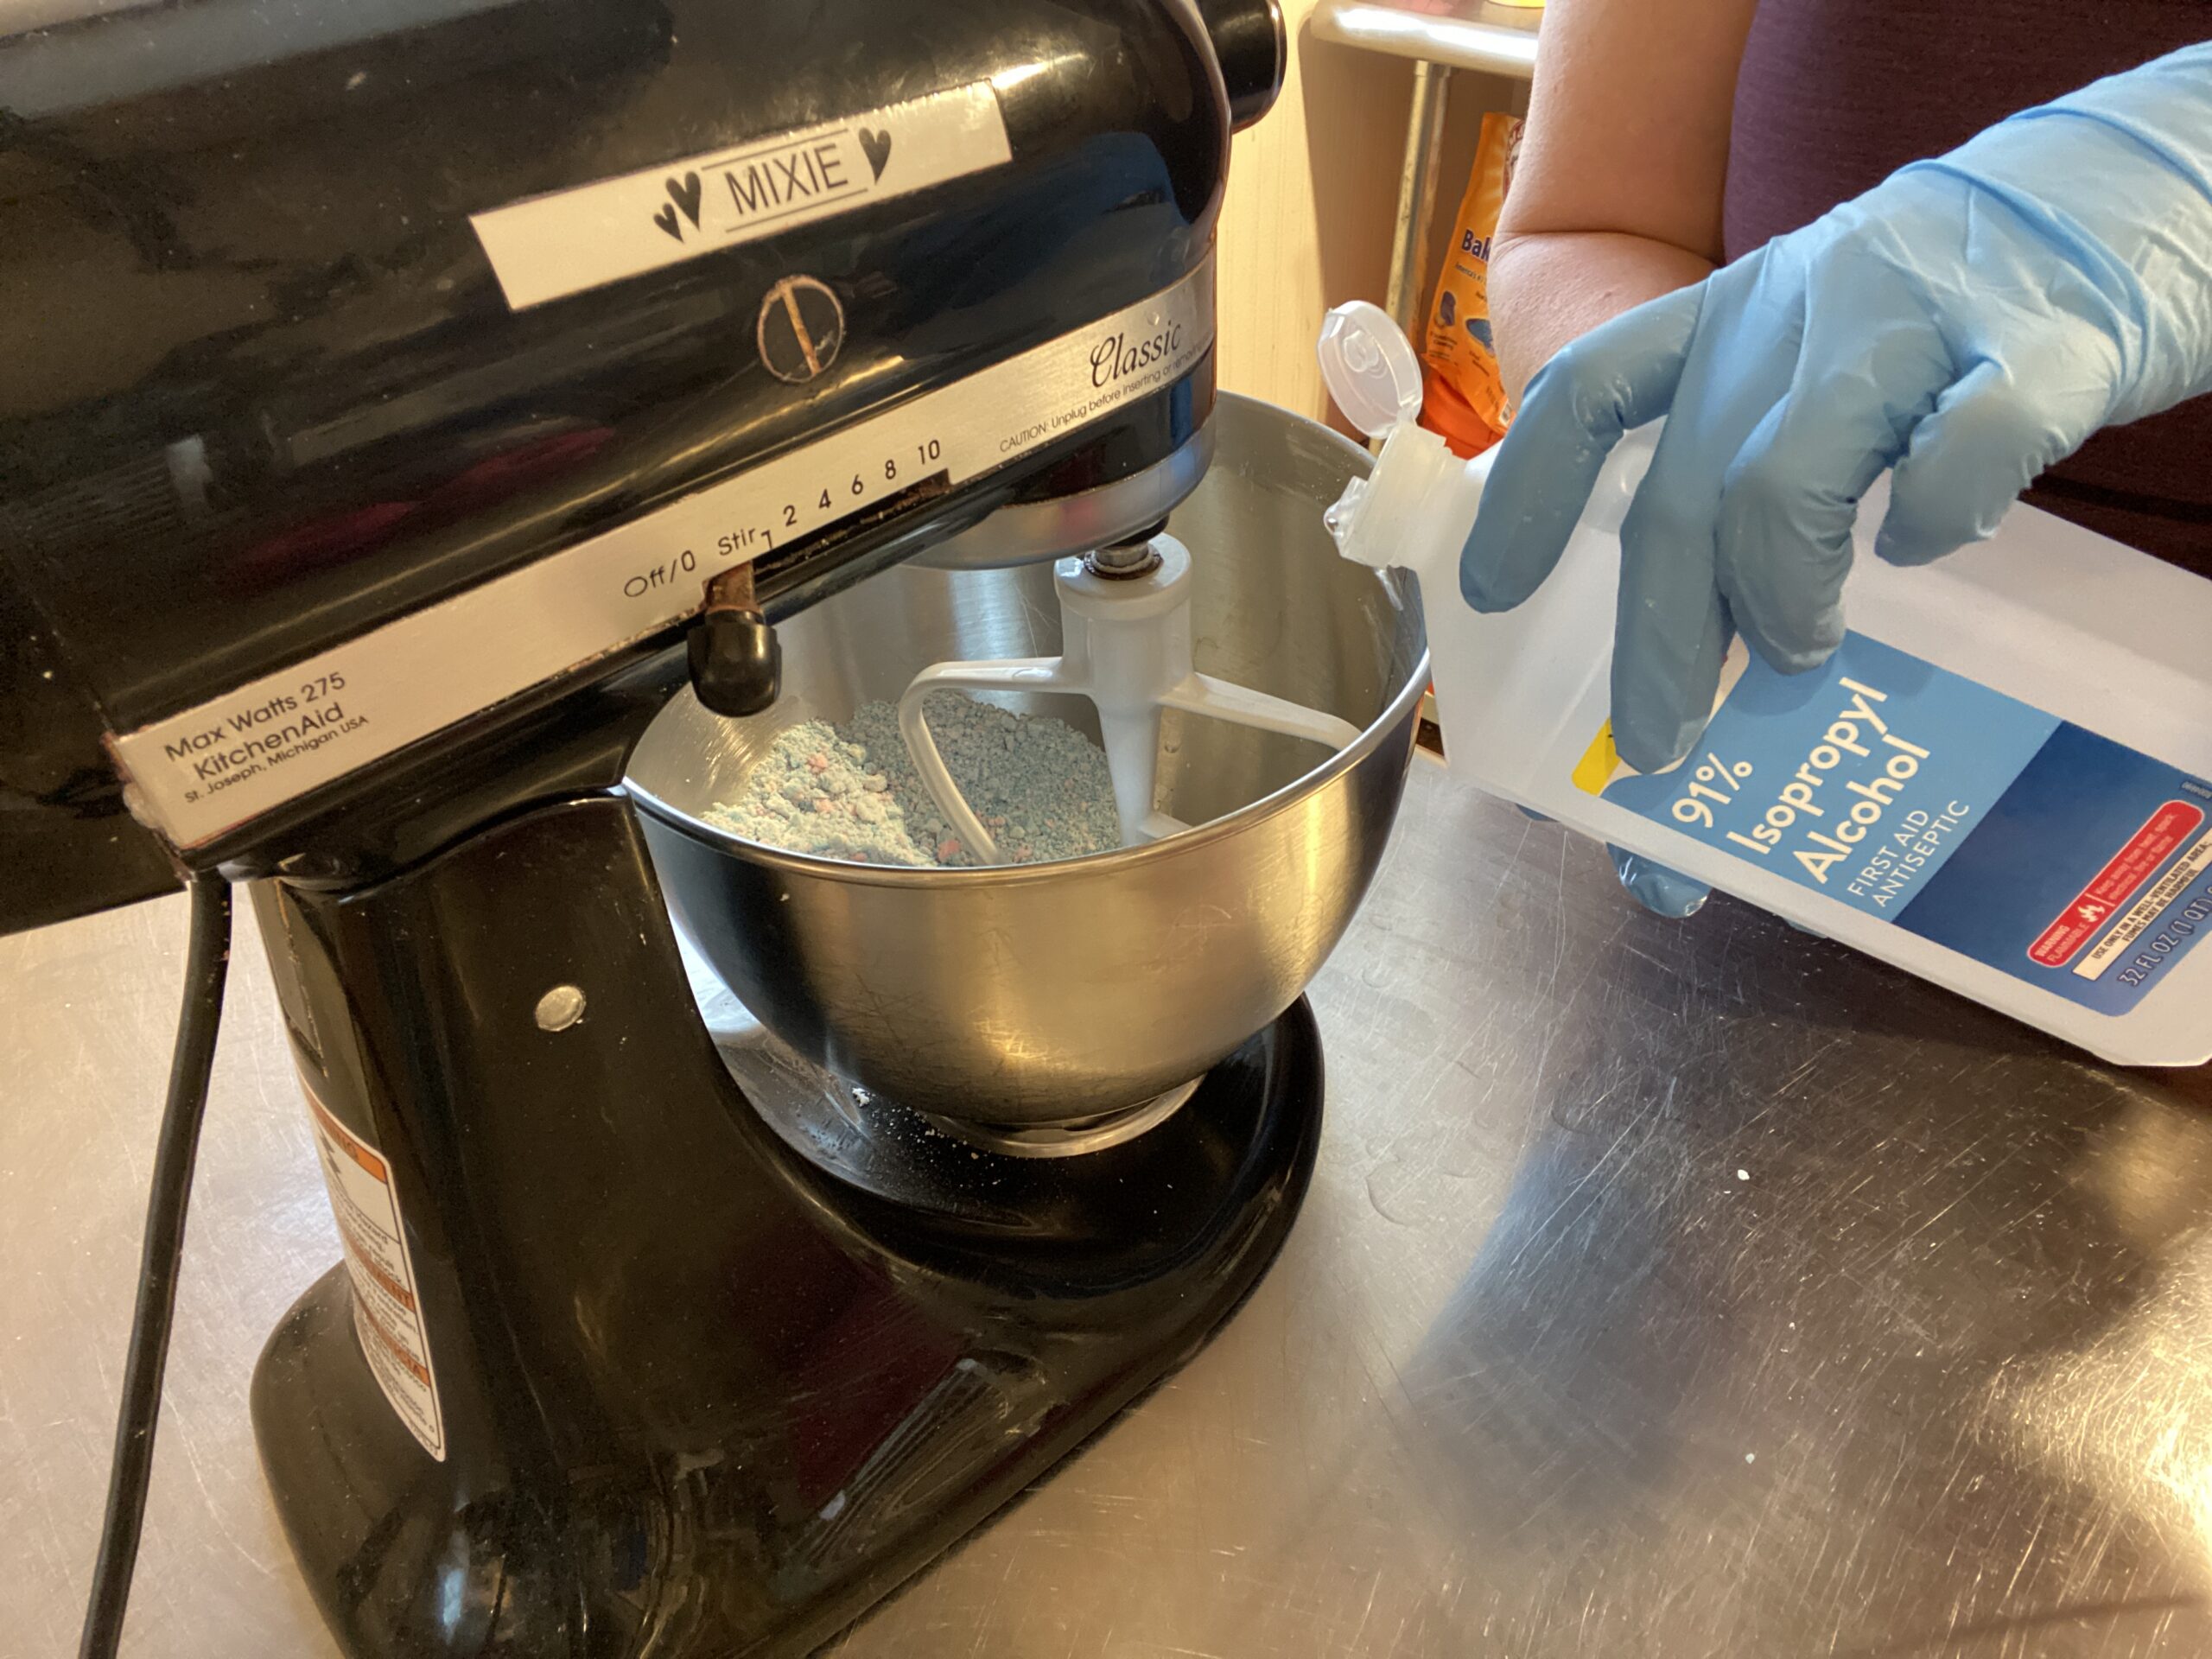
Since I think scoops are the easiest way to use Wonder Bar, I’ll show you how to rebatch this way first! Taking a few of the rolled bars I crumbled them up into my Kitchenaid mixing bowl. Since my bars were fairly dry I noticed some of the chunks were pretty big and I crushed them up a little more.
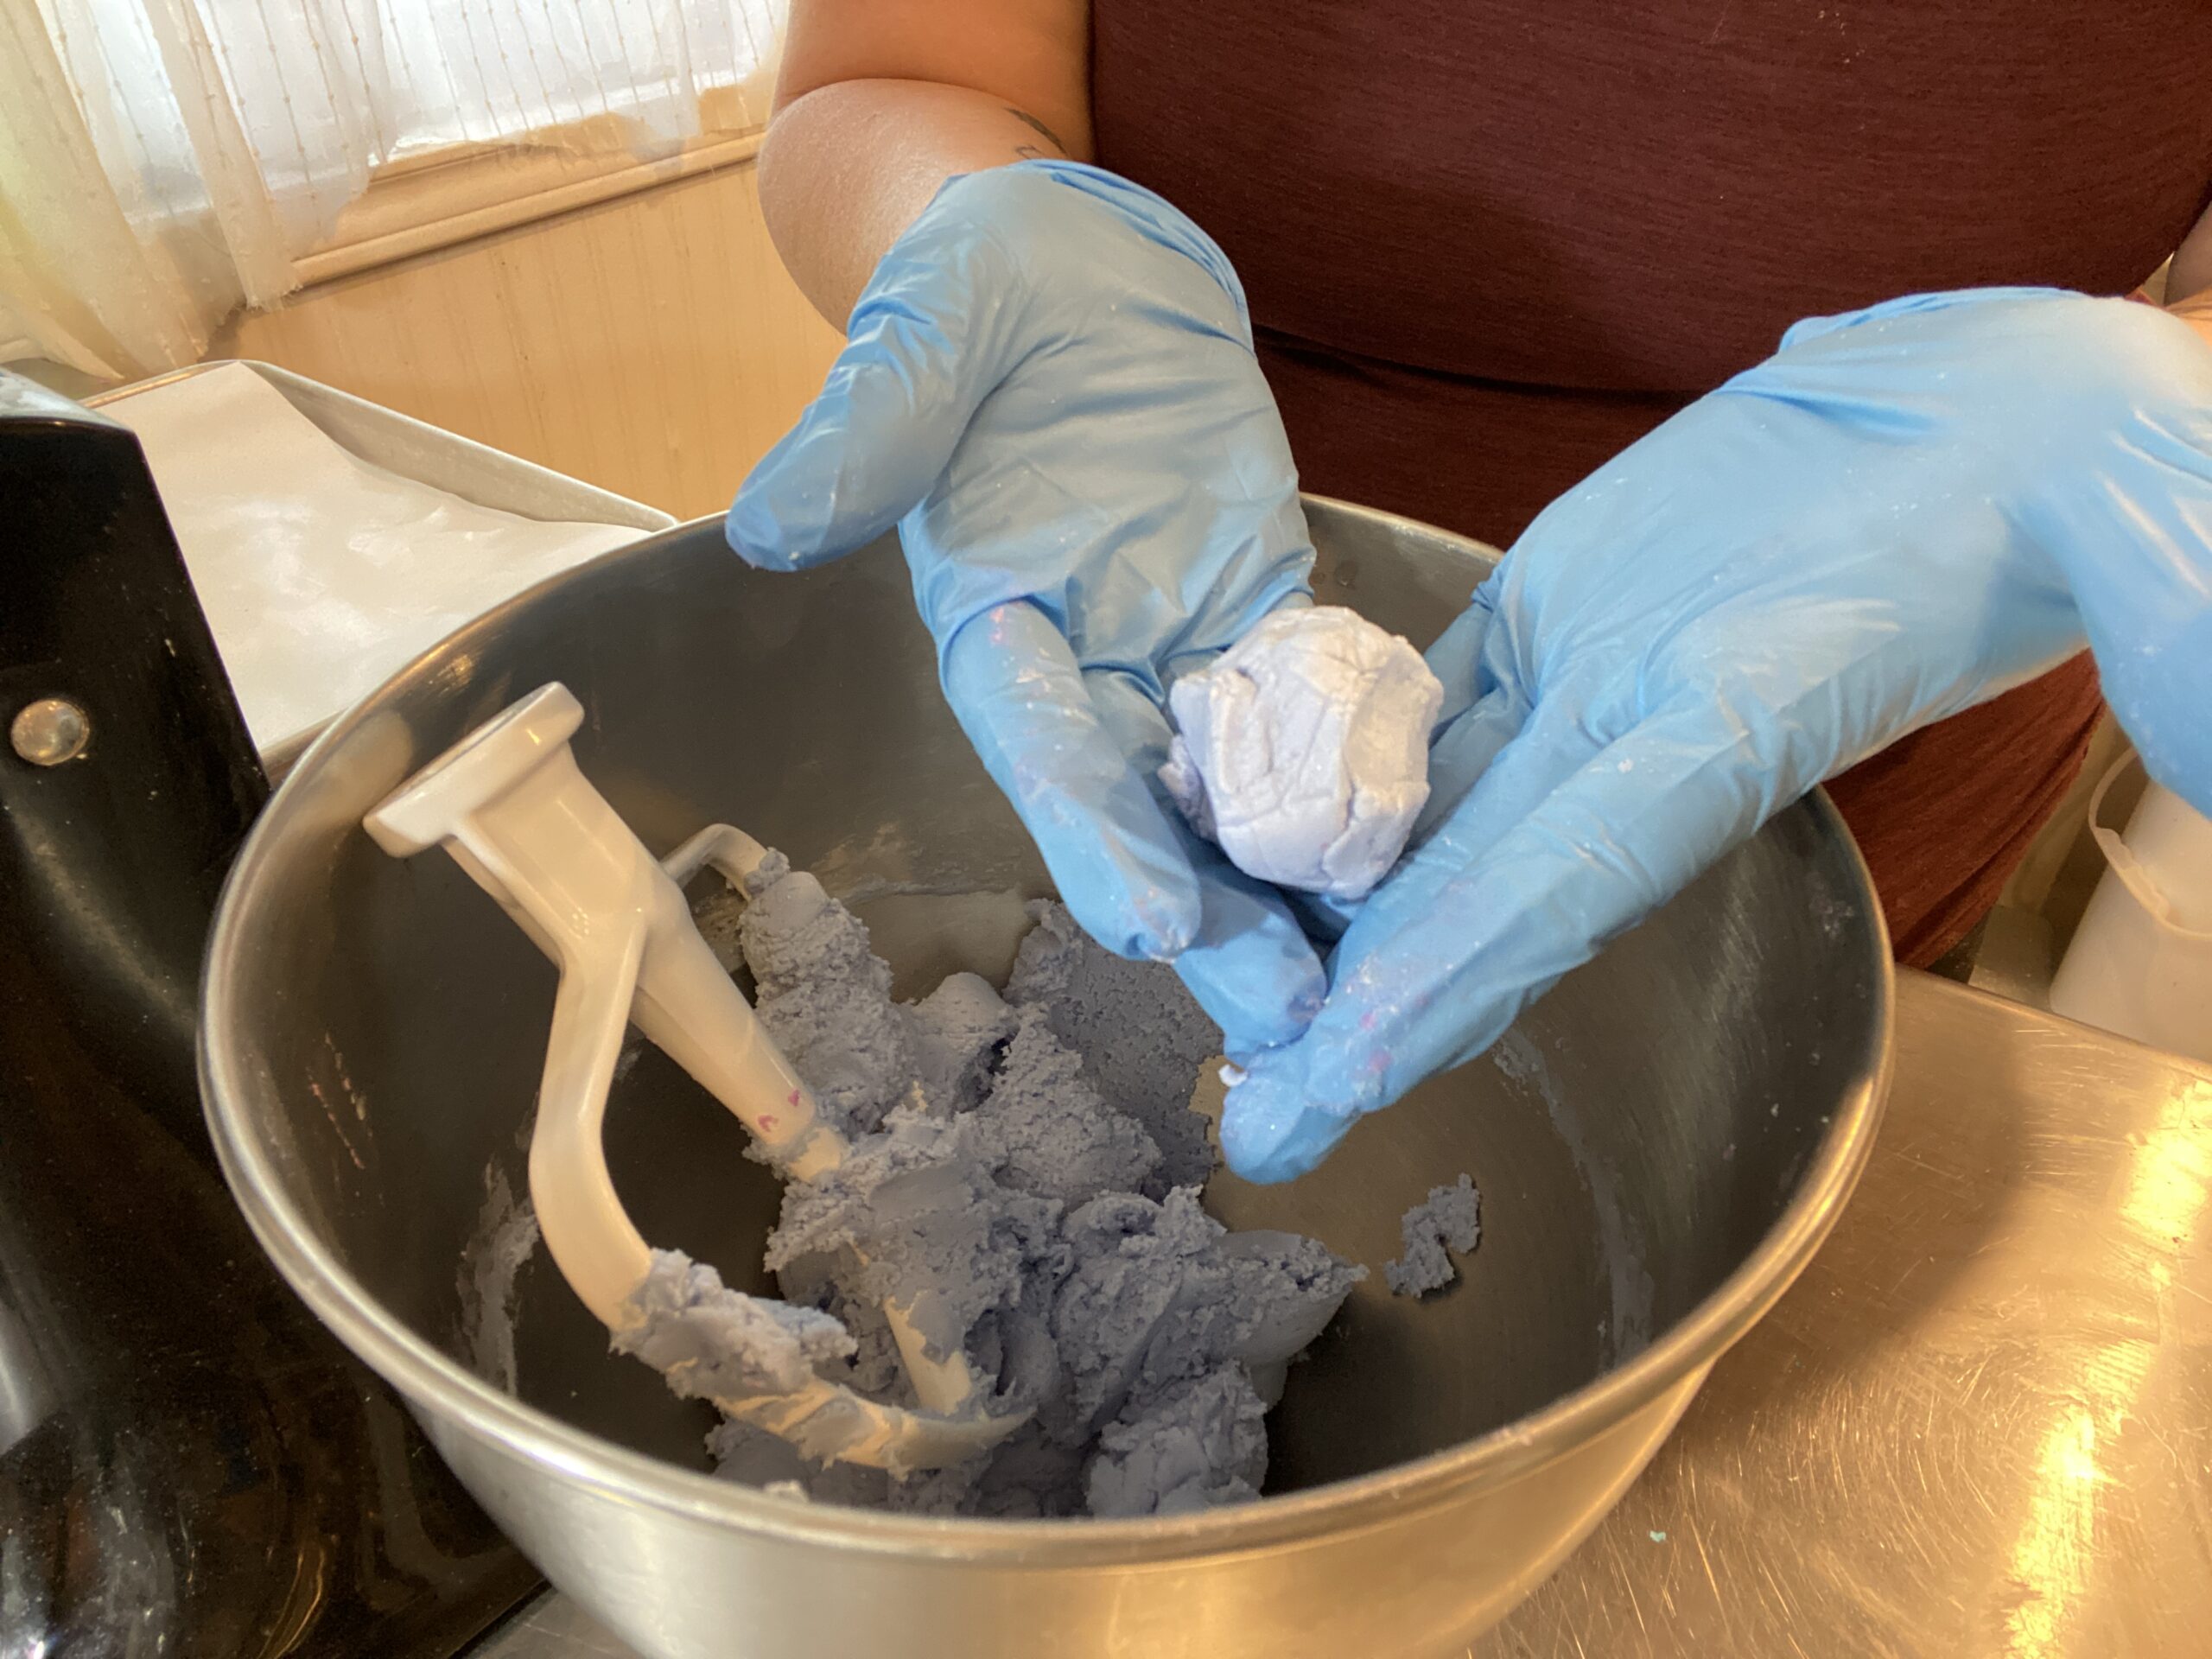
I added my paddle attachment to my mixer, then poured a small amount of rubbing alcohol into the mixing bowl and started mixing on low.
When the mix was forming a nice large lump in the bowl but not sticking to the sides or my gloves I knew it was time to scoop.
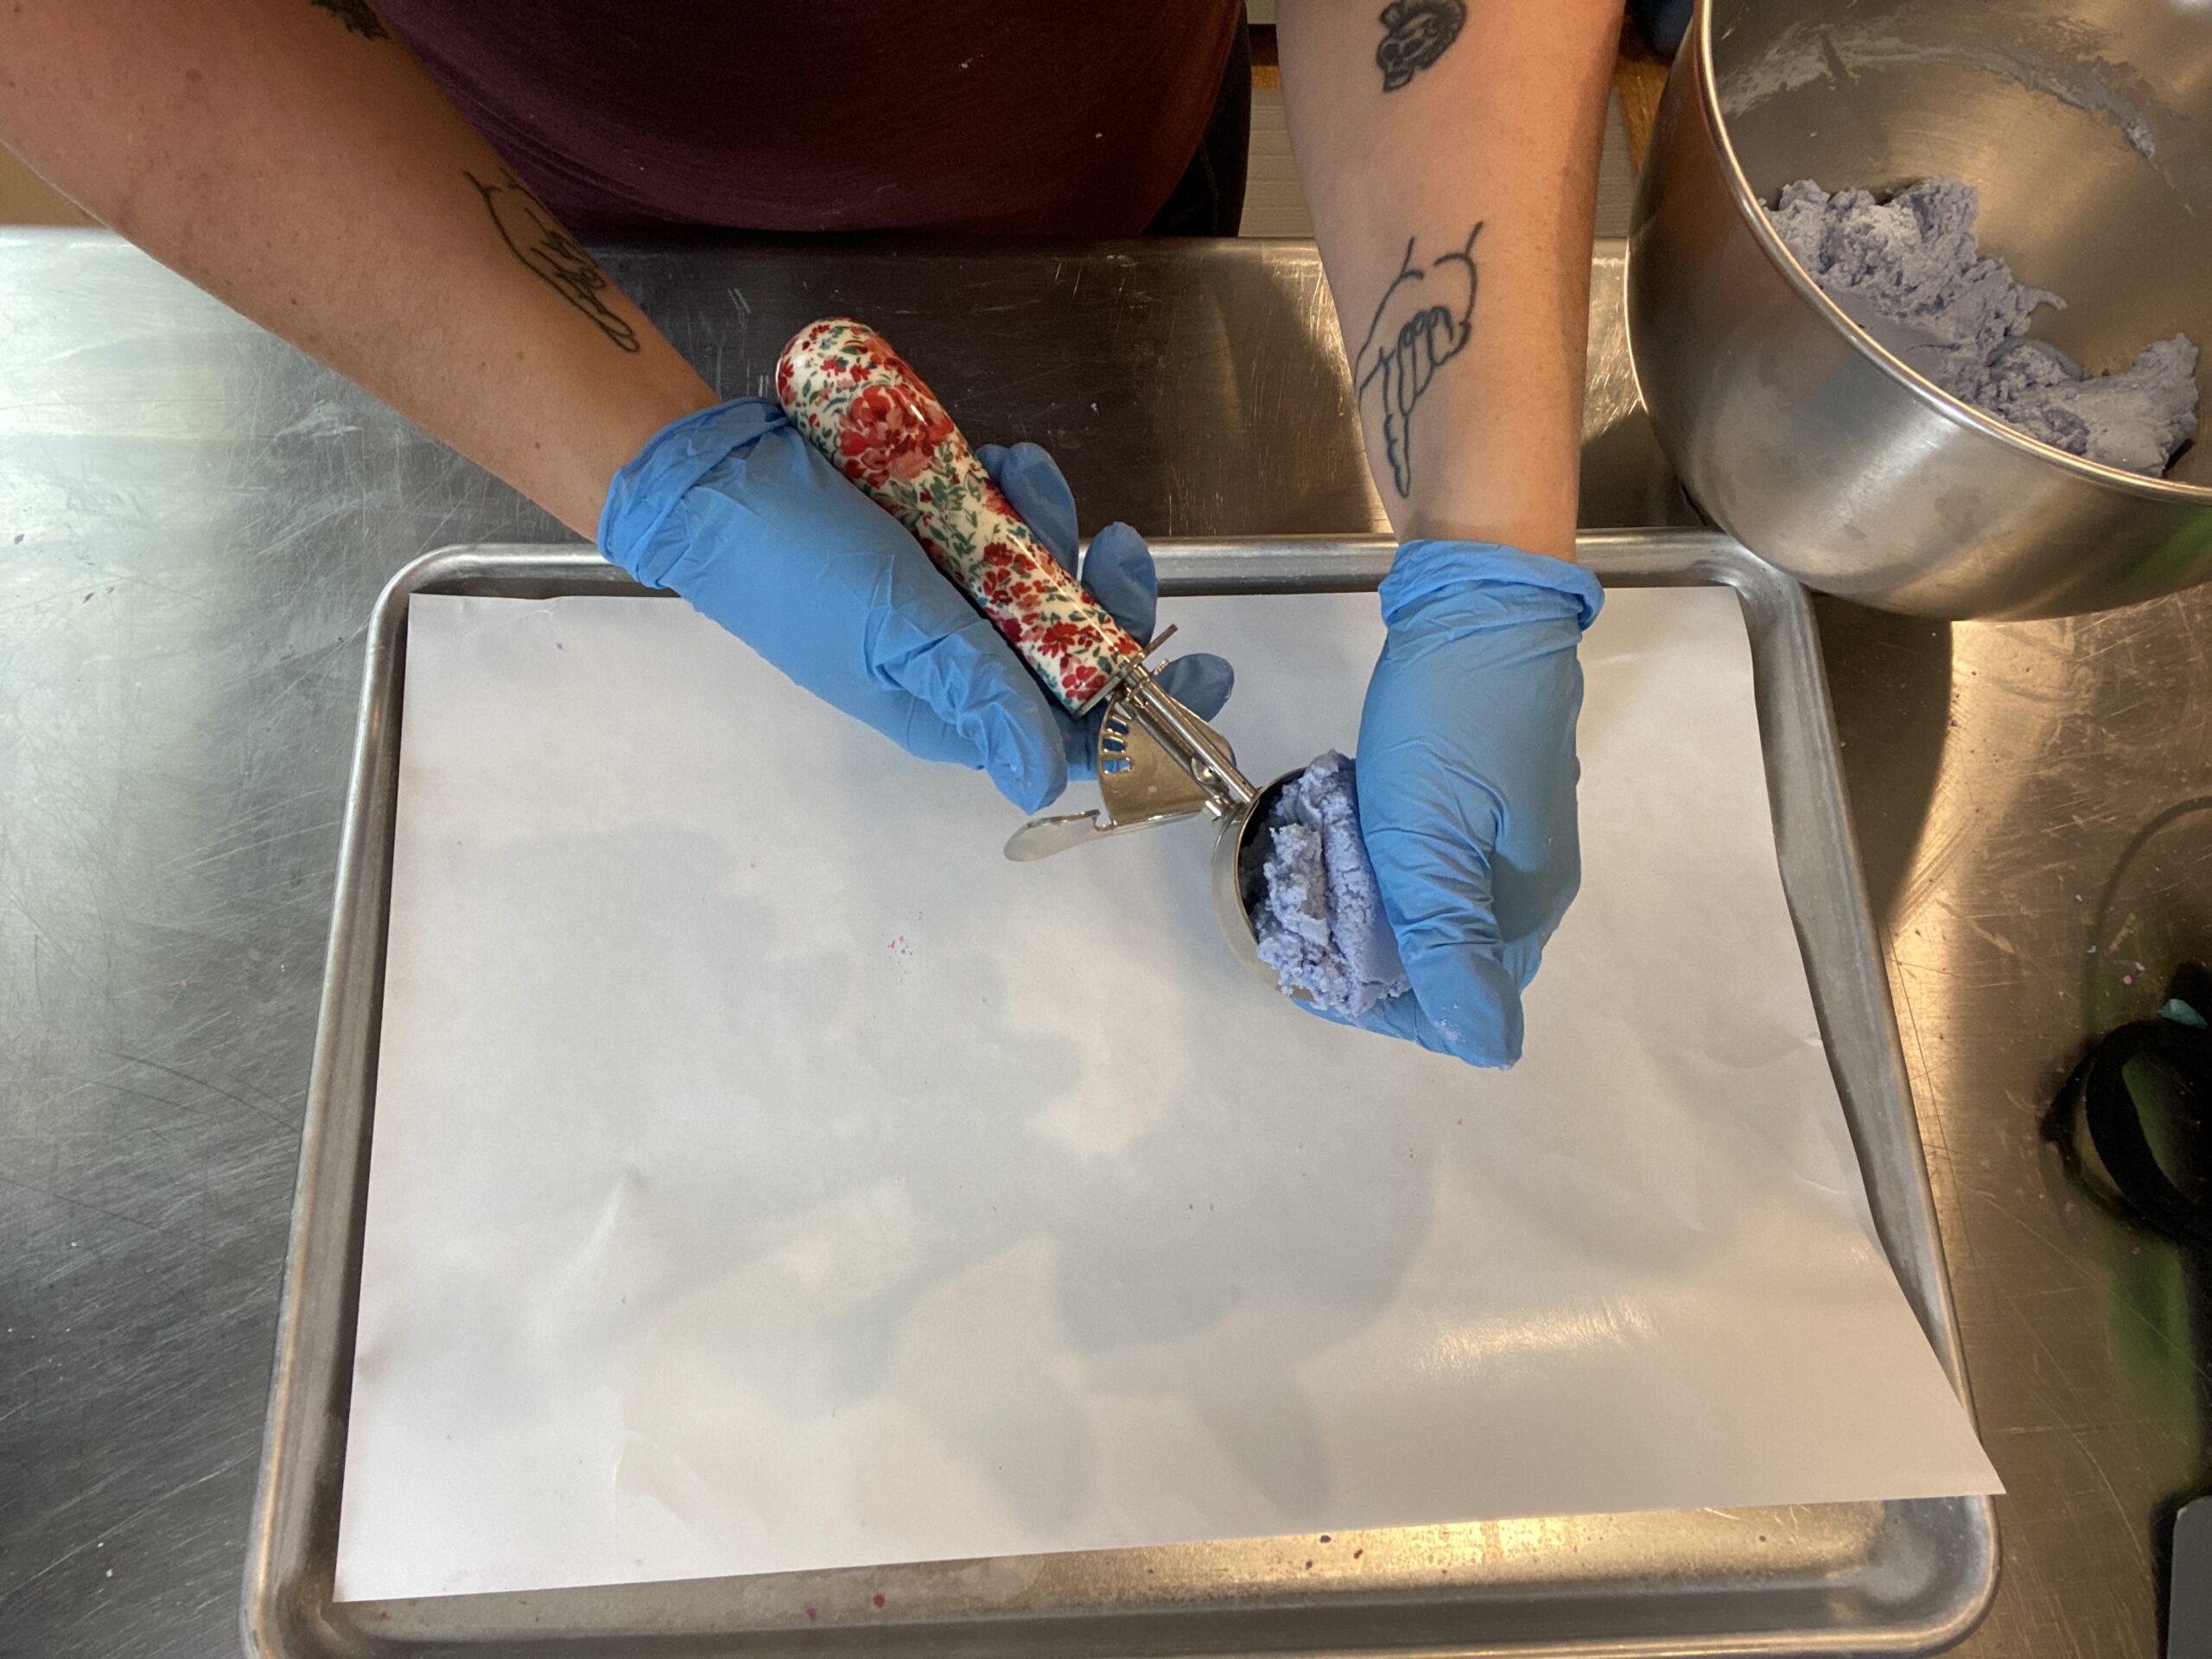


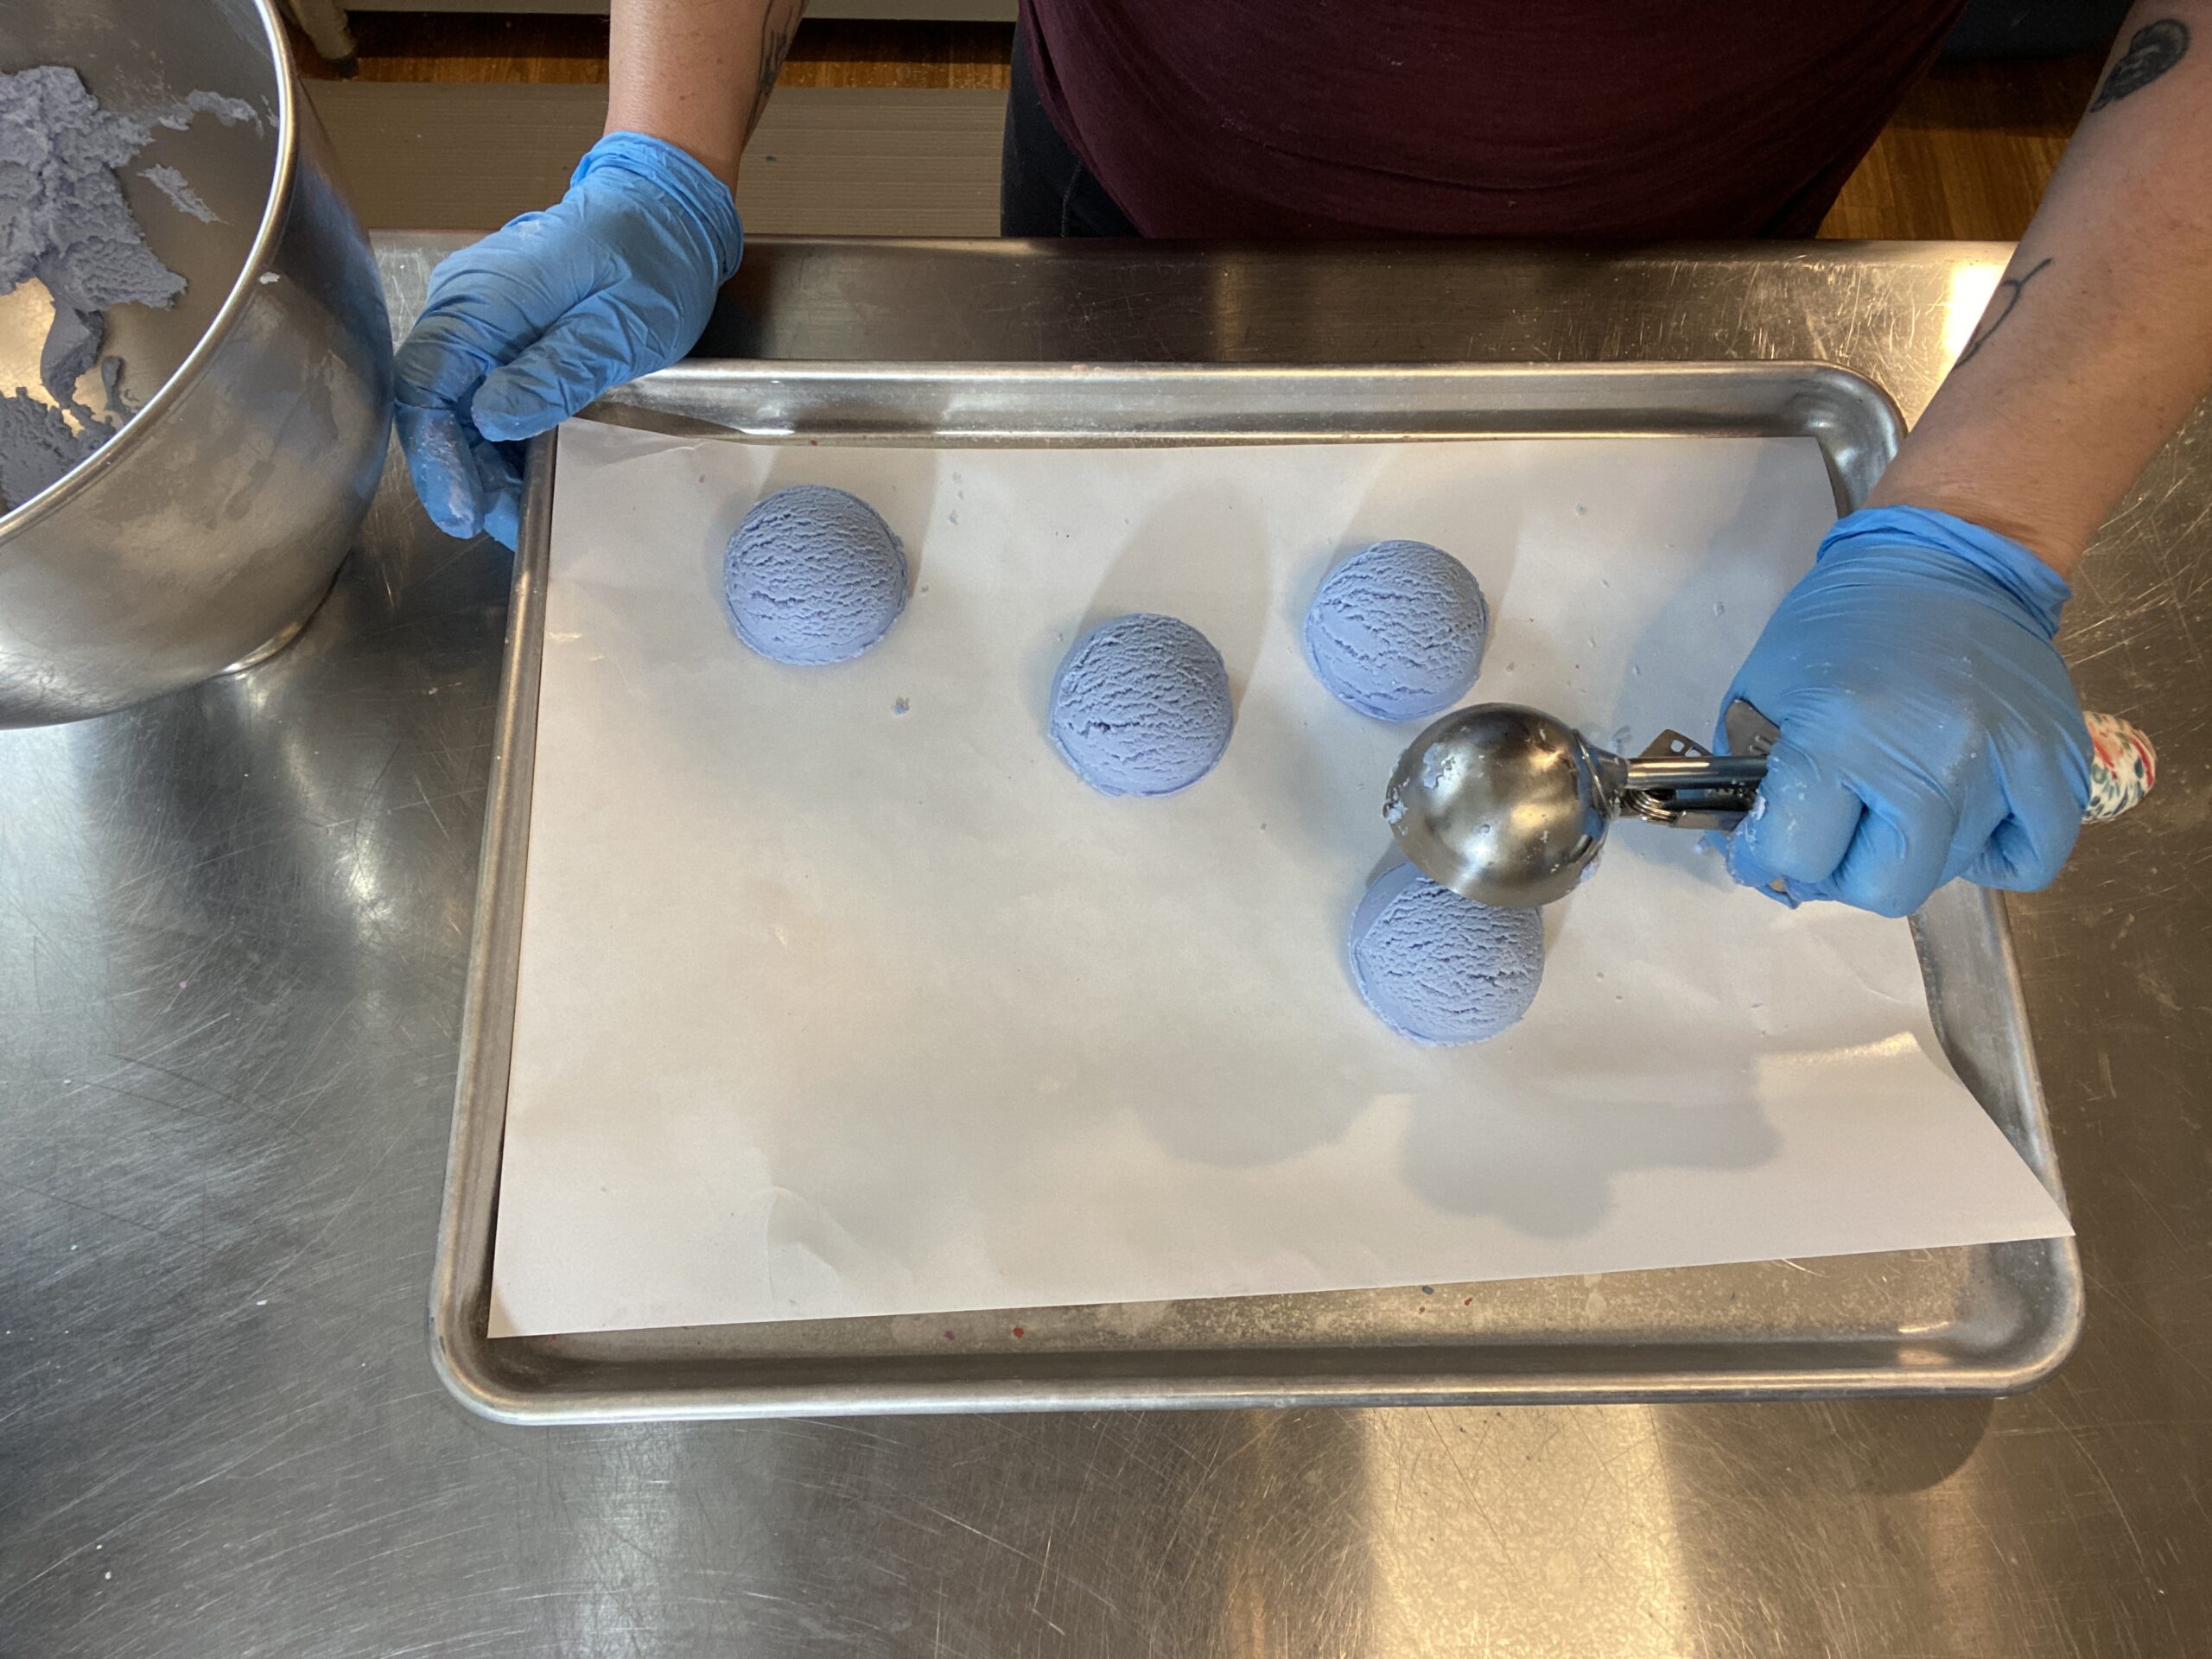
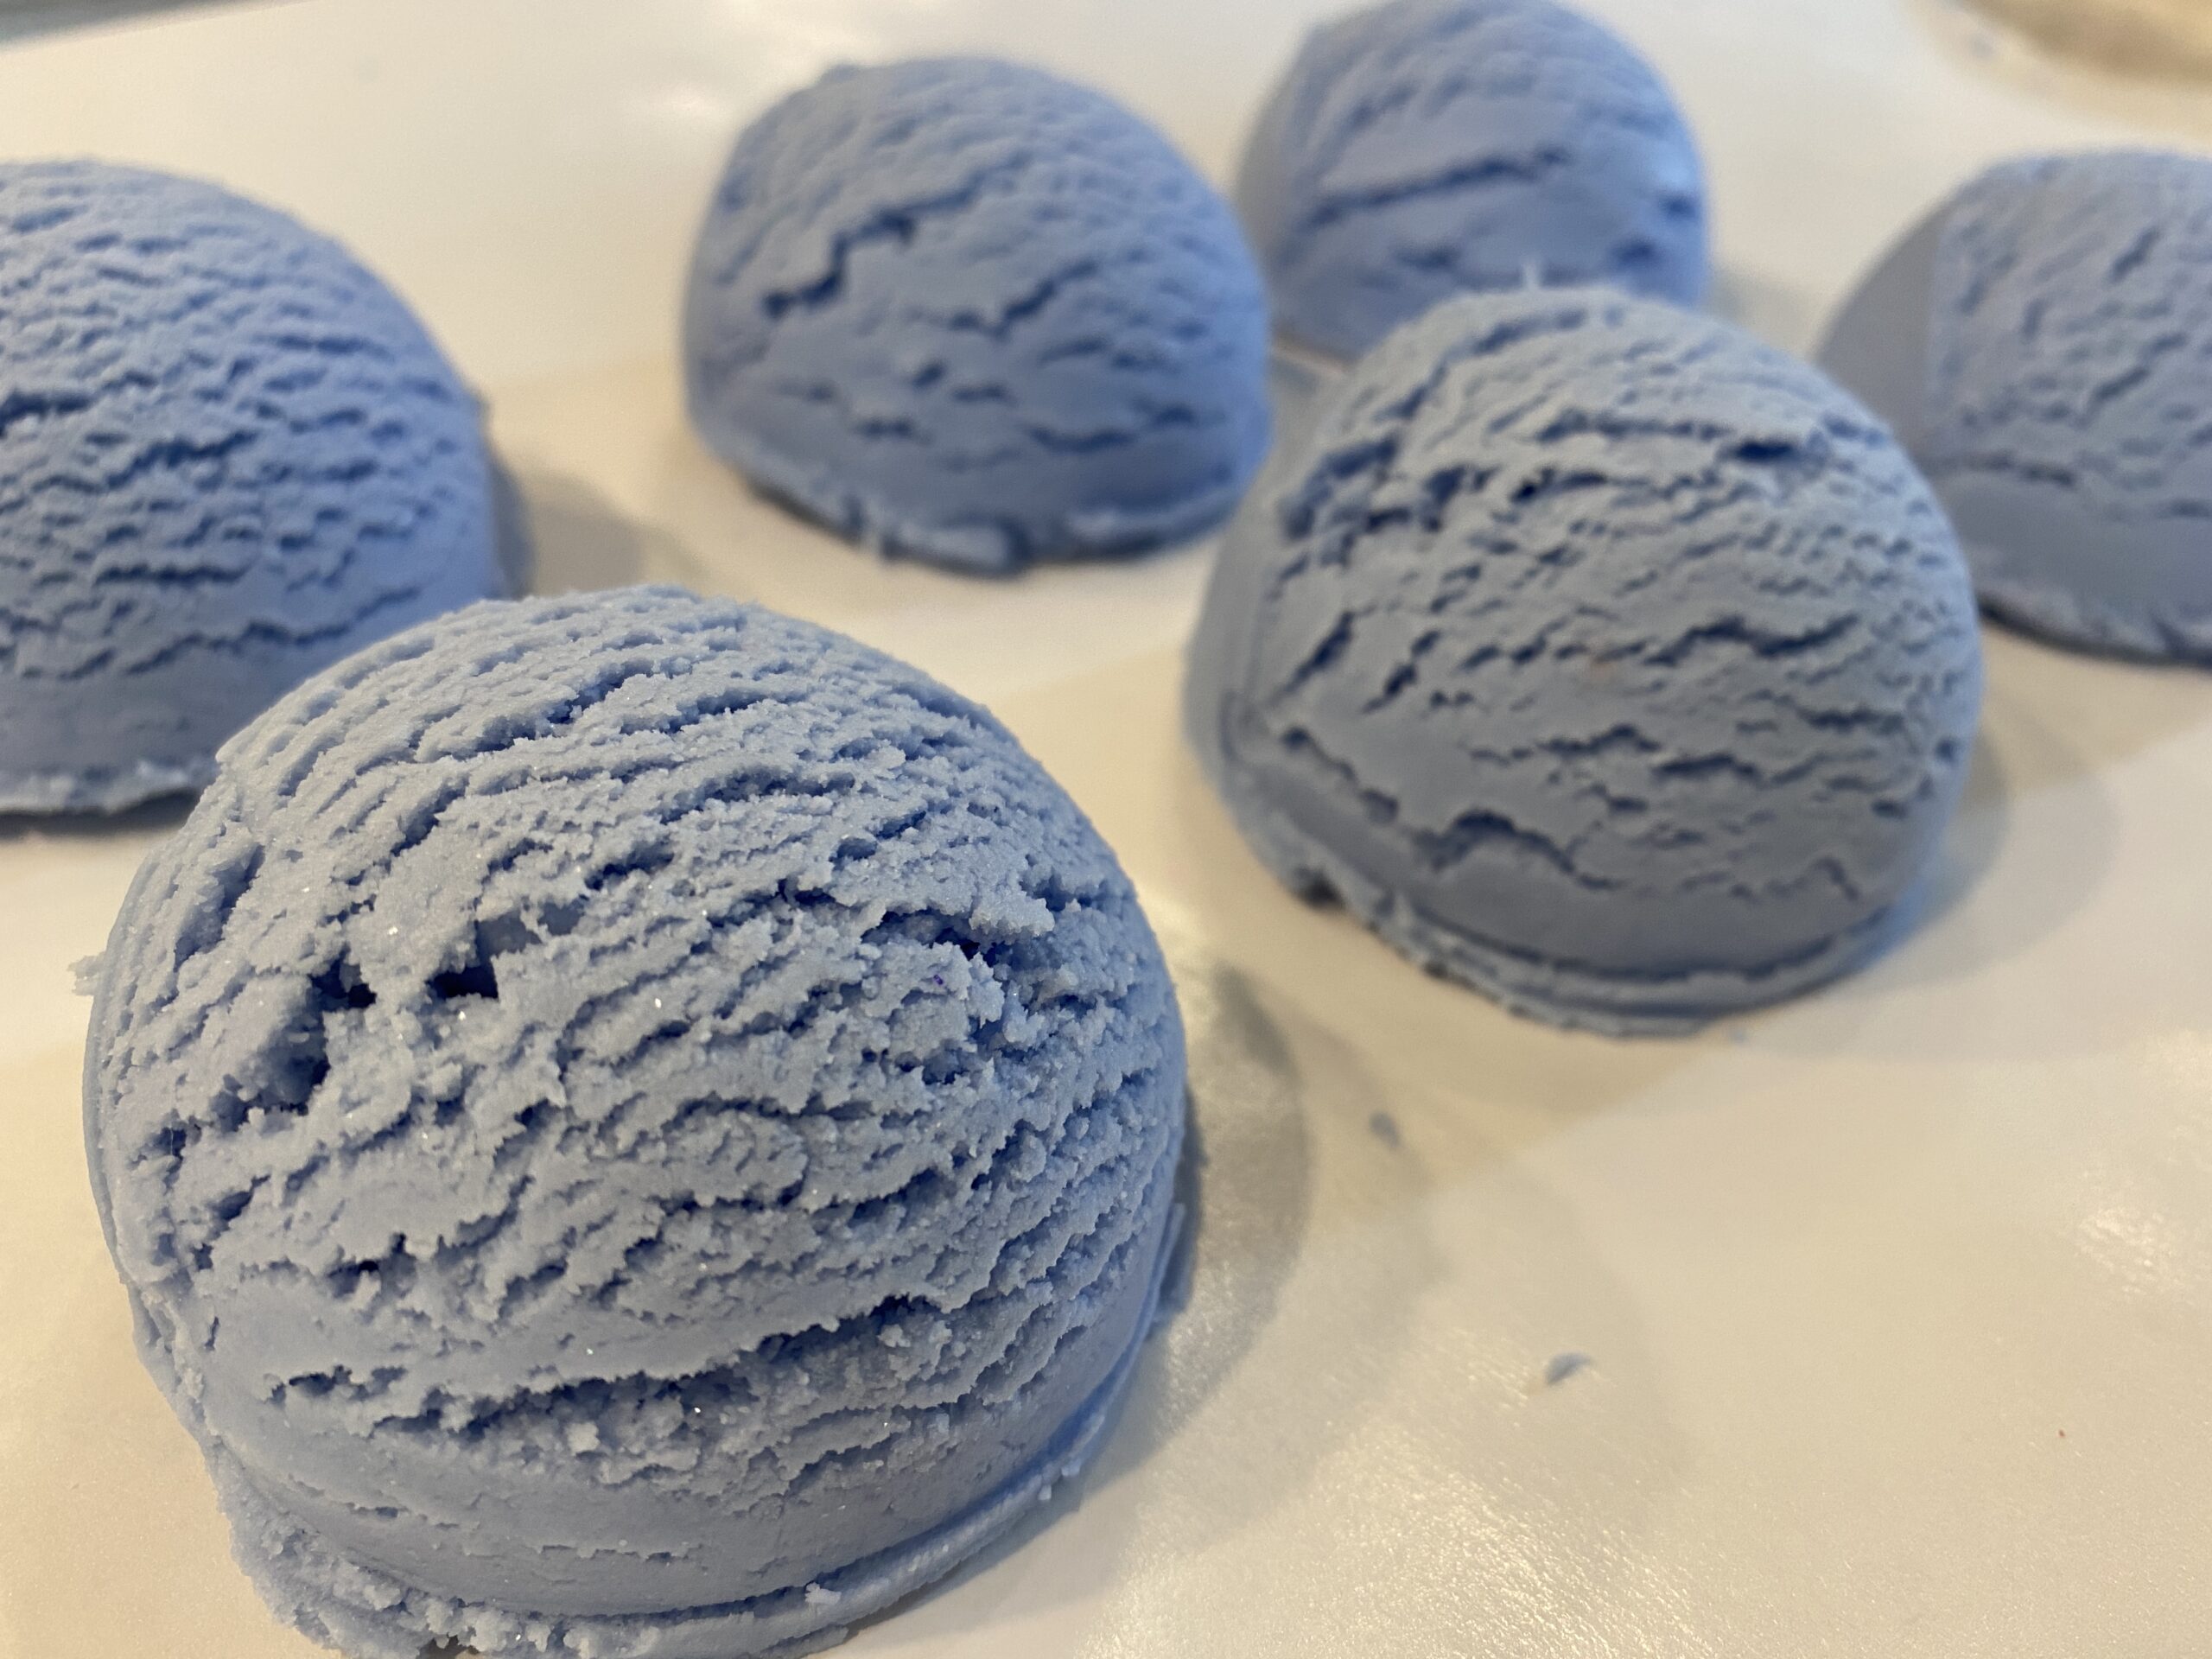
I use The Pioneer Woman Stainless Steel Trigger Ice Cream Scoop from Walmart. It’s never broken (knock on wood!) but I do keep a back up hanging around just in case. No matter what brand you use, you’ll want to make sure you use a scooper that had a plunger, or trigger. That will allow the scoop to come out with those gorgeous ice-creamy ripples.
If you added too much isopropyl alcohol you can always add a little more Wonder Bar to the bowl if you have some hanging around. If not, you can just wait a few minutes to let the mix dry out, or move on to another project—like the next way to rebatch, which we will post soon!
So if your wonder bar project doesn’t go the way you wanted, never fear! Your ingredients aren’t wasted, and your project can be re-imagined!
Wonder Bar Bubble Bar Recipe + Process Guide
Get one recipe to make it all! Make bubble bar scoops, rolls and bubble frosting, using just ONE recipe! Get Wonder Bar here.
Submit a Comment
Logged in as Amanda. Log out? Required fields are marked *
Notify me of follow-up comments by email.
Notify me of new posts by email.
Would it be ok to use 99 percent alcohol instead of 91 percent.It’s hard to here in Canada.
You can use 99% but it will dry a little faster than 91%… which isn’t generally a problem for scoops but might make the piped version a little harder to work with!
You can actually make your own 91% by adding 8 grams of distilled water for every 100 grams of 99% isopropyl alcohol 😉