I live in south Texas. Our trees don’t change to beautiful, fiery hues in the fall. Instead. They just turn brown. So. When people begin asking for a color study in Brown I thought, “ahh, yes, BROWN this is something I am well acquainted with!”
(View all of Robyn’s color studies here!)
While it might not be the most common request, I can definitely understand why there’s an interest in getting a good guide on this color. Brown, it turns out, is not an easy color to mix. And to be honest, I don’t even know if you can find a pre-blended Brown Lake or Dye from the major suppliers.
BUT… BUT… BROWN?
The biggest issue I have with brown bath bombs is the unfortunate association with… poo. It’s just not a color that most people want to find themselves bathing in at the end of the day. Even if the bath bomb is shaped like a chocolate bar or a gingerbread man, once it dissolves will your customers enjoy bathing in those muddy waters? Because as cute as a chocolate donut bath bomb might be, you also have to think about the user experience once everything is said and done.
So, is there a way around this brown water issue? I think there is, but you and I friend, we are delving into unknown territory here. Until I was asked to make a brown color study, I had never made a brown bath bomb. It had never occured to me as something people would want, and I had to really try to think around the issue of the end water. I now can proudly offer you a few solutions to this and let you go whichever direction suits you best.
HOW TO BROWN
So to start with, how would we make brown? You can make brown from mixing equal parts of complimentary colors, which are colors that sit opposite each other on the color wheel.

The most obvious choices will be:
- Green and Red
- Blue and Orange
- Purple and Yellow
Right there though–I mean right off the bat–this adds a layer of complication! You need to know how to successfully make Green (for the Green and Red blend), and Purple (for the Purple and Yellow blend) first, before going on to make brown.
You can also buy Green and Purple Lakes/Dyes premixed and hope that whatever blend was used works well, but I find pre-blended colors a bit unpredictable. Depending on their dye load, there are lots of variety within these colors themselves, and identical colors can be made with completely different blends. It’s important to know how the colors will behave, and which Lakes or Dyes were used to make them, before using them to create complex blends like brown (or black).
If you’re anything like me, you’re eyeing that Blue and Orange option right now and thinking that its simplicity seems pretty appealing compared to the other two options… right? Well, yeah. That’s how it looks, but if you read the study in Orange you’ll know that while Yellow 6 appears orange, it’s actually, well yellow. In addition, Yellow 6 and Red 40 tend to darken mixes, so it might not be as simple as that.
BECAUSE THIS ISN’T COMPLICATED ENOUGH!
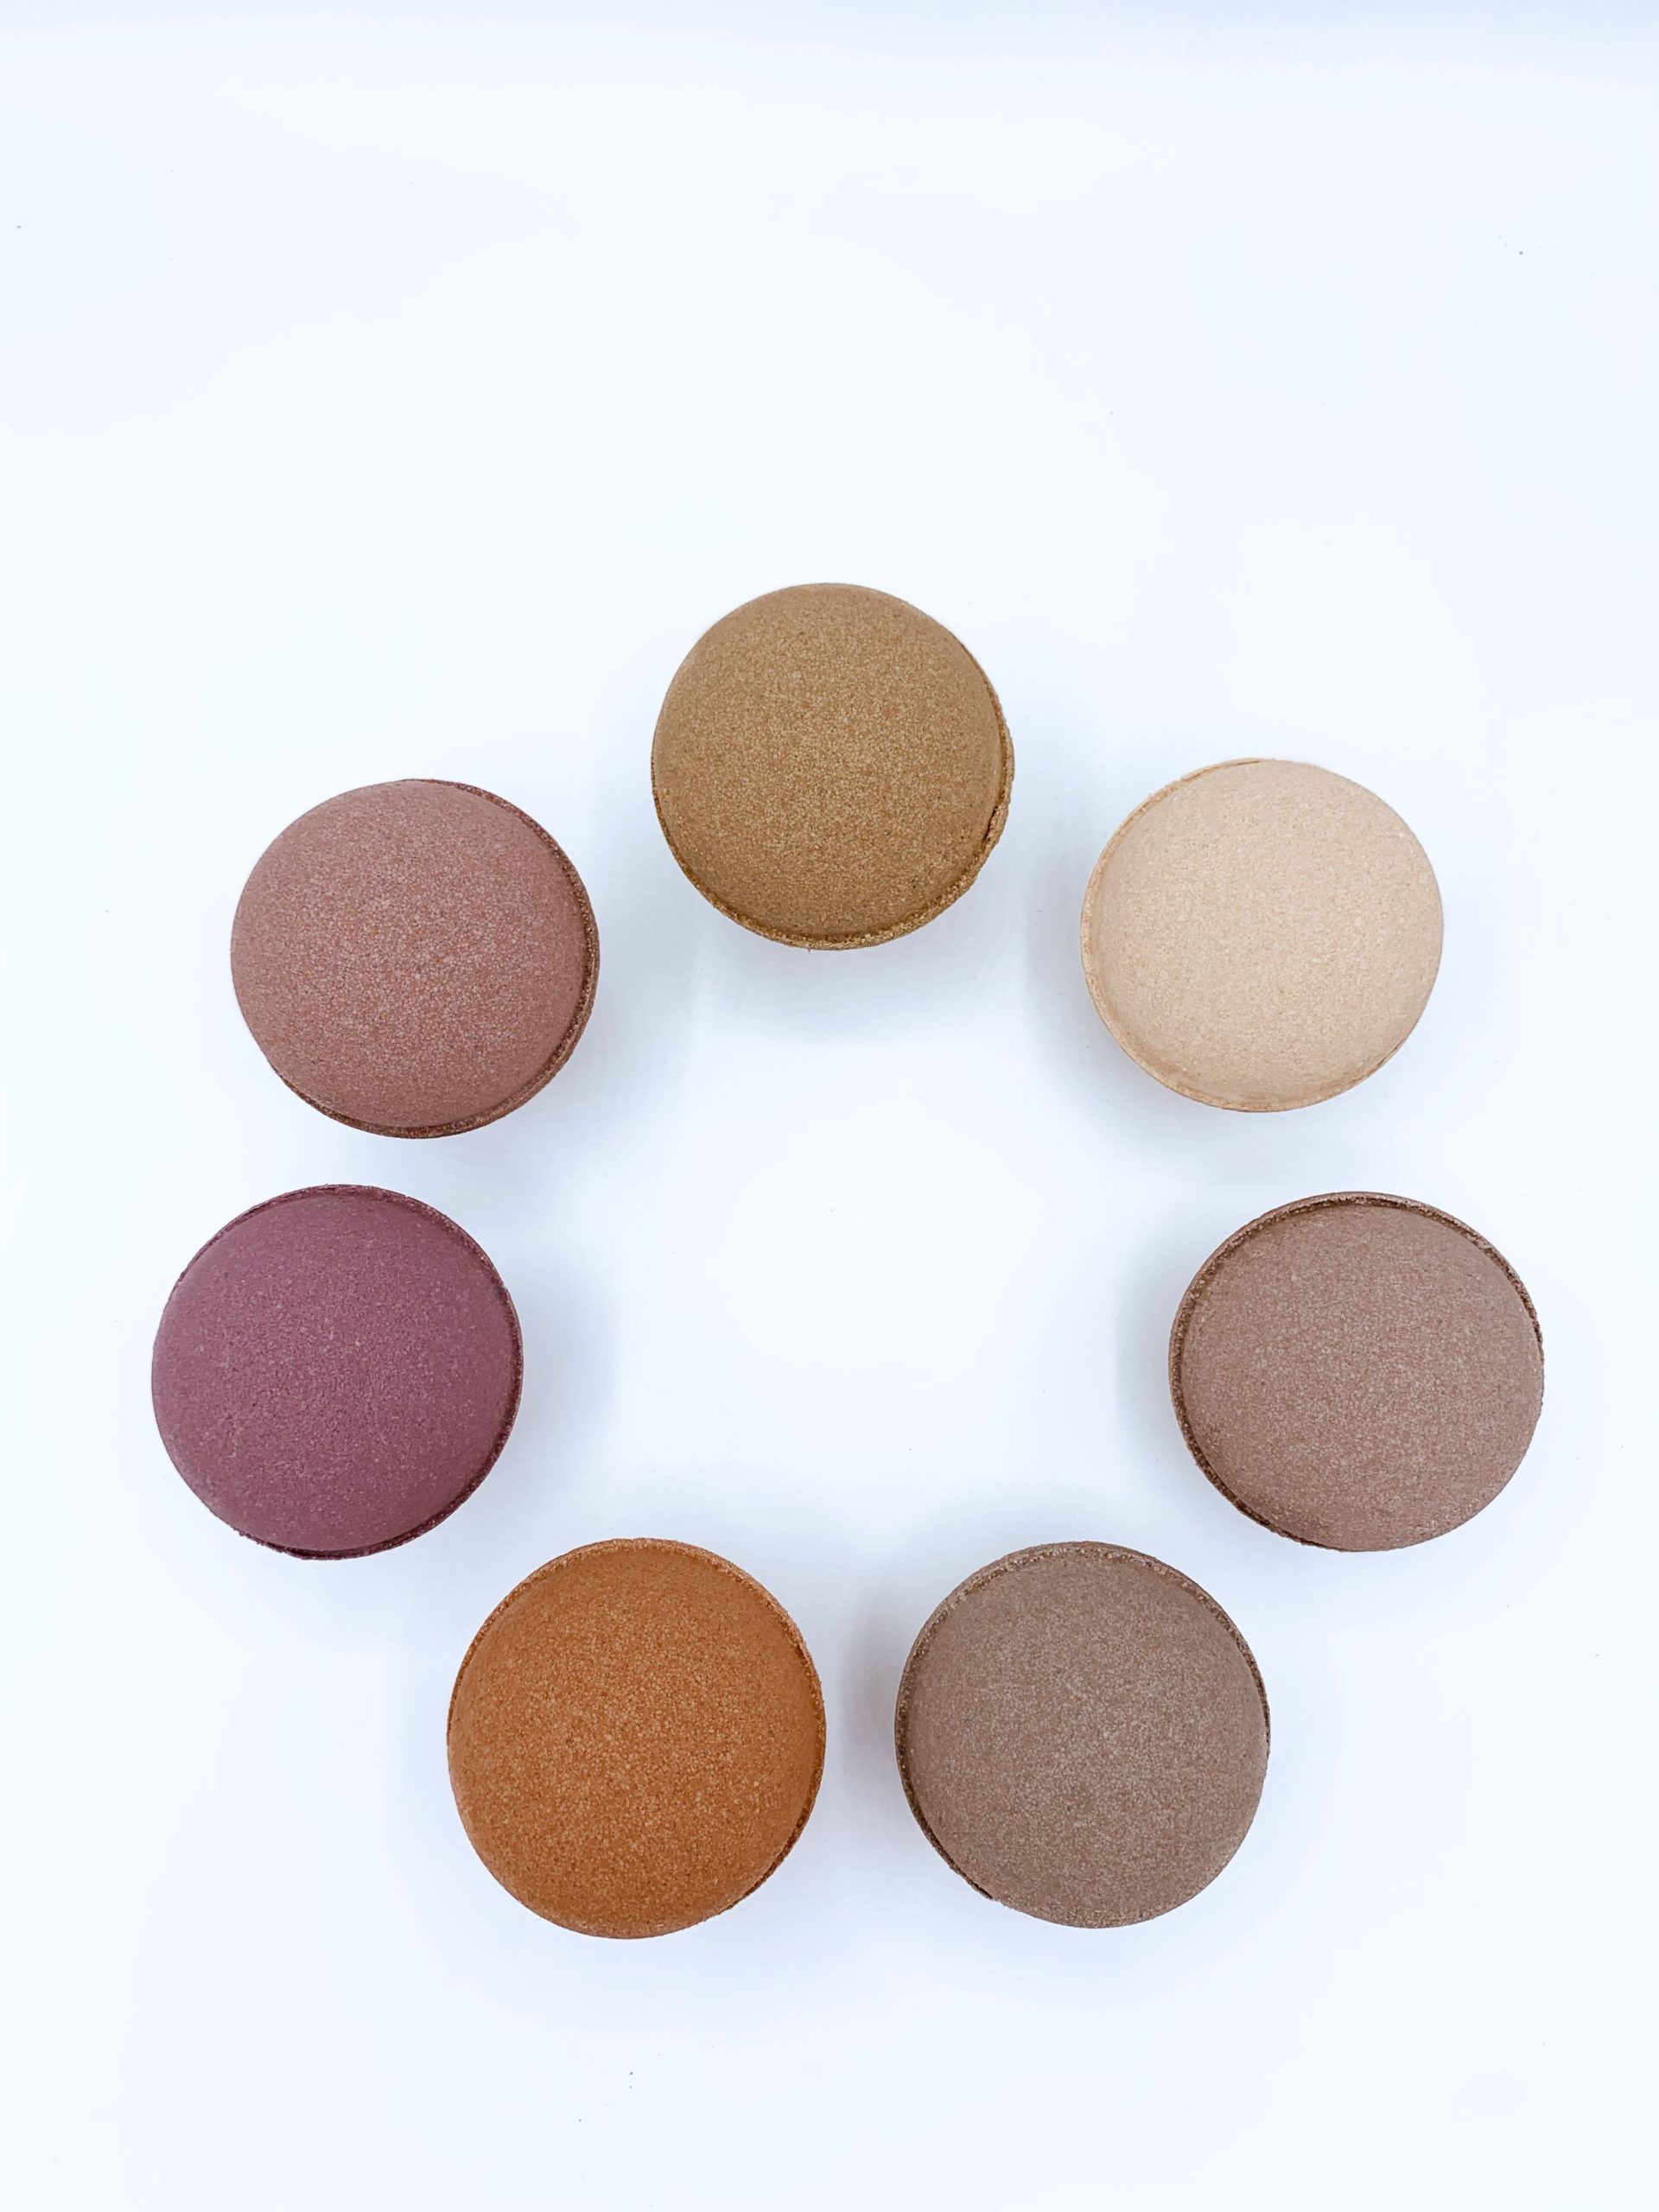
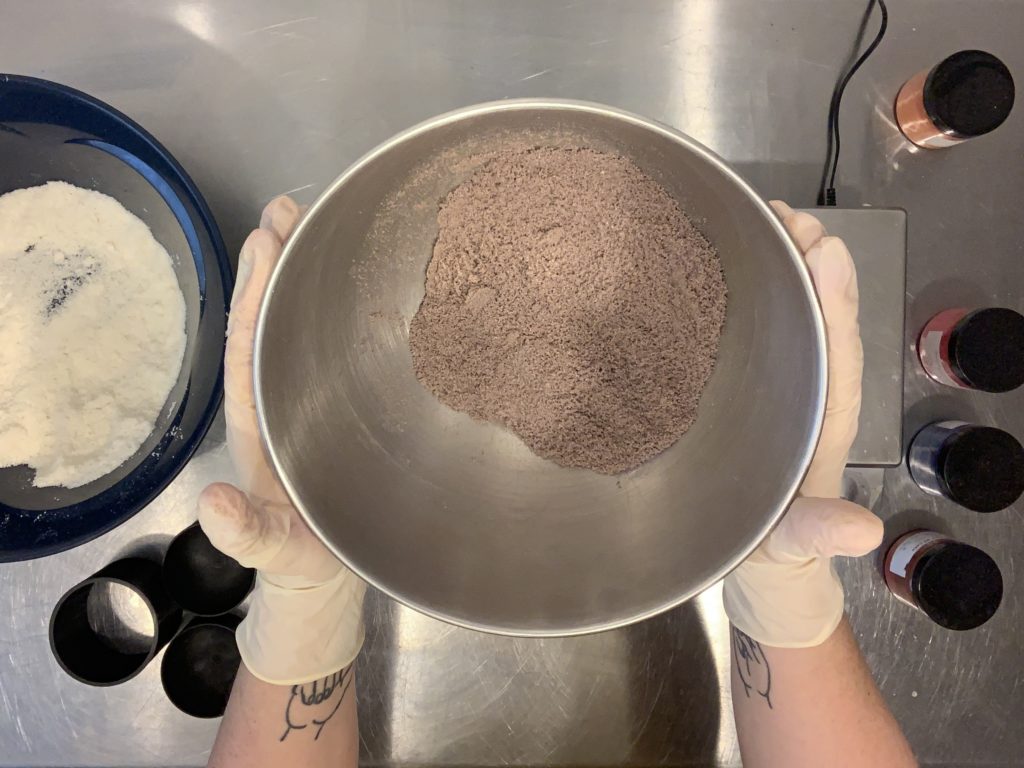
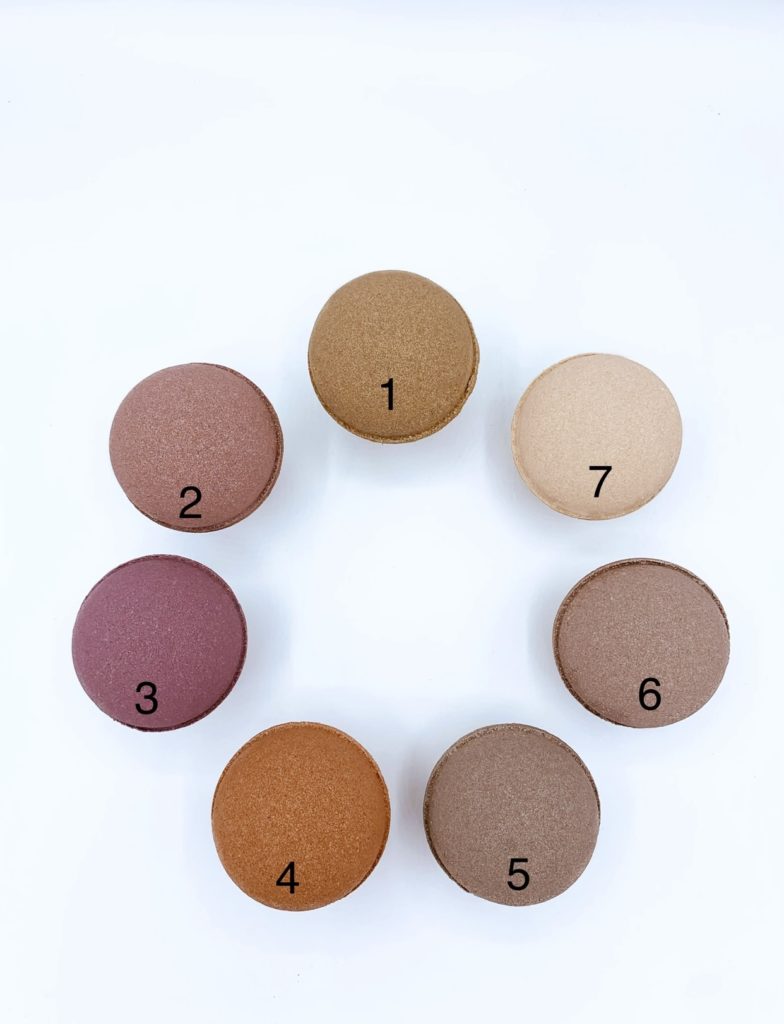
For this color study I made 11… that’s ELEVEN… combinations looking for the perfect brown. Many of them aren’t even worth mentioning because they didn’t show up as brown, but I will discuss some of the fails so you can hopefully understand what went wrong (when things went wrong). I also deviated from the amount of bath bomb mix being colored.
In the past I have used 250 g sample sizes of mix and given you ratios to make it scalable for larger batch sizes. I’m actually in the process of refining the color studies and as a result am making a switch to Single Bath Bomb sample sizes which I think will make them easier to translate to complete batches.
The sample sizes for this study are each 189g (or 6.65ish ounces), which is the average weight of my 2.5 inch round bath bombs. My standard batch size makes 12-6.65 ounce bath bombs. If you know how many full size bath bombs your mix makes, you’ll be able to quickly figure out how to increase or decrease your color ratios.
Since each sample size is so small, I also used microscoops to measure out my Lakes. While dyes are typically measured in microscoops, Lakes generally require a lot more product to color the water. However, if you make a full size batch you would obviously scale the scoops up, but leave the ratios the same. For the sample sizes this worked perfectly, and I made a couple test batches to see how they performed in full size batches and was very happy with the result.
For more information on using lakes and dyes in Bath Bombs you’ll want to refer to other color studies mentioned above. This Study doesn’t go into that distinction, but it is very important to know the difference!
LET’S DO THIS ( WITH LAKES!)
If you’re needing a good supplier, I like to get my lakes from (affiliate link) MakeYourOwn.buzz.
BROWN 1 = ORANGE + BLUE
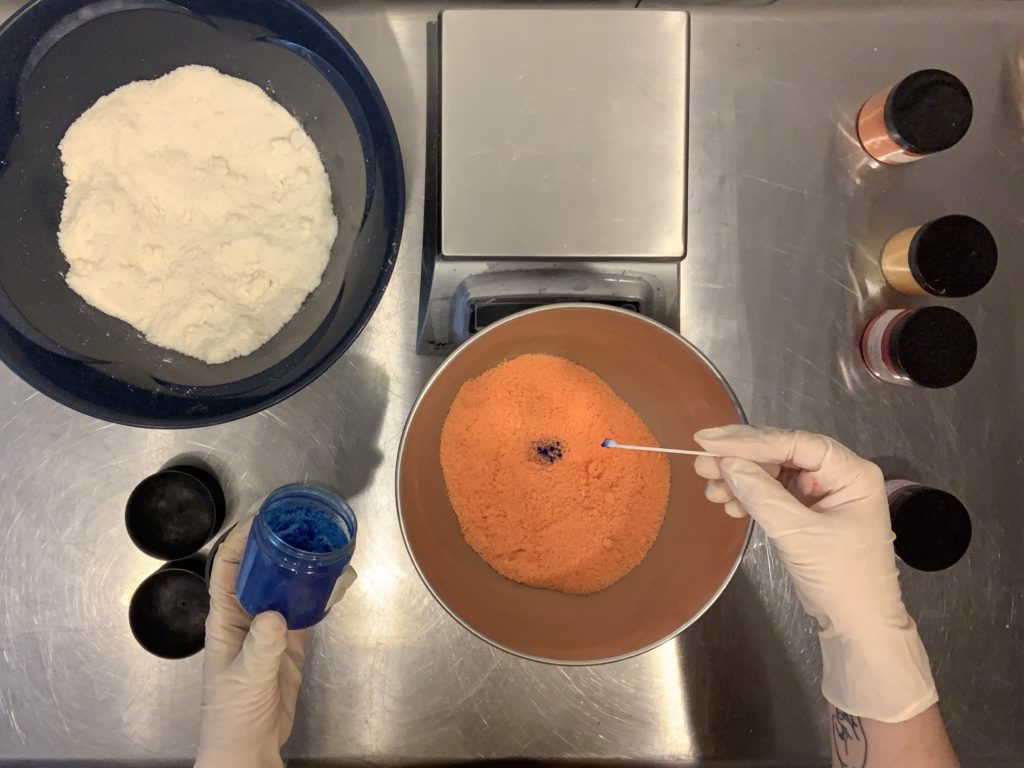

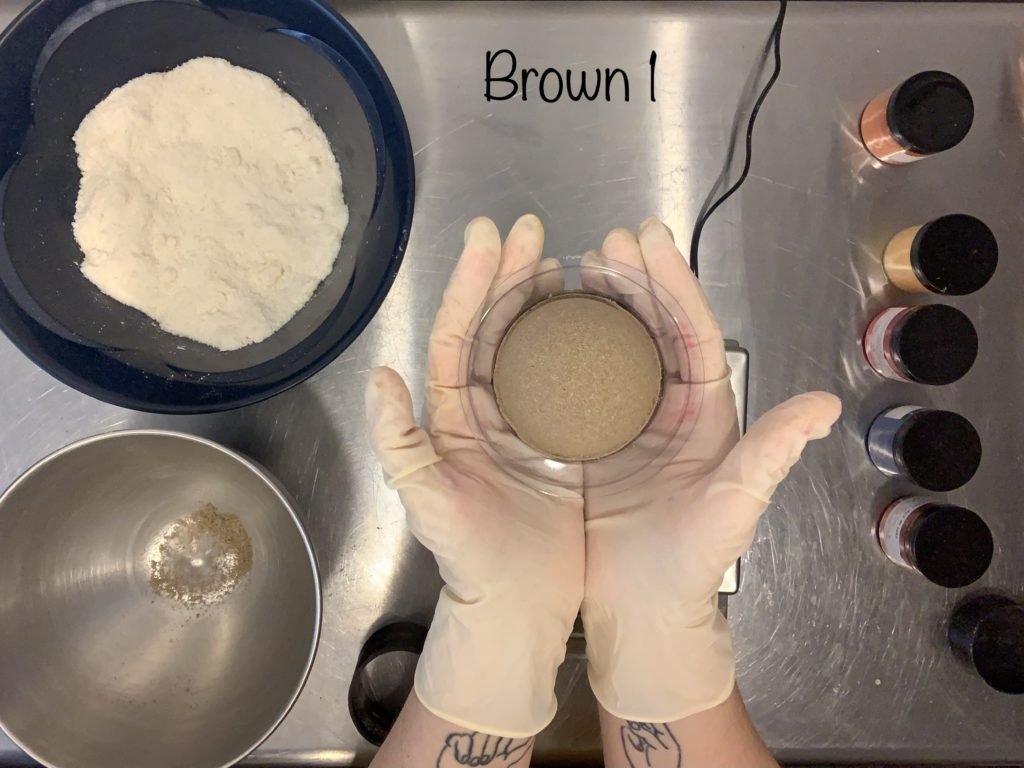
Brown 1 was actually my 3rd mix. First I tried mixing Yellow 6 with Blue 1 and the color came out green. Then I tried mixing Yellow & Red (the colors to make orange) and Blue together, but again got a very green color. So the first successful brown I got was made by first blending Yellow and Red to make orange, and then adding Blue to that. It’s not necessary to create that orange color first, but it did give me more control when adding the blue!
| Color | Parts |
| Orange | Yellow 5 Lake: 4 parts Red 27 Lake: 2 parts |
| Blue | Blue 1 Lake: 1 parts |
BROWN 2 = PURPLE & YELLOW
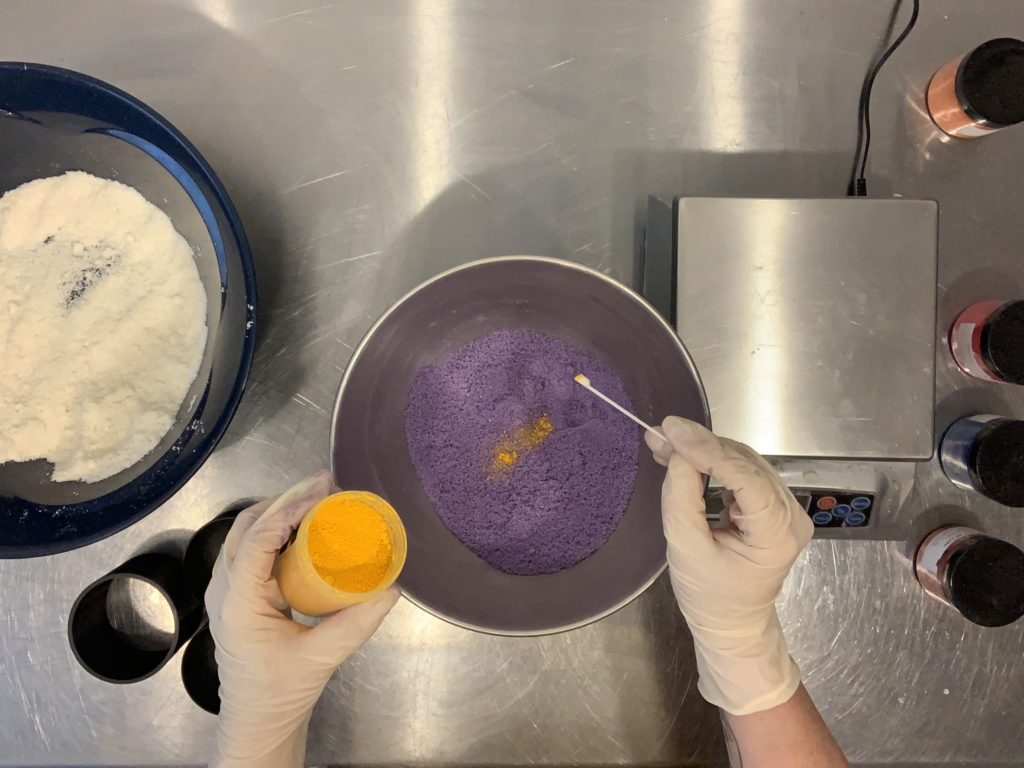
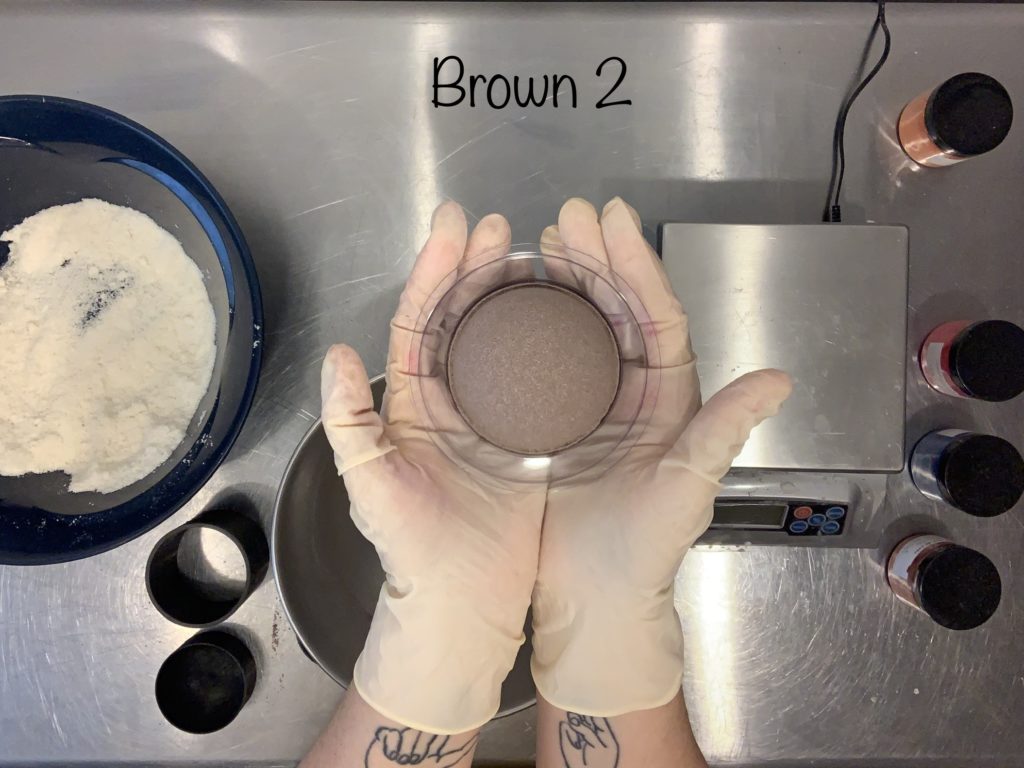
Brown 2 was my 4th mix. Piggybacking off the success of making the blended color first, I went ahead and made a Purple mix initially, then added Yellow to that. I really liked this brown.
| Color | Parts |
| Yellow | Yellow 5 Lake: 3 parts |
| Purple | Red 27 Lake: 2 parts Blue 1 Lake: 1 parts |
BROWN 3 = RED & GREEN
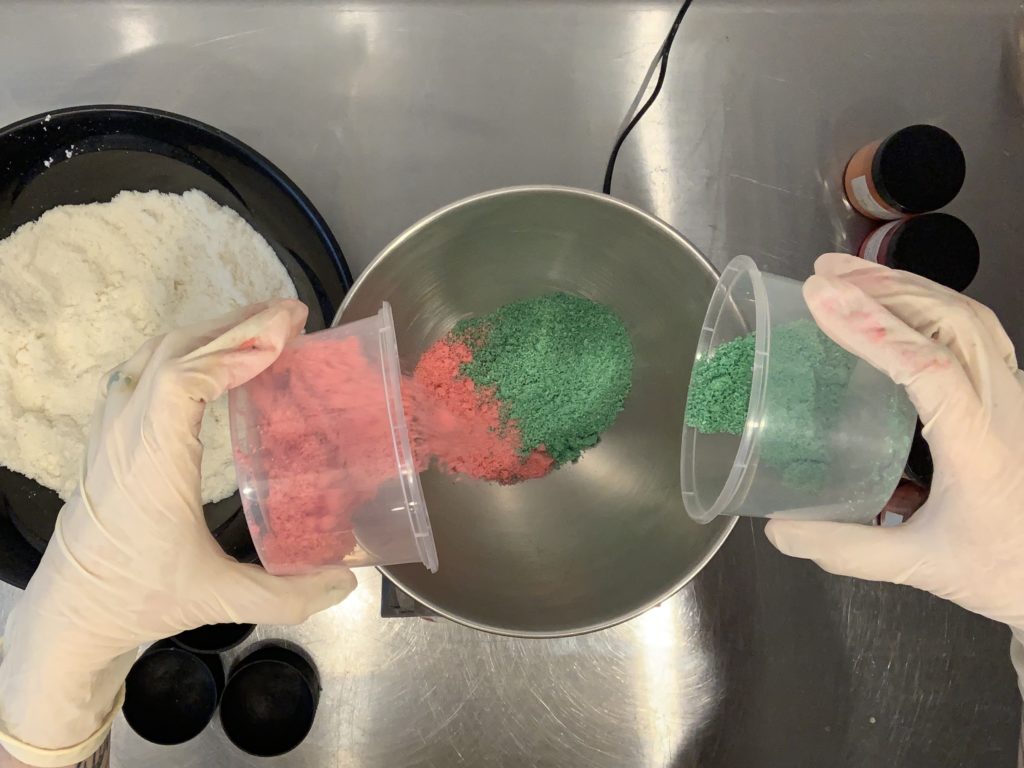
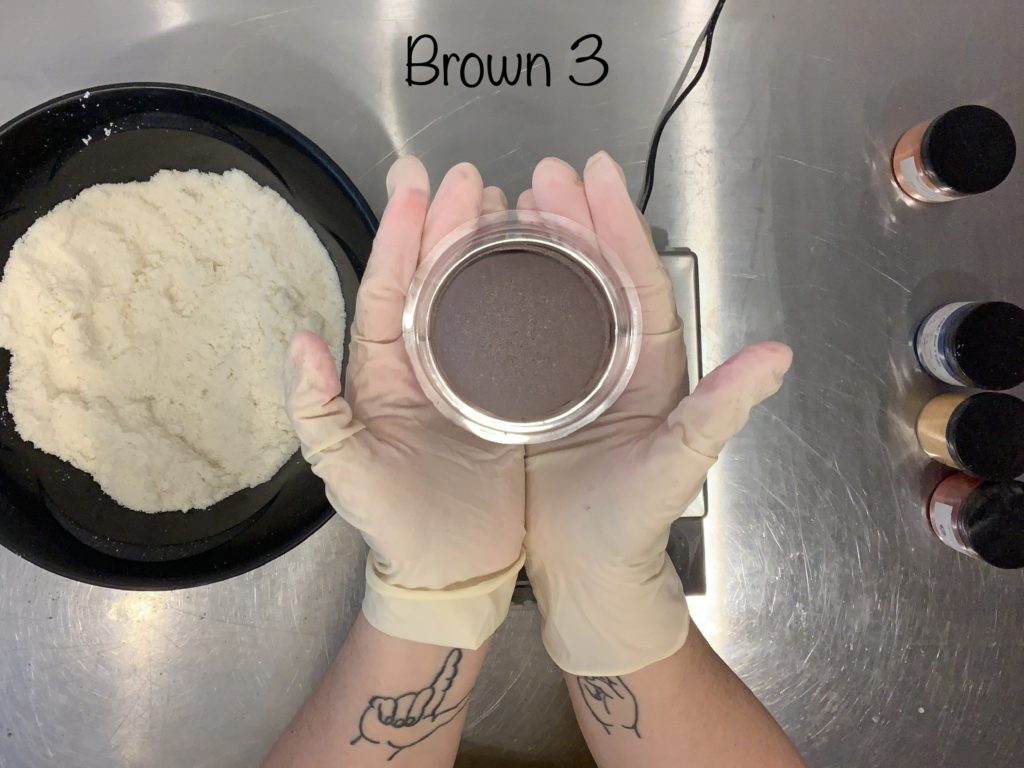
Brown 3 was actually the most complex of the Browns. Before I achieved this successful mix, I twice attempted a Green blend with Red 40 (and even Red 40+Red 27), but they just didn’t work. Let’s chalk it up to Red 40’s unwillingness to play nice with the other colors! That meant that I needed to make a Red blend that didn’t have Red 40! So I referred to the Study In Red, used that to first make a custom Red, then Green, then combined the two. I mean. Yall are really putting me through my paces with this study!
| Color | Parts |
| Green | Yellow 5 Lake: 2 parts Blue 1 Lake: 1 part |
| Red | Red 27 Lake: 2 parts Red 40 Lake: 1 part |
BROWN 4 = ORANGE + BLUE
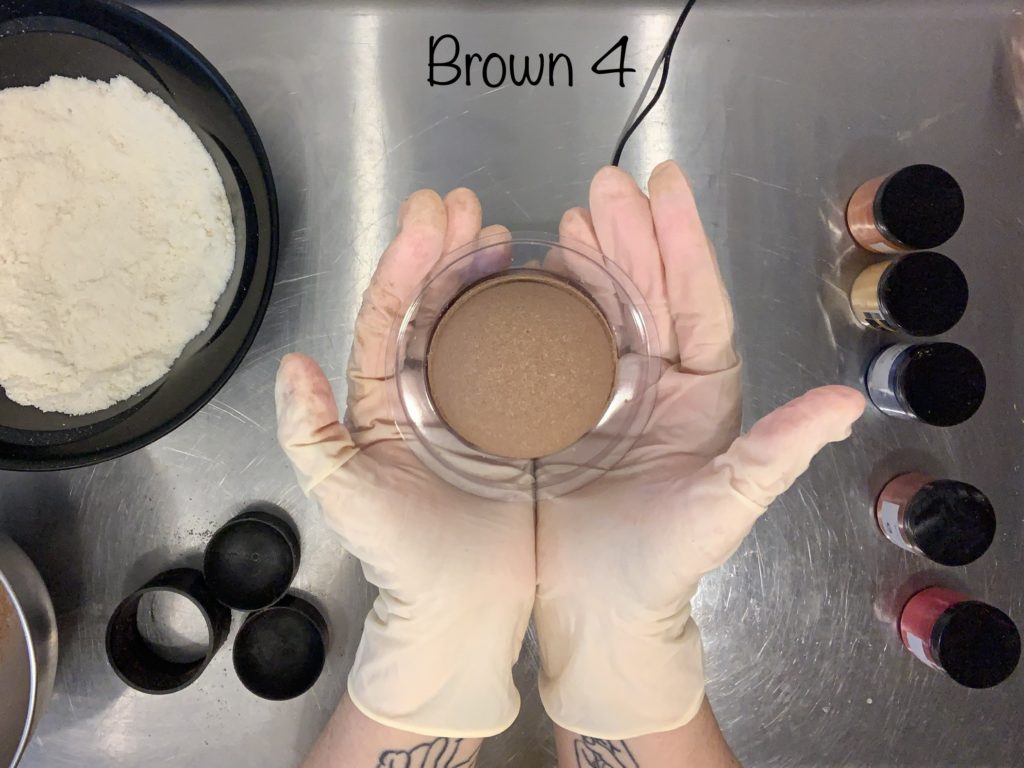
I wanted to test whether or not it was important to create the Orange mix first, or if all the colors could be combined at once. I also wanted to see how the addition of Yellow 6 would affect the color. All lakes were added at same time (as opposed to making orange first). This is probably my favorite brown for it’s caramel color. As you can see, all the colors can be added simultaneously! Huzzah.
| Color | Parts |
| Yellow 5 Lake | 4 parts |
| Yellow 6 Lake | 1 parts |
| Red 27 Lake | 1 parts |
| Blue 1 Lake | 1 parts |
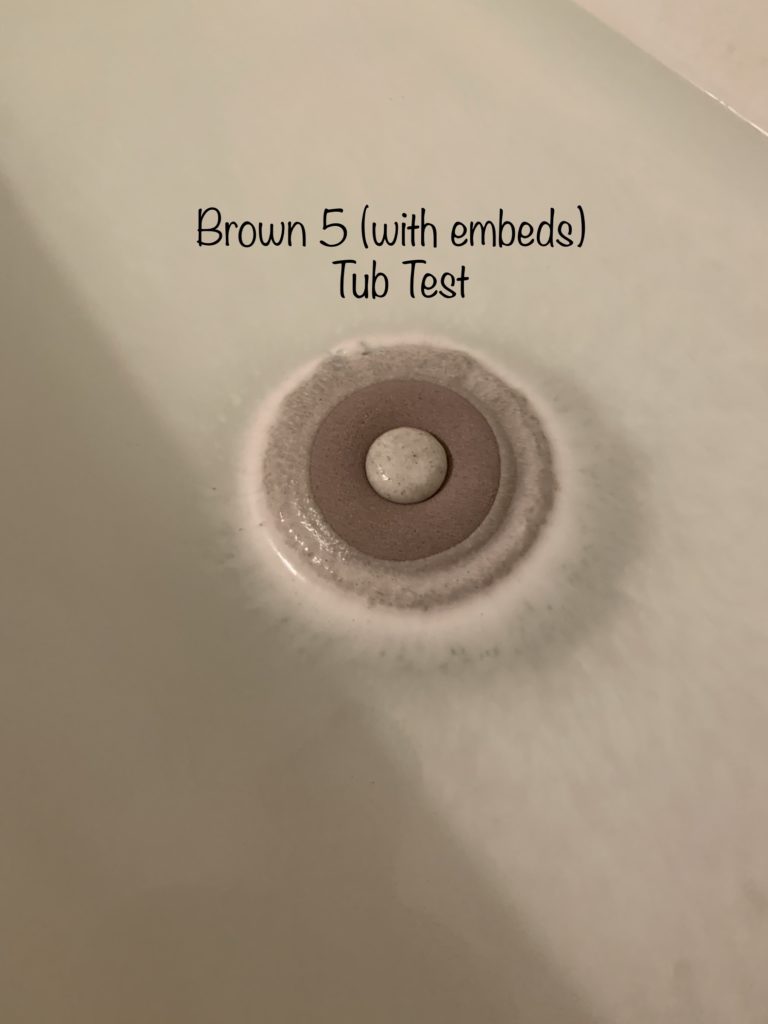
BROWN 5 = PURPLE + YELLOW
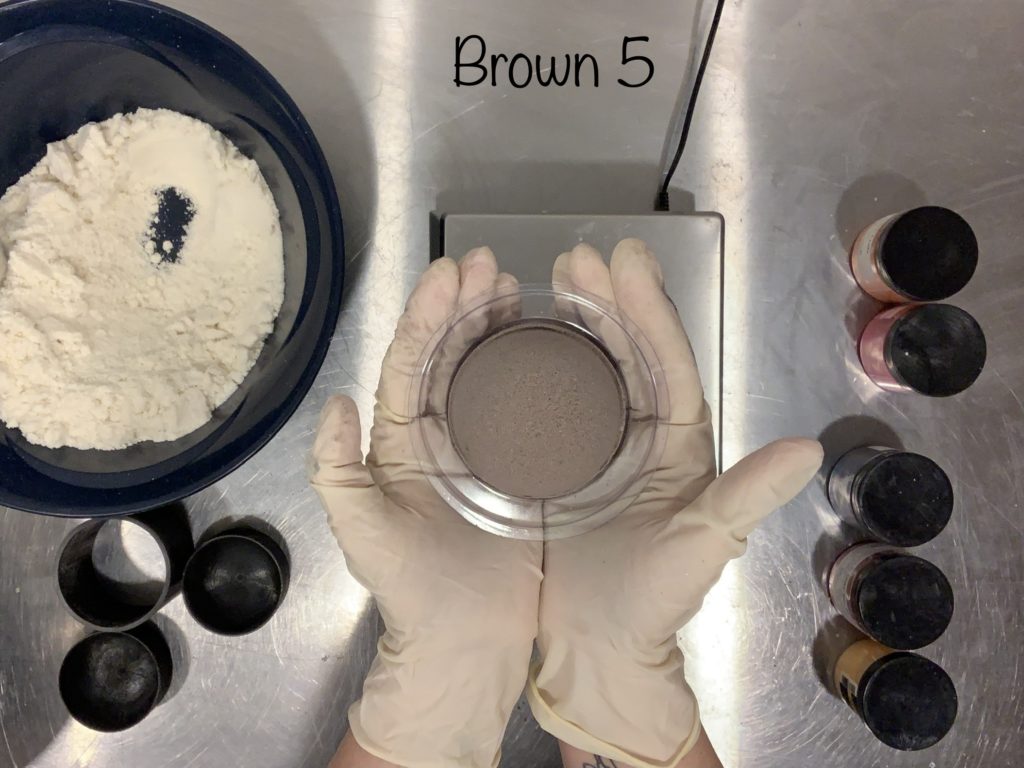
Since Brown 4 was so successful I decided to once again add all the Lake colorants at same time (as opposed to making Purple first). This one also had the addition of Yellow 5 to darken the color a bit more. I know this Brown shows up fairly dark, but I really felt like it had the most cocoa-type of color.
| Color | Parts |
| Yellow 5 Lake | 3 parts |
| Yellow 6 Lake | 1 parts |
| Red 27 Lake | 2 parts |
| Blue 1 Lake | 1 parts |
Obviously I ended up favoring the Blue/Orange, and Purple/Yellow based Browns over the Red/Green Browns. But I wasn’t ready to quite call this study quits yet. I had seen a lot of suggestions to use cocoa powder or even brown mica to get a brown colored bath bomb. So I wanted to give those two a shot and see how they fared.
LET’S DO THIS (WITH OTHER STUFF!)
The appeal I saw in using mica was that it doesn’t color the bath water much. If a bath bomb is painted with mica on the outside it might initially color the foam as the bath bomb fizzes out, but the end water isn’t generally colored by the mica. I reasoned that it might actually play in our favor and keep us from having “EW!” brown water at the end of the bath. You could, I hypothesized, use brown mica to color a bath bomb, chock it full of pretty embeds and have brightly colored water in the end.
This is not how the game played out! This is what had happened…
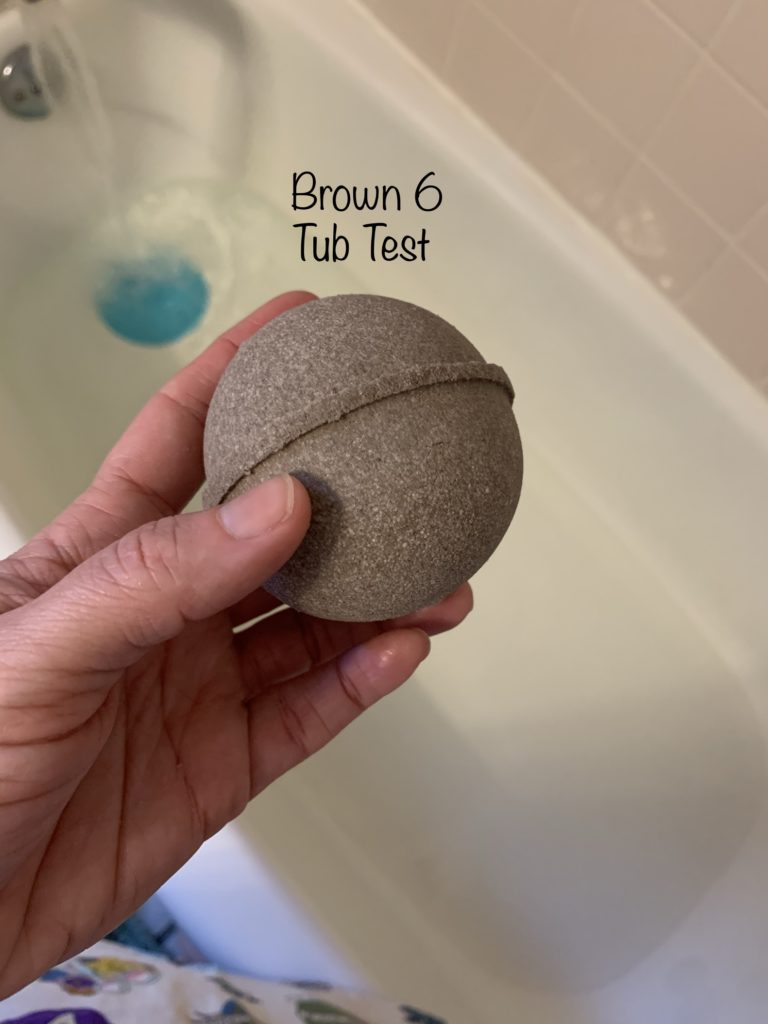
BROWN 6 = BROWN MICA

I was actually really impressed with how good this brown looked! I mean it looked almost identical to Brown 5, and required a lot less work. I got some tingly good feels at this point! I thought I was about to have a break through and I was excited. What if MICA was the solution?! How cool would that be?
BROWN 6
| Color | Parts |
| Mocha Brown Mica | ½ tsp |
Right away my theory that the mica wouldn’t color the water was debunked. I have long held the belief that mica won’t color the water, and while I still don’t think it’s your best option when it comes to coloring bath bombs, I have officially been proven wrong. That water is definitely brown!
The amount of mica needed is an obvious drawback. If 1 bath bomb takes ½ tsp, then a full size batch (which for me is 12 bath bombs) would take 6 TEASPOONS! That’s. A. LOT. Not only is it expensive, but you should always keep in mind that mica will leave particulate in the tub. Even if you use Polysorbate 80. Even if it rinses out right away. Even if it doesn’t *stain*. It’s still leaving a residue in the bathtub. When it’s pretty, shimmery gold dust left from your unicorn poo bath bomb dust, then that might be forgivable, but with BROWN… this is what is left behind. Lowkey rude!
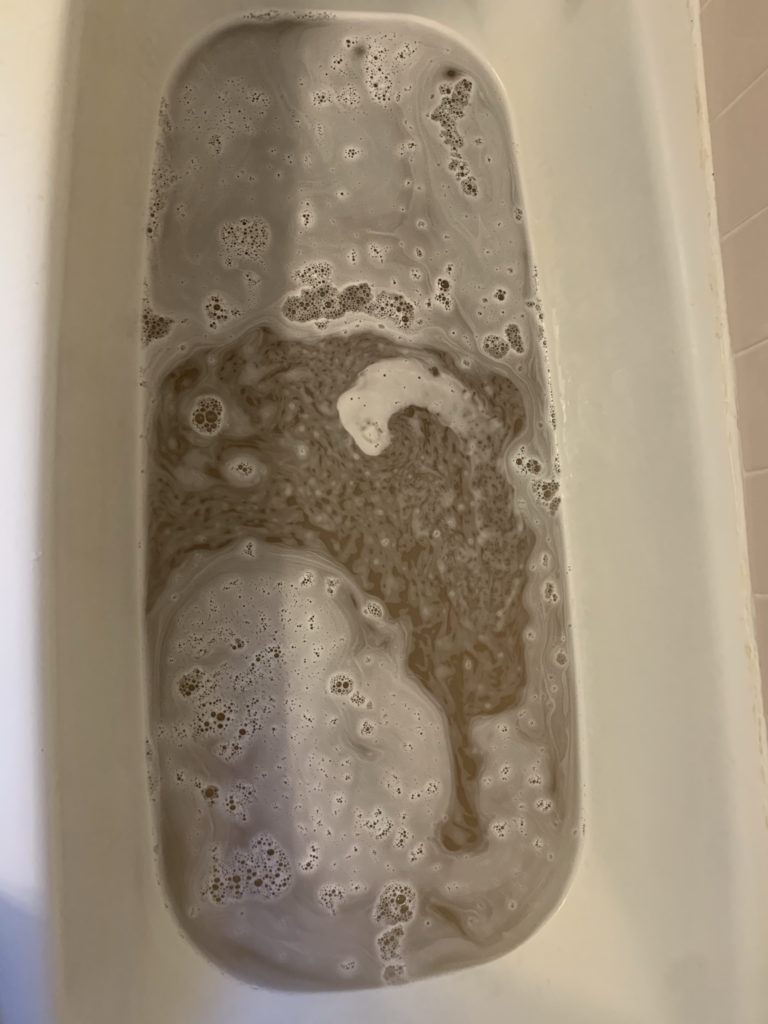
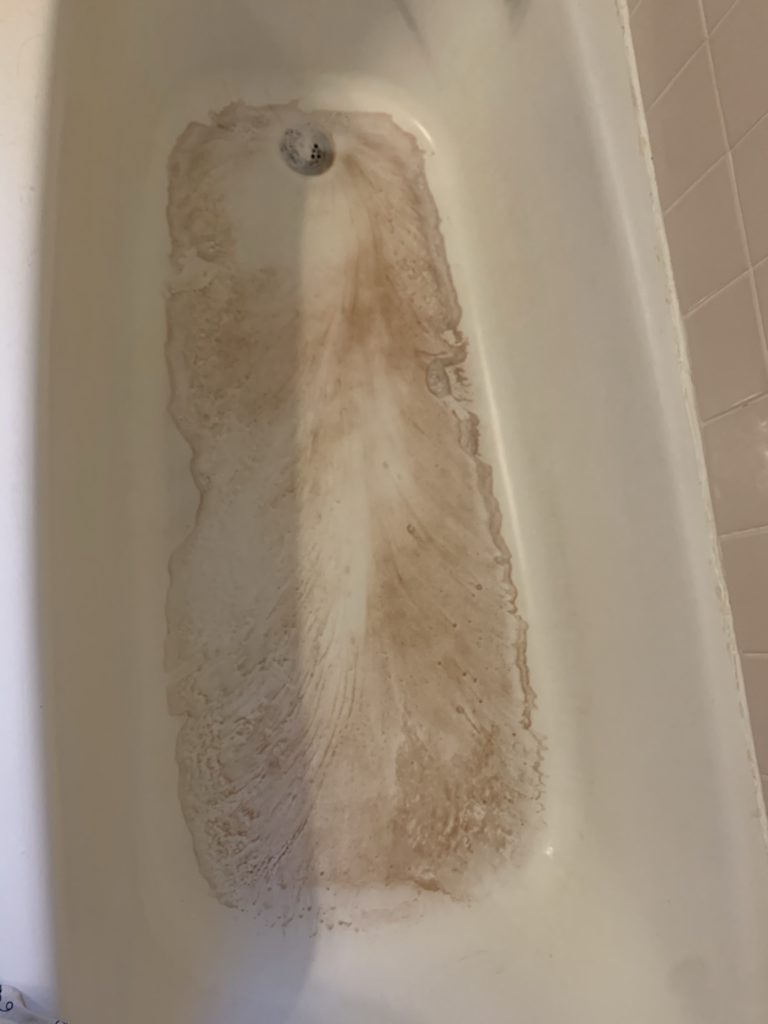
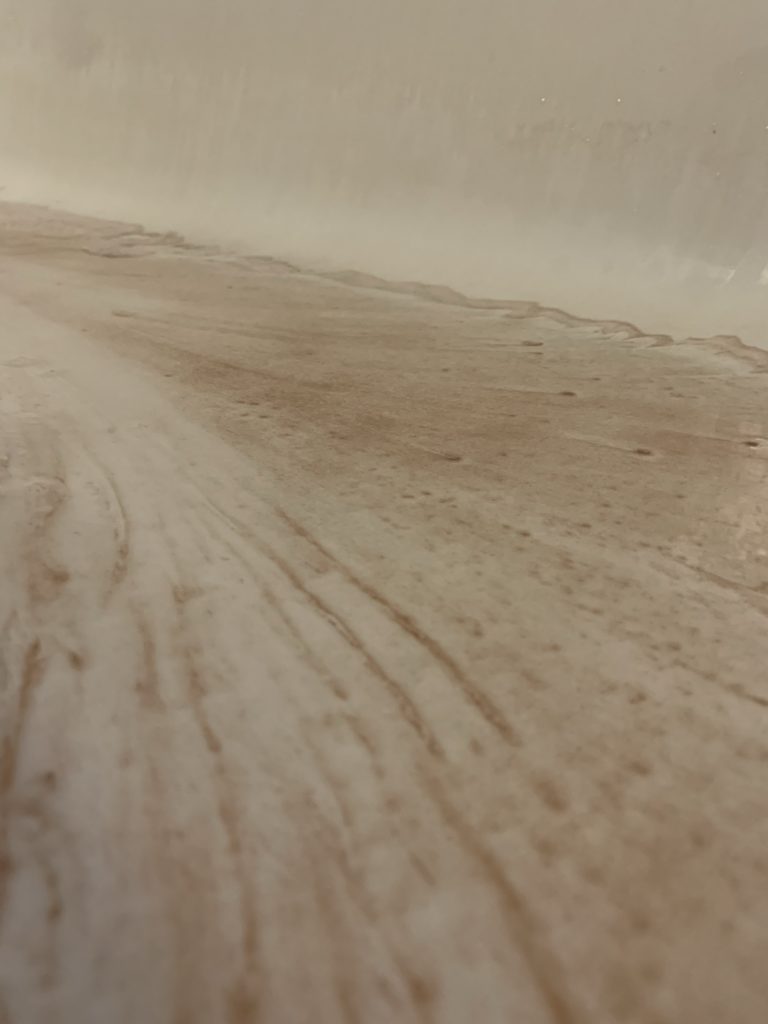
If you’re going to use mica, then explaining this residue to your customers is probably going to be very important, because you don’t want them saying that your bath bombs STAIN (when really they mean there was some residual mica left over)… Yikes! Also think of how you would feel as a customer if you came into your bathroom and saw this!
BROWN 7 = COCOA POWDER
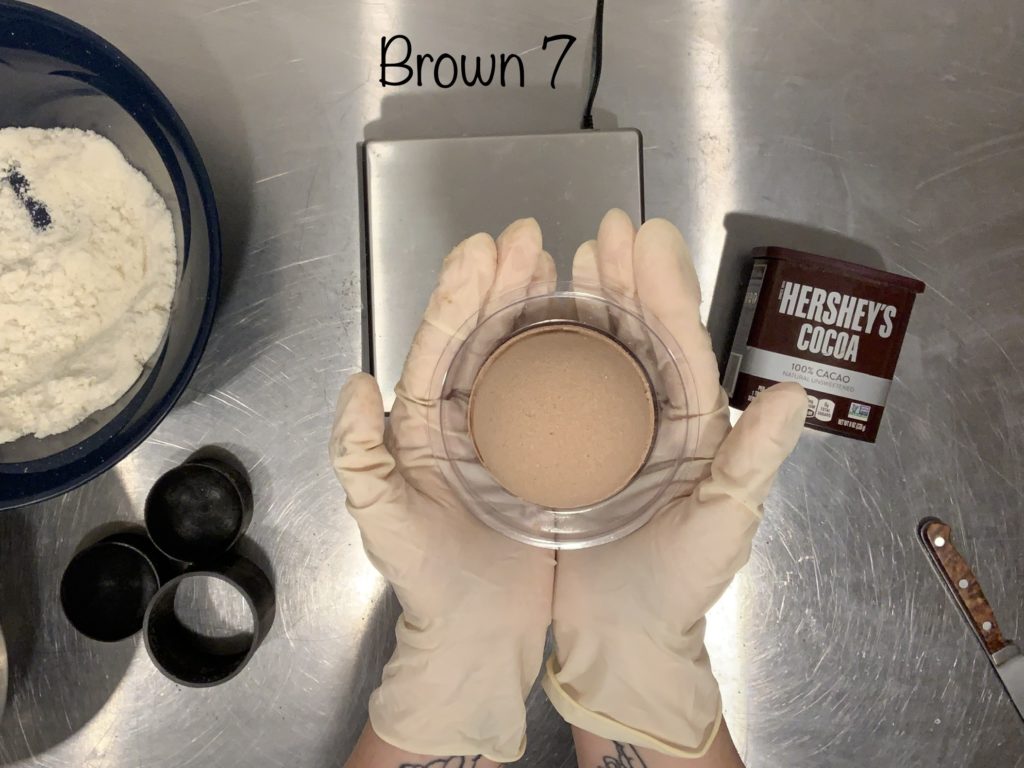
Not happy to leave well enough alone, but also not having seen the results of the Mica bath bomb, I decided, rather unenthusiastically, to try cocoa powder.
| Color | Parts |
| Cocoa Powder | 1.5 tsp |
Well dang. I liked the cocoa powder! It didn’t have a huge impact on the color of the water, and while it left a small amount of residue, I would say that it’s on par with regular bath bomb residue. This small amount left behind was certainly not as much of a turn off as the mica quarry left in my tub after testing the infamous BROWN 6 mica bath bomb!


Brown 7 actually made a really nice light tan color which I’m sure you could be darker if more cocoa powder was added–however–the amount needed to color just one bath bomb was mildly concerning. I would be worried that adding enough for a full batch might make your mix dry out! For me it would equal 18 teaspoons, or 6 tablespoons!!! However, this low cost, quick and easy option when used to make a small batch might be a great solution to complex color mixes!
WRAPPING IT UP
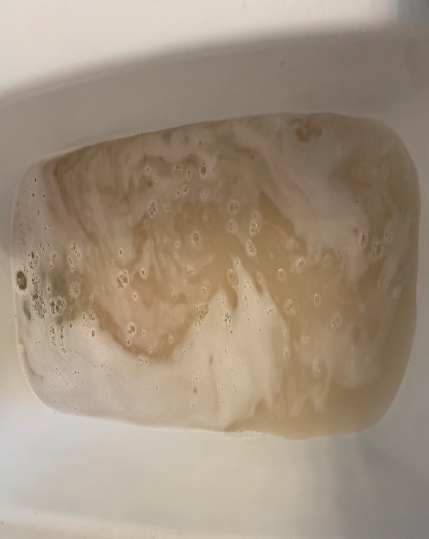
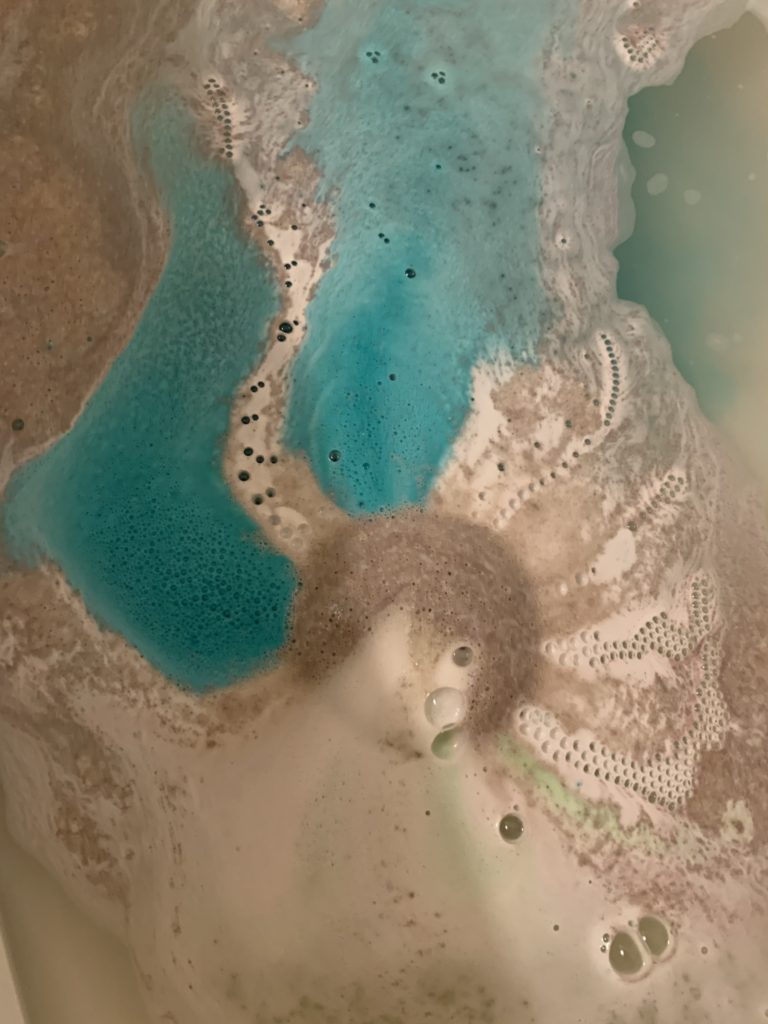
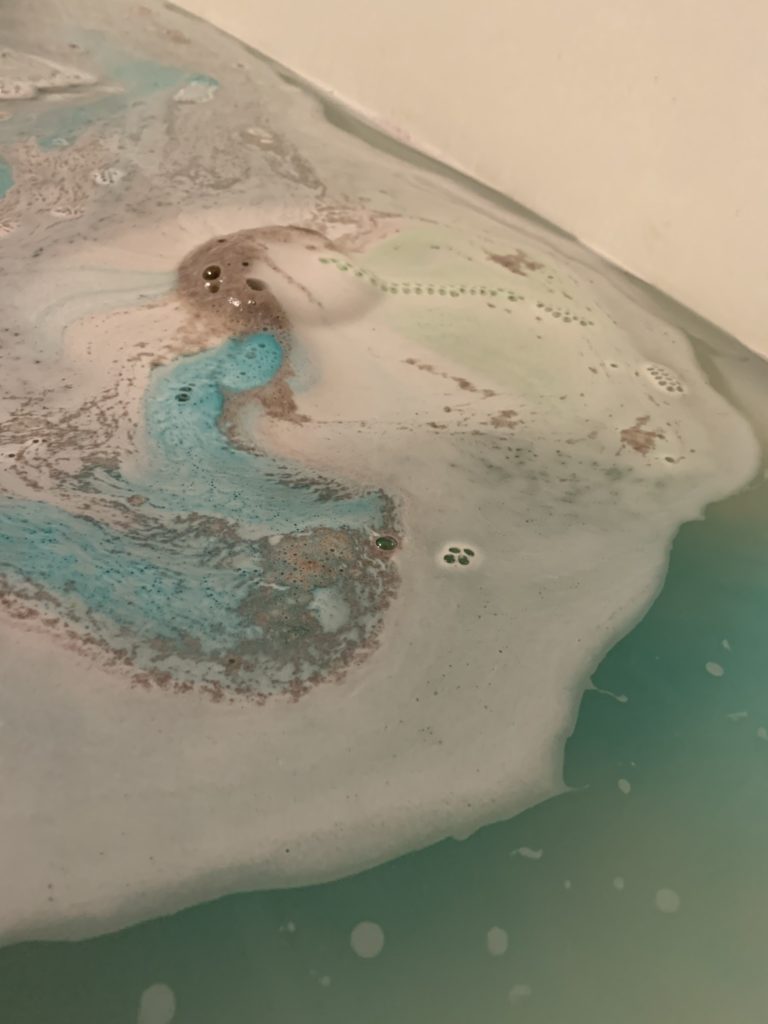
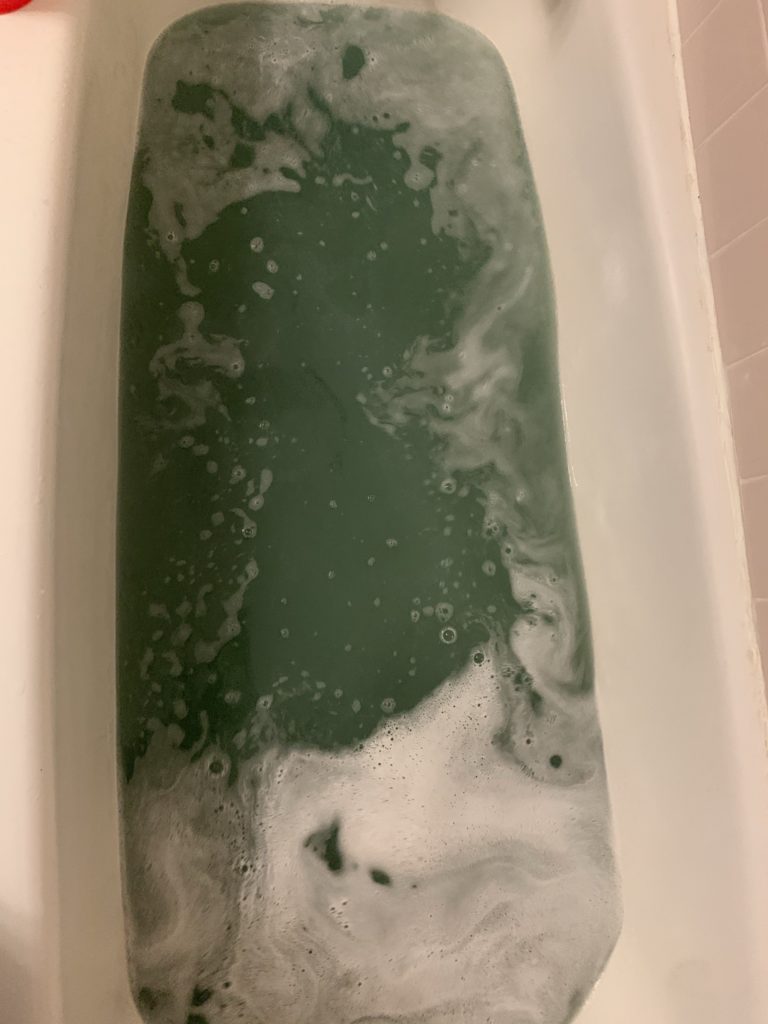
The final Tub Test is of a full size batch made with BROWN 5. I added some green embeds to see if the end-water-brownness could be avoided. The answer is a resounding yes.
I guess one last note should be added about the effect lighting has on how these Brown tones come across in product photography. The split screen image with the donut bath bomb shows the EXACT SAME bath bomb.
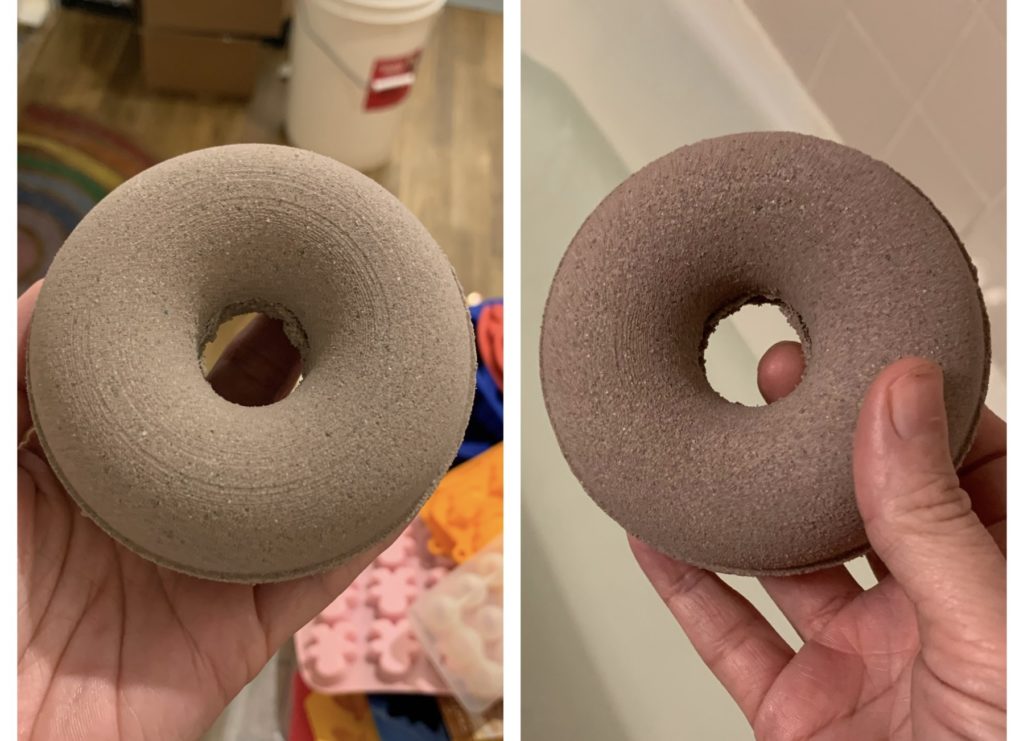
One picture was taken in mostly artificial light, the other with natural sunlight. While I know some of these browns photograph quite dark, or even purple in tone, I promise you, I only chose the best of the best. They all visually register as brown, especially when they are not set right next to each other which makes their differences much more noticeable! I’m sure whichever brown you choose to go with, any of the ones in this study will be a great solution for you!
Thank you for this! So interesting to see how these colors play with each other. Whenever I’m working on a new color, I check out these color studies. They’re the best!
Aww thank you! I’m glad they help!
Hello, thank you for publishing your color studies, they are fascinating 🙂. I was wondering if you know if using a fragrance that discolors to brown in soap color a bath bomb brown, too?
Thanks 🙏🏼
Hi! That’s a great question! Discoloring Fragrance Oils will effect bath bombs and bubble bars, but definitely not to the same level as with soap. Sometimes they will cause a tan discoloration, and often they develop spots over time. It’s aggravated by oxidation, so the best thing you can do to prevent it is to wrap your product right away. On the other hand, if you planned on the FO to discolor your bath bomb all the way brown (the way it will with soap), then you’ll be disappointed. It won’t color them deep brown unfortunately.
I generally use discoloring FO’s with darker colors (dark greens, purples, blues, black) to help hide any spots or color shifts!
So I’m still pretty new so feel free to laugh at me…but what if it was a white bath bomb with colored embeds but painted on the outside with brown mica…maybe with an airbrush for speed?? That way it wouldn’t be such a large amount of mica and maybe wouldn’t color the water so much or leave as much residue? Is there any value to this? Lol
Hi what colours do you mix to create skin tone?
A tiny bit disappointed that you didn’t do this study with dyes. I am having such a time. Usually the citric acid changes the color soon as it is added. It has resulted in a gray color that did not color the bath water at all, or a pastel green color that eventually turned brown once fully dry, sort of like your brown 2. If you do a dye study, please let me know.
Yes I’d like to see brown with dyes too please!