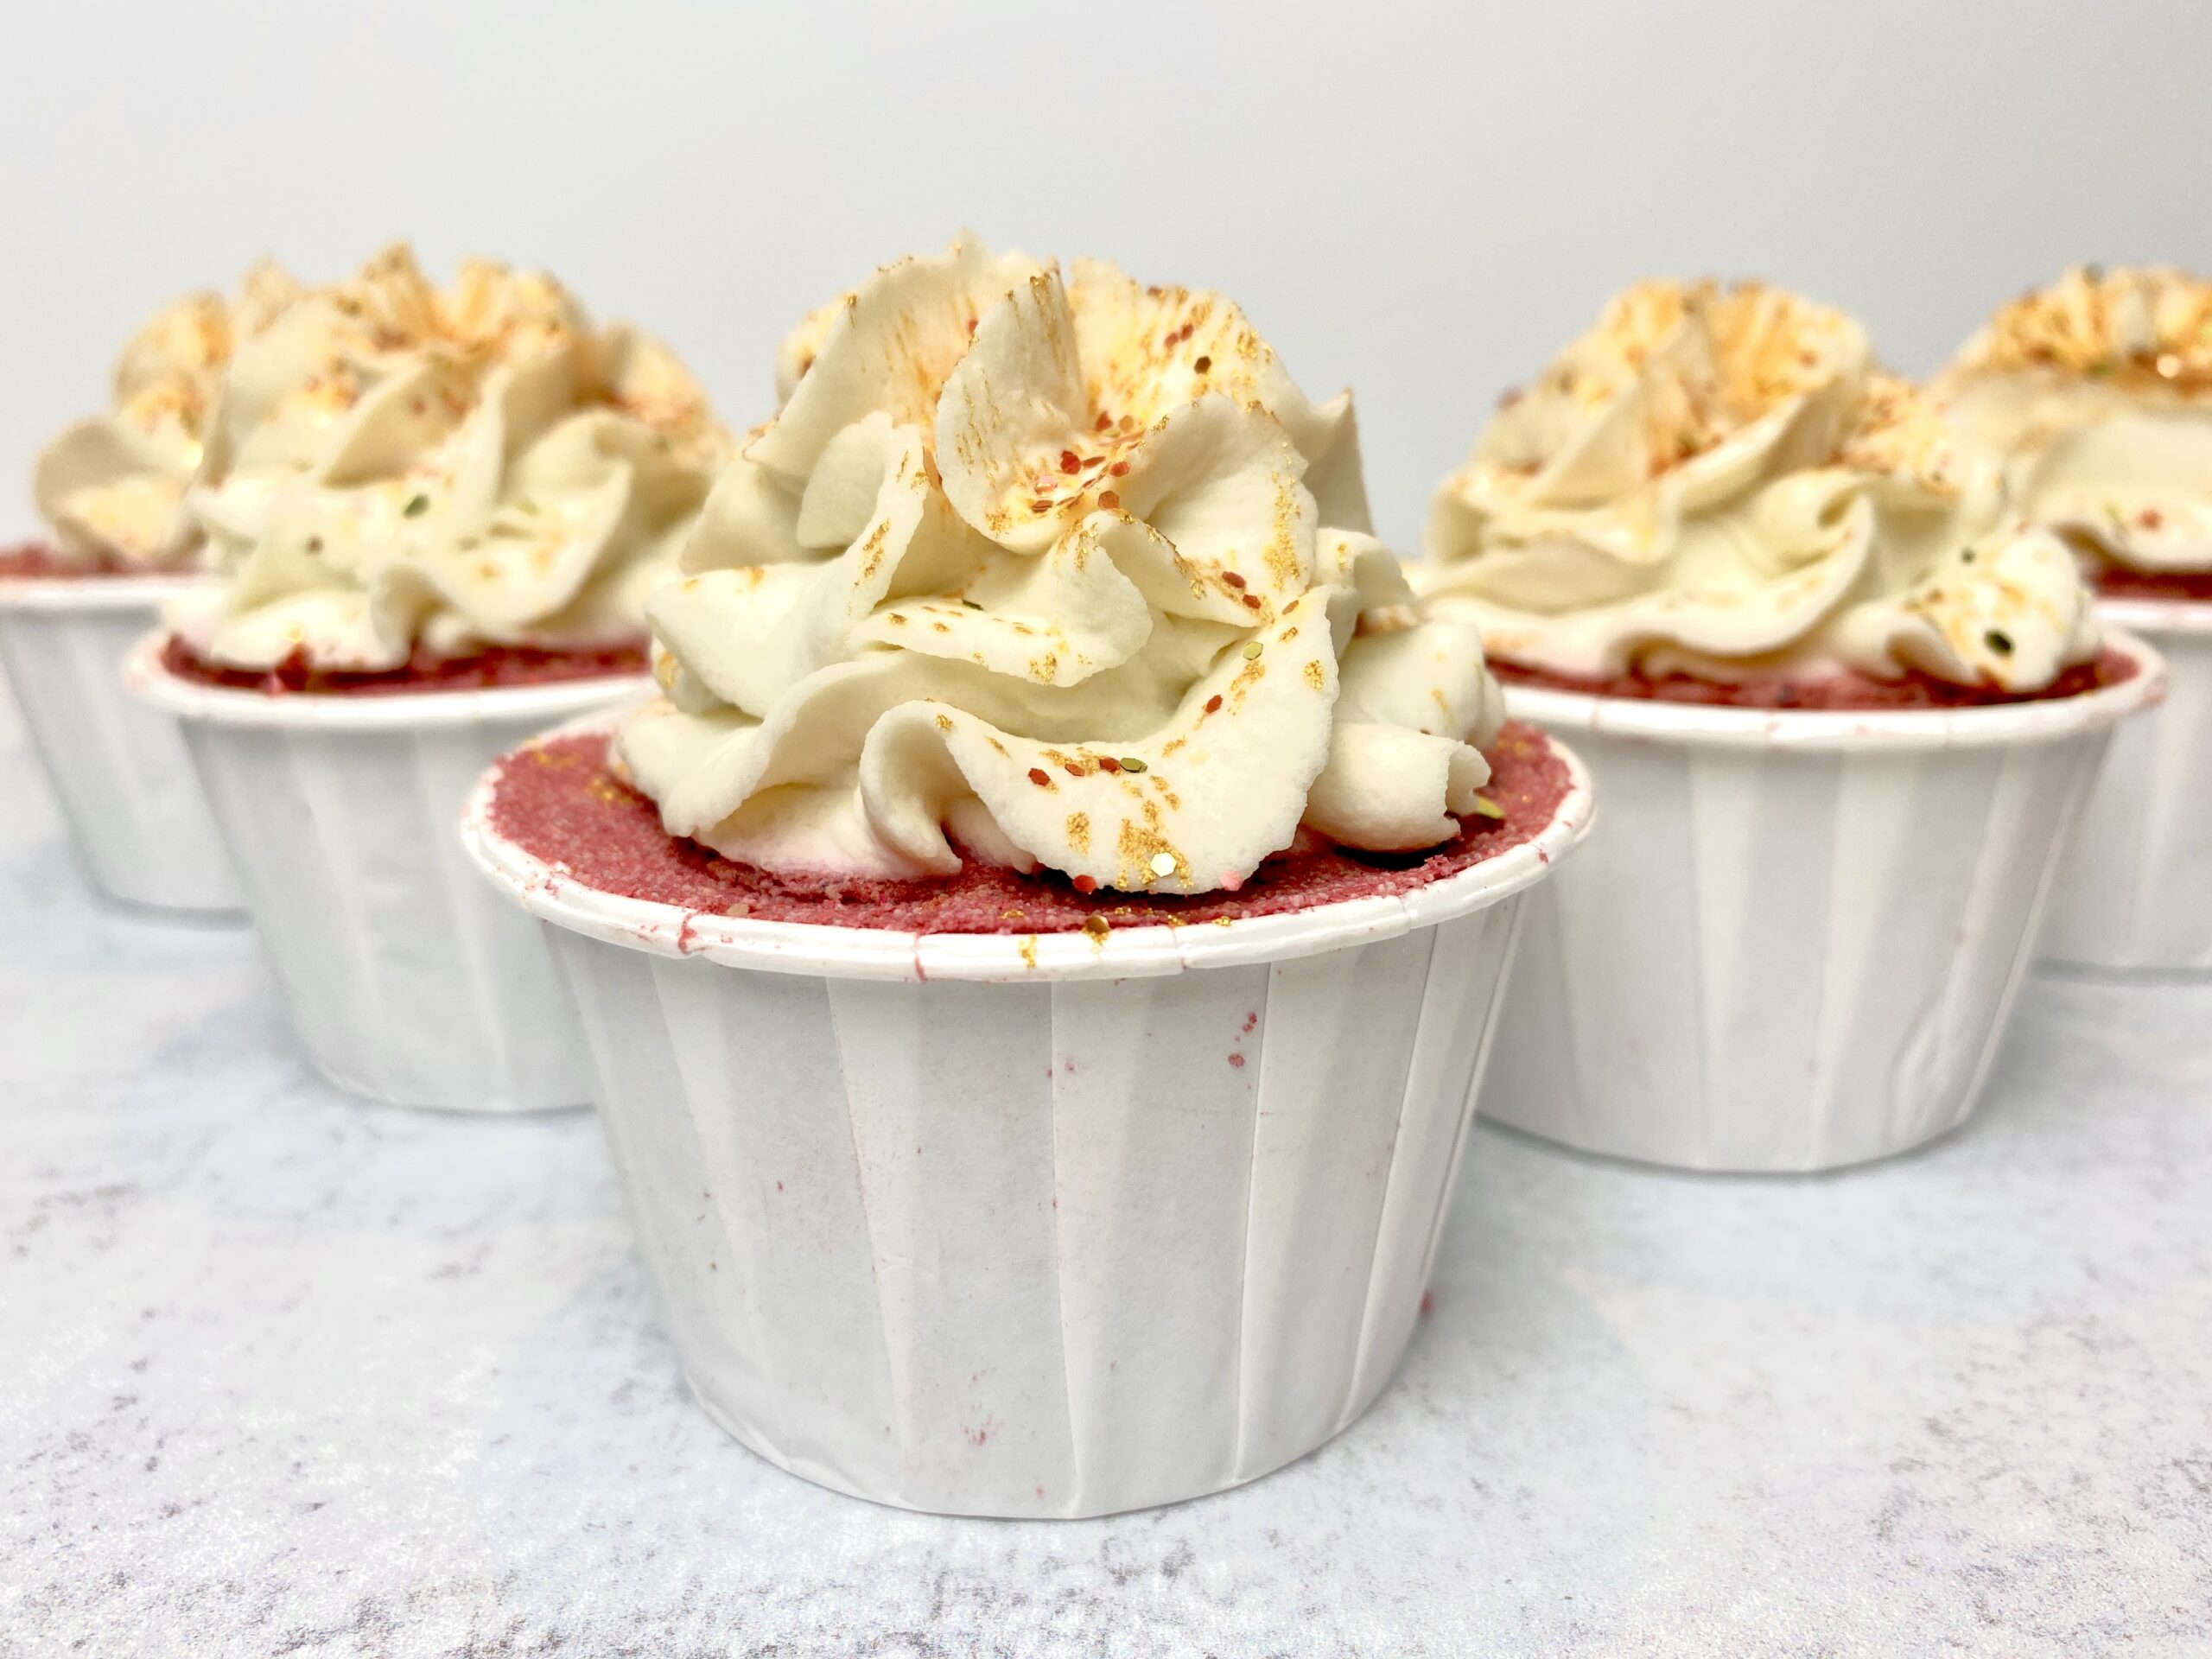
Robyn and I (Amanda) wanted to create a simple but elegant bath bomb cupcake, perfect for the Holiday Season! The fun thing about this project is that you can modify the colors in any way to create your own cupcakes for any occasion.
If you’re new to making bath bombs, you might be wondering how to top them! We have the perfect solution. You can use Wonder Bar – a pipeable bubble bar to do the job. It is so easy to work with and creates a beautiful piped topping. You can easily masterbatch Wonder Bar so you can grab just what you need, when you need it, to pipe your cupcakes.
Let’s get started!
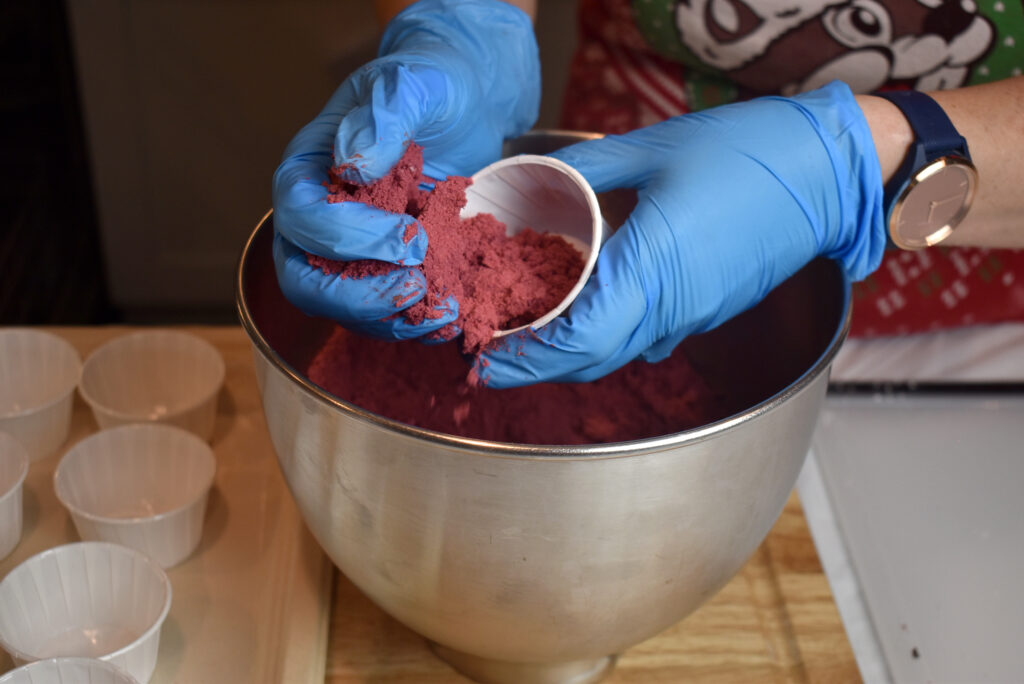
First, you’ll need some way to mold your cupcakes. You can certainly use a cupcake bottom bath bomb mold, but to make things even more simple, you can grab some plastic coated candy/nut cups from the craft store or Amazon. These make a perfect vessel to form your cupcake bases and they double as packaging. Boom!
For these Holiday/Christmas cupcakes Robyn and I wanted a more sophisticated and festive look, instead of the typical red and green. We went with a rich red bottom, white piping and dusting of gold mica with glitter.
For this project, Robyn and I used Robyn’s Humid Weather Bath Bomb Recipe. We used Wonder Bar for piped icing.
This tutorial is all about the design! You can use any bath bomb recipe that you prefer. Let’s jump into it!
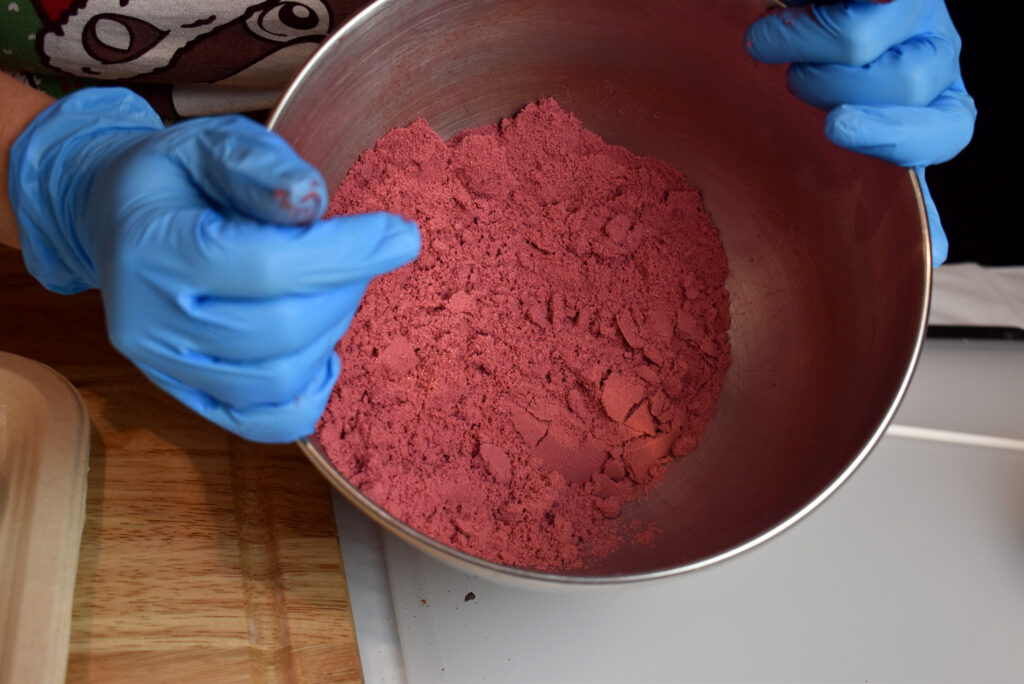
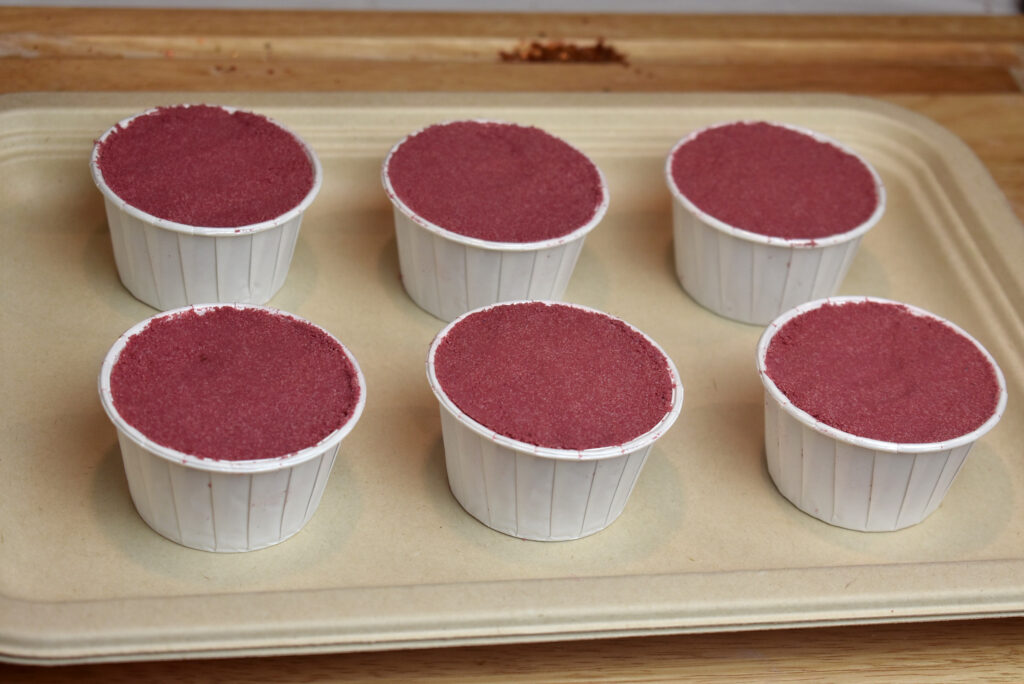
We wanted a deeper red, leaning more towards crimson, for the bottoms. We blended together 1/4 teaspoon each of Red 27 Lake, Red 40 Lake and Yellow 6 Lake. Then we deepened it a bit using 1/8 teaspoon of Blue 1 Lake. We only made 1/4 of Robyn’s recipe so if you make a full recipe, you’ll need to add more color. This batch size made 6 cupcakes at about 80 grams each.
Step 1: Mix up your bath bomb mixture and add color!
Step 2: Add binder until your mixture is the perfect consistency for molding your bath bombs.
TIP: Water as a binder: We LOVE water as a binder. It activates the mixture a tiny bit and creates a bath bomb that dries really quickly! You don’t need much! Be sure to mix it well to avoid warting.
Step 3: Fill your cupcake bottoms. Don’t pack your mixture to tightly or your wrappers will bow out. Pack lightly! Weigh each one for consistency if you want. We filled each one about 80 grams full.
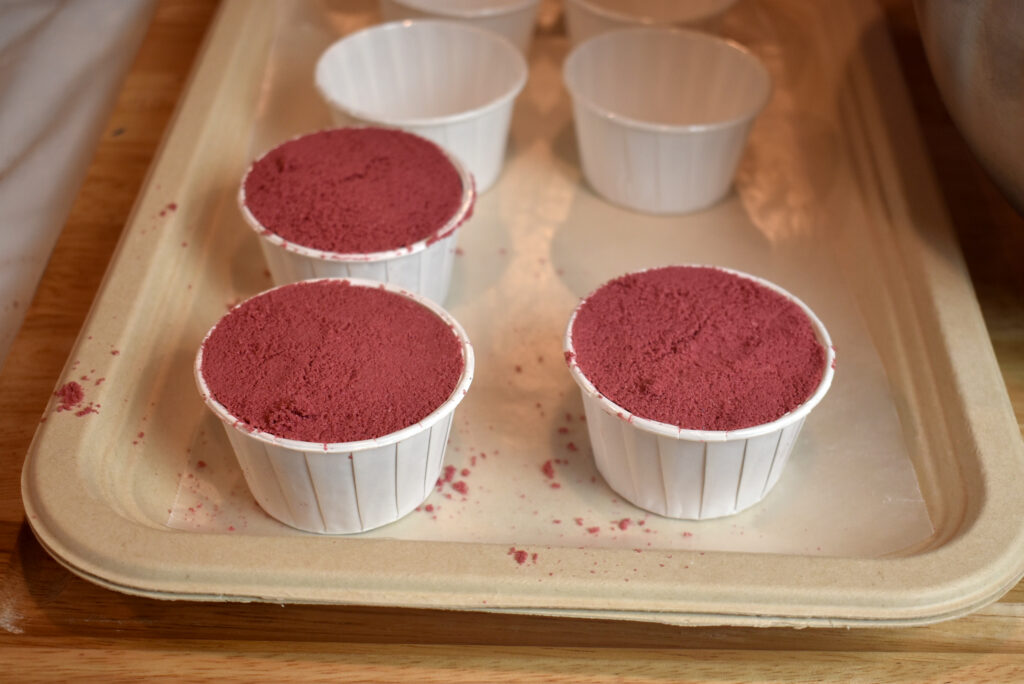
Step 4: Dry your bath bombs before decorating. Depending on how humid it is where you live, you might need to dry them 1-4 days. I dry in a room with a dehumidifer running and mine only need about 24 hours to dry (even in humid Florida!).
TIP: Drying your bath bombs: The best way to quickly dry your bath bombs is to place them in a room with a dehumidifier running. If you have no humidity where you live, then you probably don’t have to do this. But if you have any humidity, I highly recommend investing in a dehumidifier. Even if you don’t have high humidity, it can help your bath bombs dry quickly so you can decorate and package even faster! I like this dehumidifier from Homelabs on Amazon.
Once dry, you can add your wonder bar piping and mica/glitter.
Let’s do it!
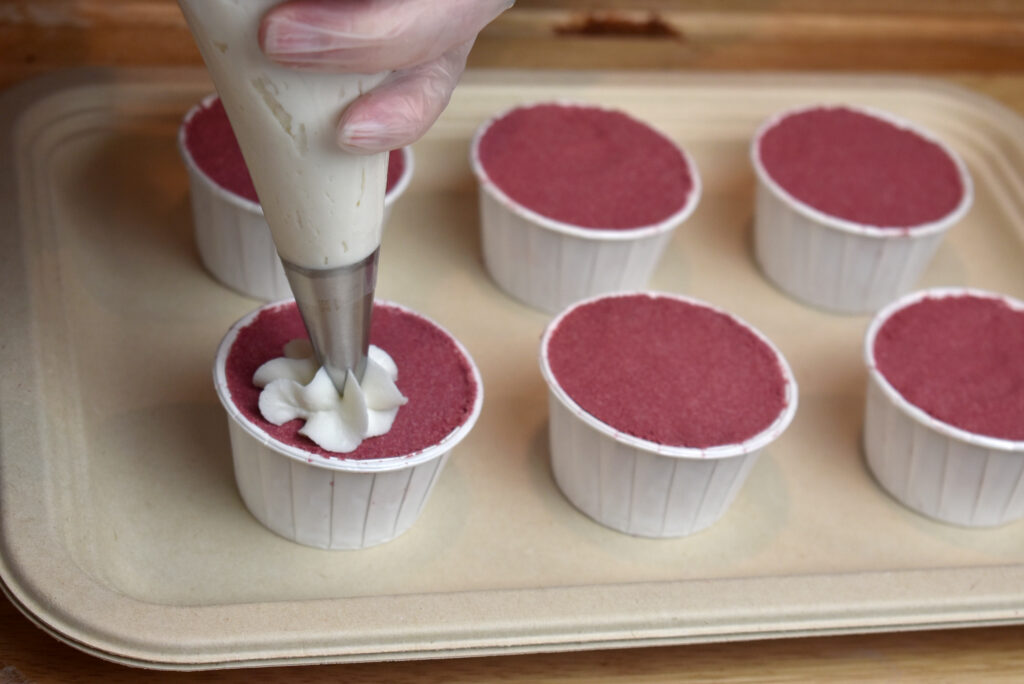
We used Wonder Bar for the bubble frosting! Easy peasy!
If you want to make just a bit of Wonder Bar for topping your bath bomb project, check out this blog post on masterbatching Wonder Bar! You can simply take out a bit of mixture and add alcohol as needed to get it to that piping consistency.
Or, you could make a whole batch of Wonder Bar and then use the leftovers to pipe bubble wands!
We took a bit of materbatched Wonder Bar and left it uncolored. We added alcohol to get it to the perfect piping consistency.
TIP: Before piping Wonder Bar onto your bath bombs, be sure to spray bath bombs with 91% alcohol to help it stick!
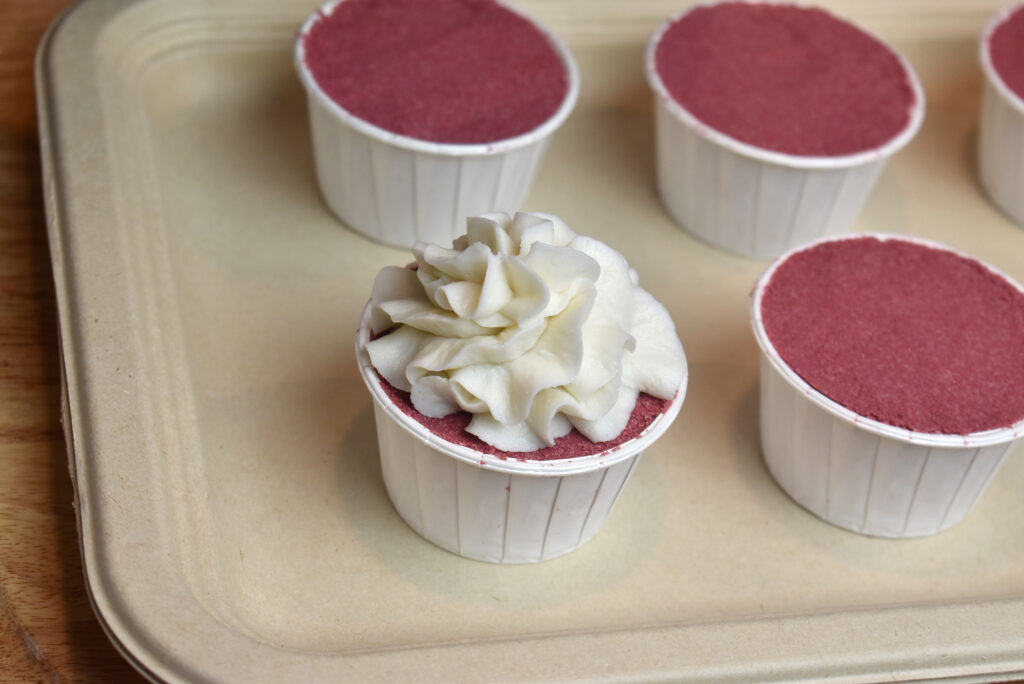
We piped the cupcake toppings using a Wilton 1M tip.
Next, we topped with a bit of gold mica! Spray your cupcakes first with 91% alcohol so it sticks. We simply added Mad Mica’s Golden Buddah mica to a tea strainer and dusted each cupcake.
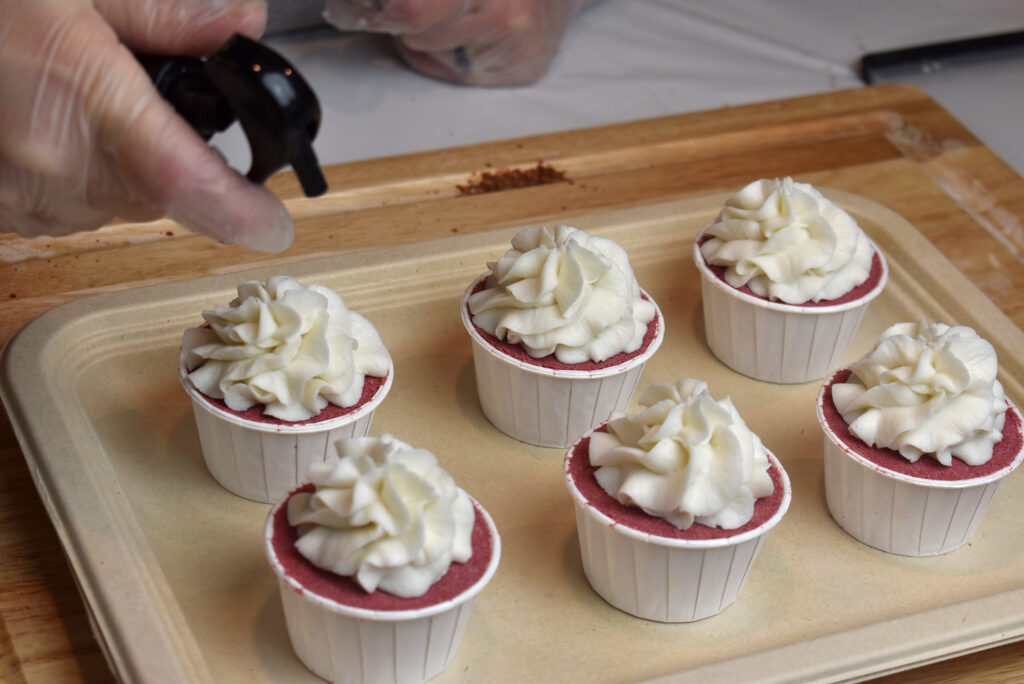
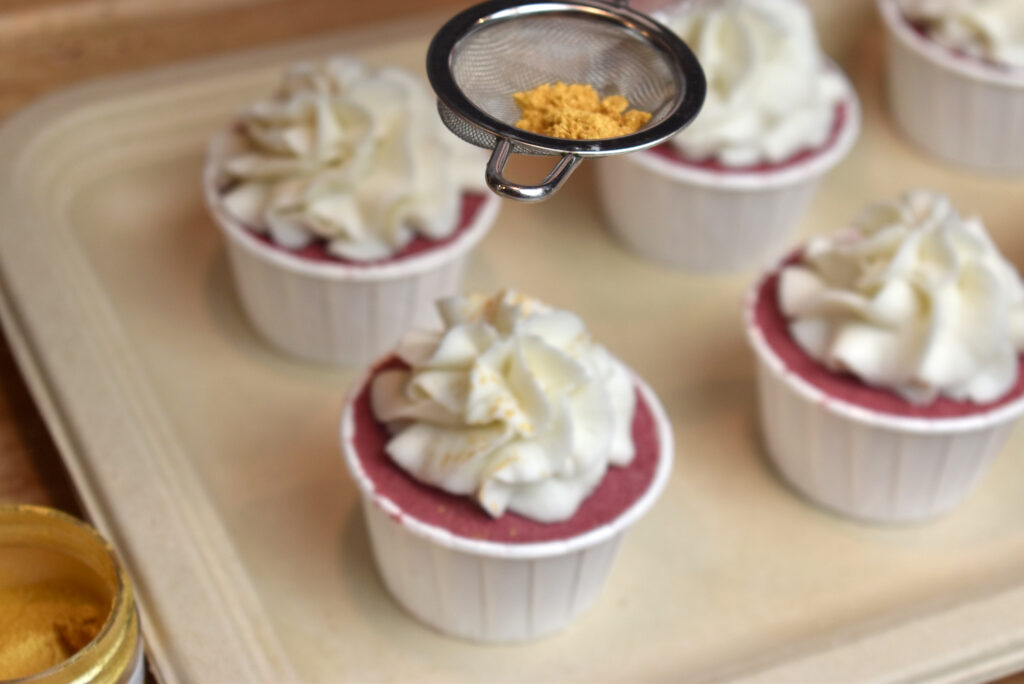
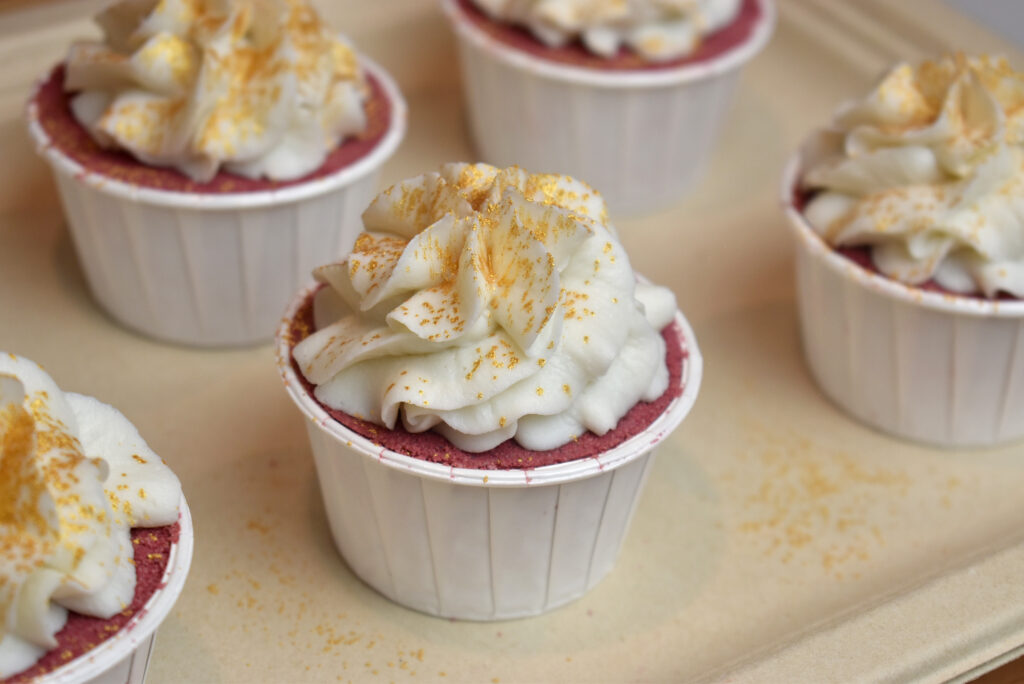
Then we added a bit of Good Glitter Fall Vibes glitter for a little extra glam.

Allow your cupcakes to fully dry and then package!

We hope this inspires you to make your own cupcakes! Please share in the group if you do!
Happy Making!
Amanda & Robyn
Wonder Bar Bubble Bar Recipe + Process Guide
Get one recipe to make it all! Make bubble bar scoops, rolls and bubble frosting, using just ONE recipe! Get Wonder Bar here.
Robyn’s Humid Weather Bath Bomb Recipe
Making bath bombs in wet, rainy weather can be so frustrating! If you live in an area with constant high humidity, then you’ll need a recipe that can hang day in and day out without failing, warting, cracking or crumbling. Check out Robyn’s Humid Weather Bath Bomb Recipe!