We’ve declared it bubble bar wand week here on the blog! Did you catch the Orange and Black Bubble Wands and the Purple and Black Bubble Wands?
This post isn’t very different as far as technique! We just wanted to show you another design idea for inspiration!
The Orange and Black Bubble Wands were made using a full batch of Wonder Bar. This batch was actually made after piping swirls on top of pumpkins (tutorial coming soon). It’s easy to make bubble wands with leftover Wonder Bar from piping!
For this project, I used Wonder Bar! Wonder Bar is a bubble bar recipe that can be pressed like a bath bomb, scooped into bubble scoops, rolled into fun rolls and piped into bubble frosting! It is the most dynamic bubble bar recipe on the market. Check it out here!
You can use Wonder Bar or you can use your favorite pipeable bubble frosting. This tutorial is all about the design.
So, what’s a bubble wand? In case you’re new to all of this, a bubble wand is a bubble bar attached to a stick (cake pop stick, or pop sickle stick) that you hold under running water to create a bath full of bubbles! My kids LOVE bubble wands! They love holding them under running water as bubbles magically appear!
Here’s how to make them!
Get the Wonder Bar recipe here. You can use a full batch or you can dip out of a masterbatch and only make a few! And like I mentioned above, this was actually the leftovers from piping on cauldrons.
Other ingredients and supplies needed:
- Pop sickle sticks (or cake pop sticks)
- Cosmetic approved, eco Glitter
- Ghosts – We found adorable ghost toys from Party City!
When it comes to bubble wands, it is ALL about consistency. As mentioned, Wonder Bar allows you to create a pipeable bubble frosting. These directions are outlined in the PDF when you purchase.
Step 1: Mix Wonder Bar until you get a pipeable consistency! It should look like frosting.
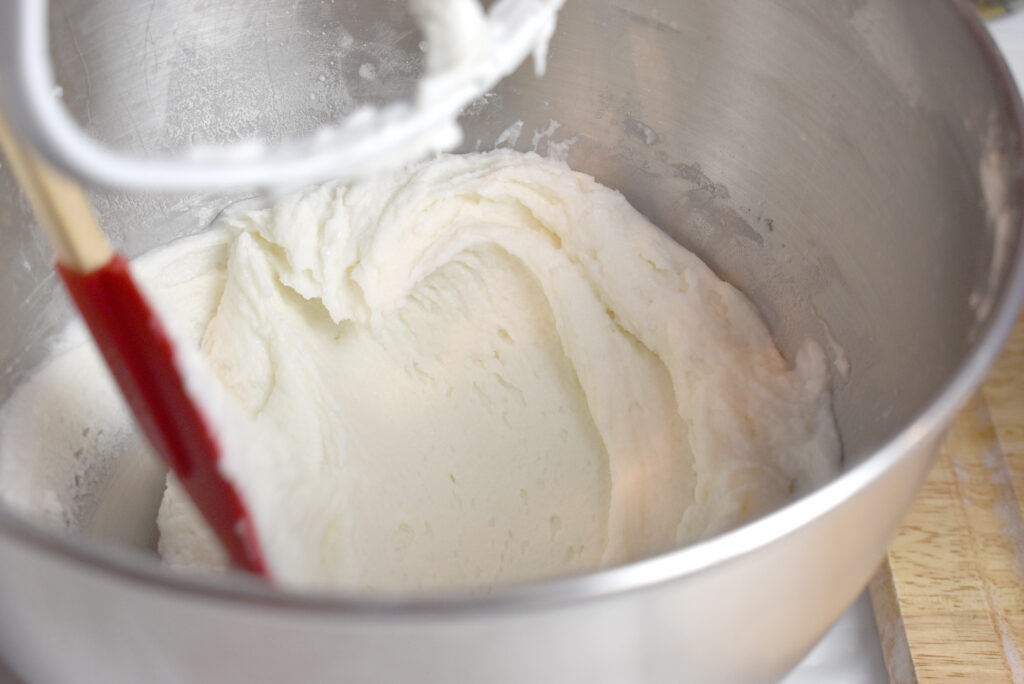
TIP: Try a test piping! If your piping is airy and cracking, then add more alcohol!
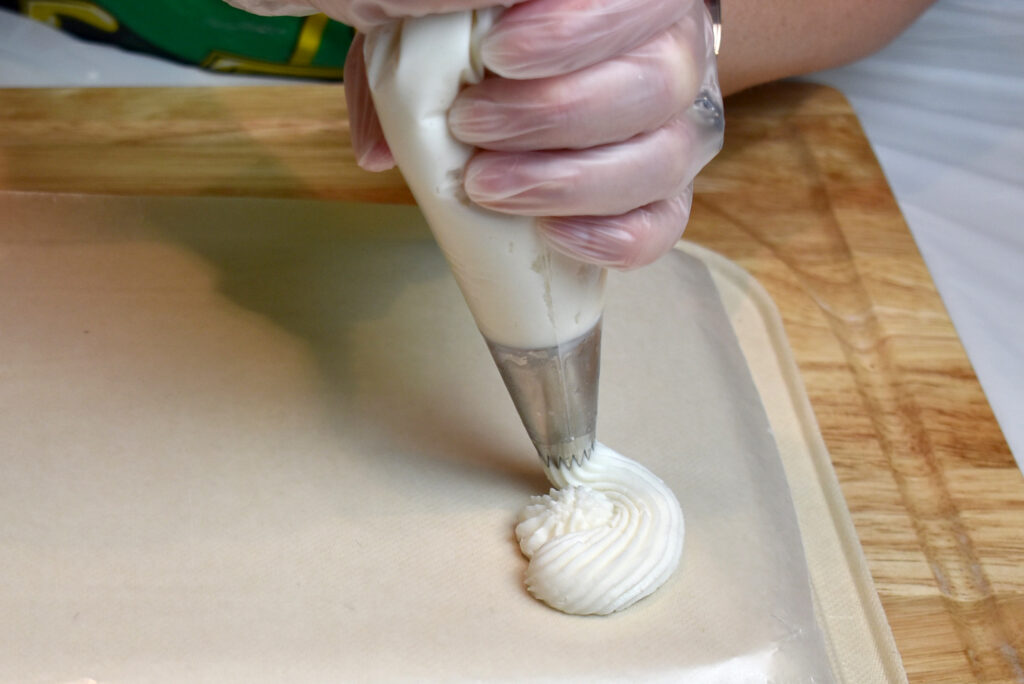
Step 2: Prepare piping bag with your tip. We used an Ateco 866 French Pastry tip.
Step 3: Scoop your white mixture into your piping bag. Wonder Bar is pretty white on it’s own! We didn’t add any whitener.
Step 4: Pipe a blob of Wonder Bar as shown.

Step 5: Pipe a circle surrounding the blob.
Step 6: Place a stick on top of this first layer. Having a bottom layer and a top layer creates a more stable bubble wand where the stick won’t fall out!
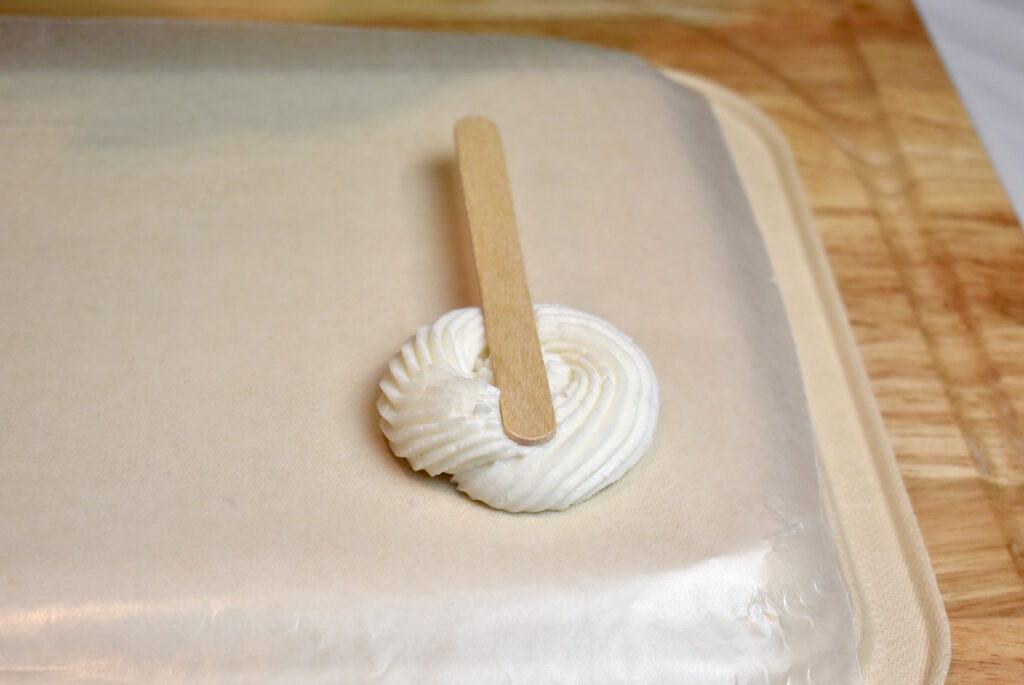
Step 7: Pipe another swirl on top to complete your bubble wand.

Step 8: Top with a fun toy! We added a ghost toy! Sprinkle with glitter, if you want! We love cosmetic, eco glitter!
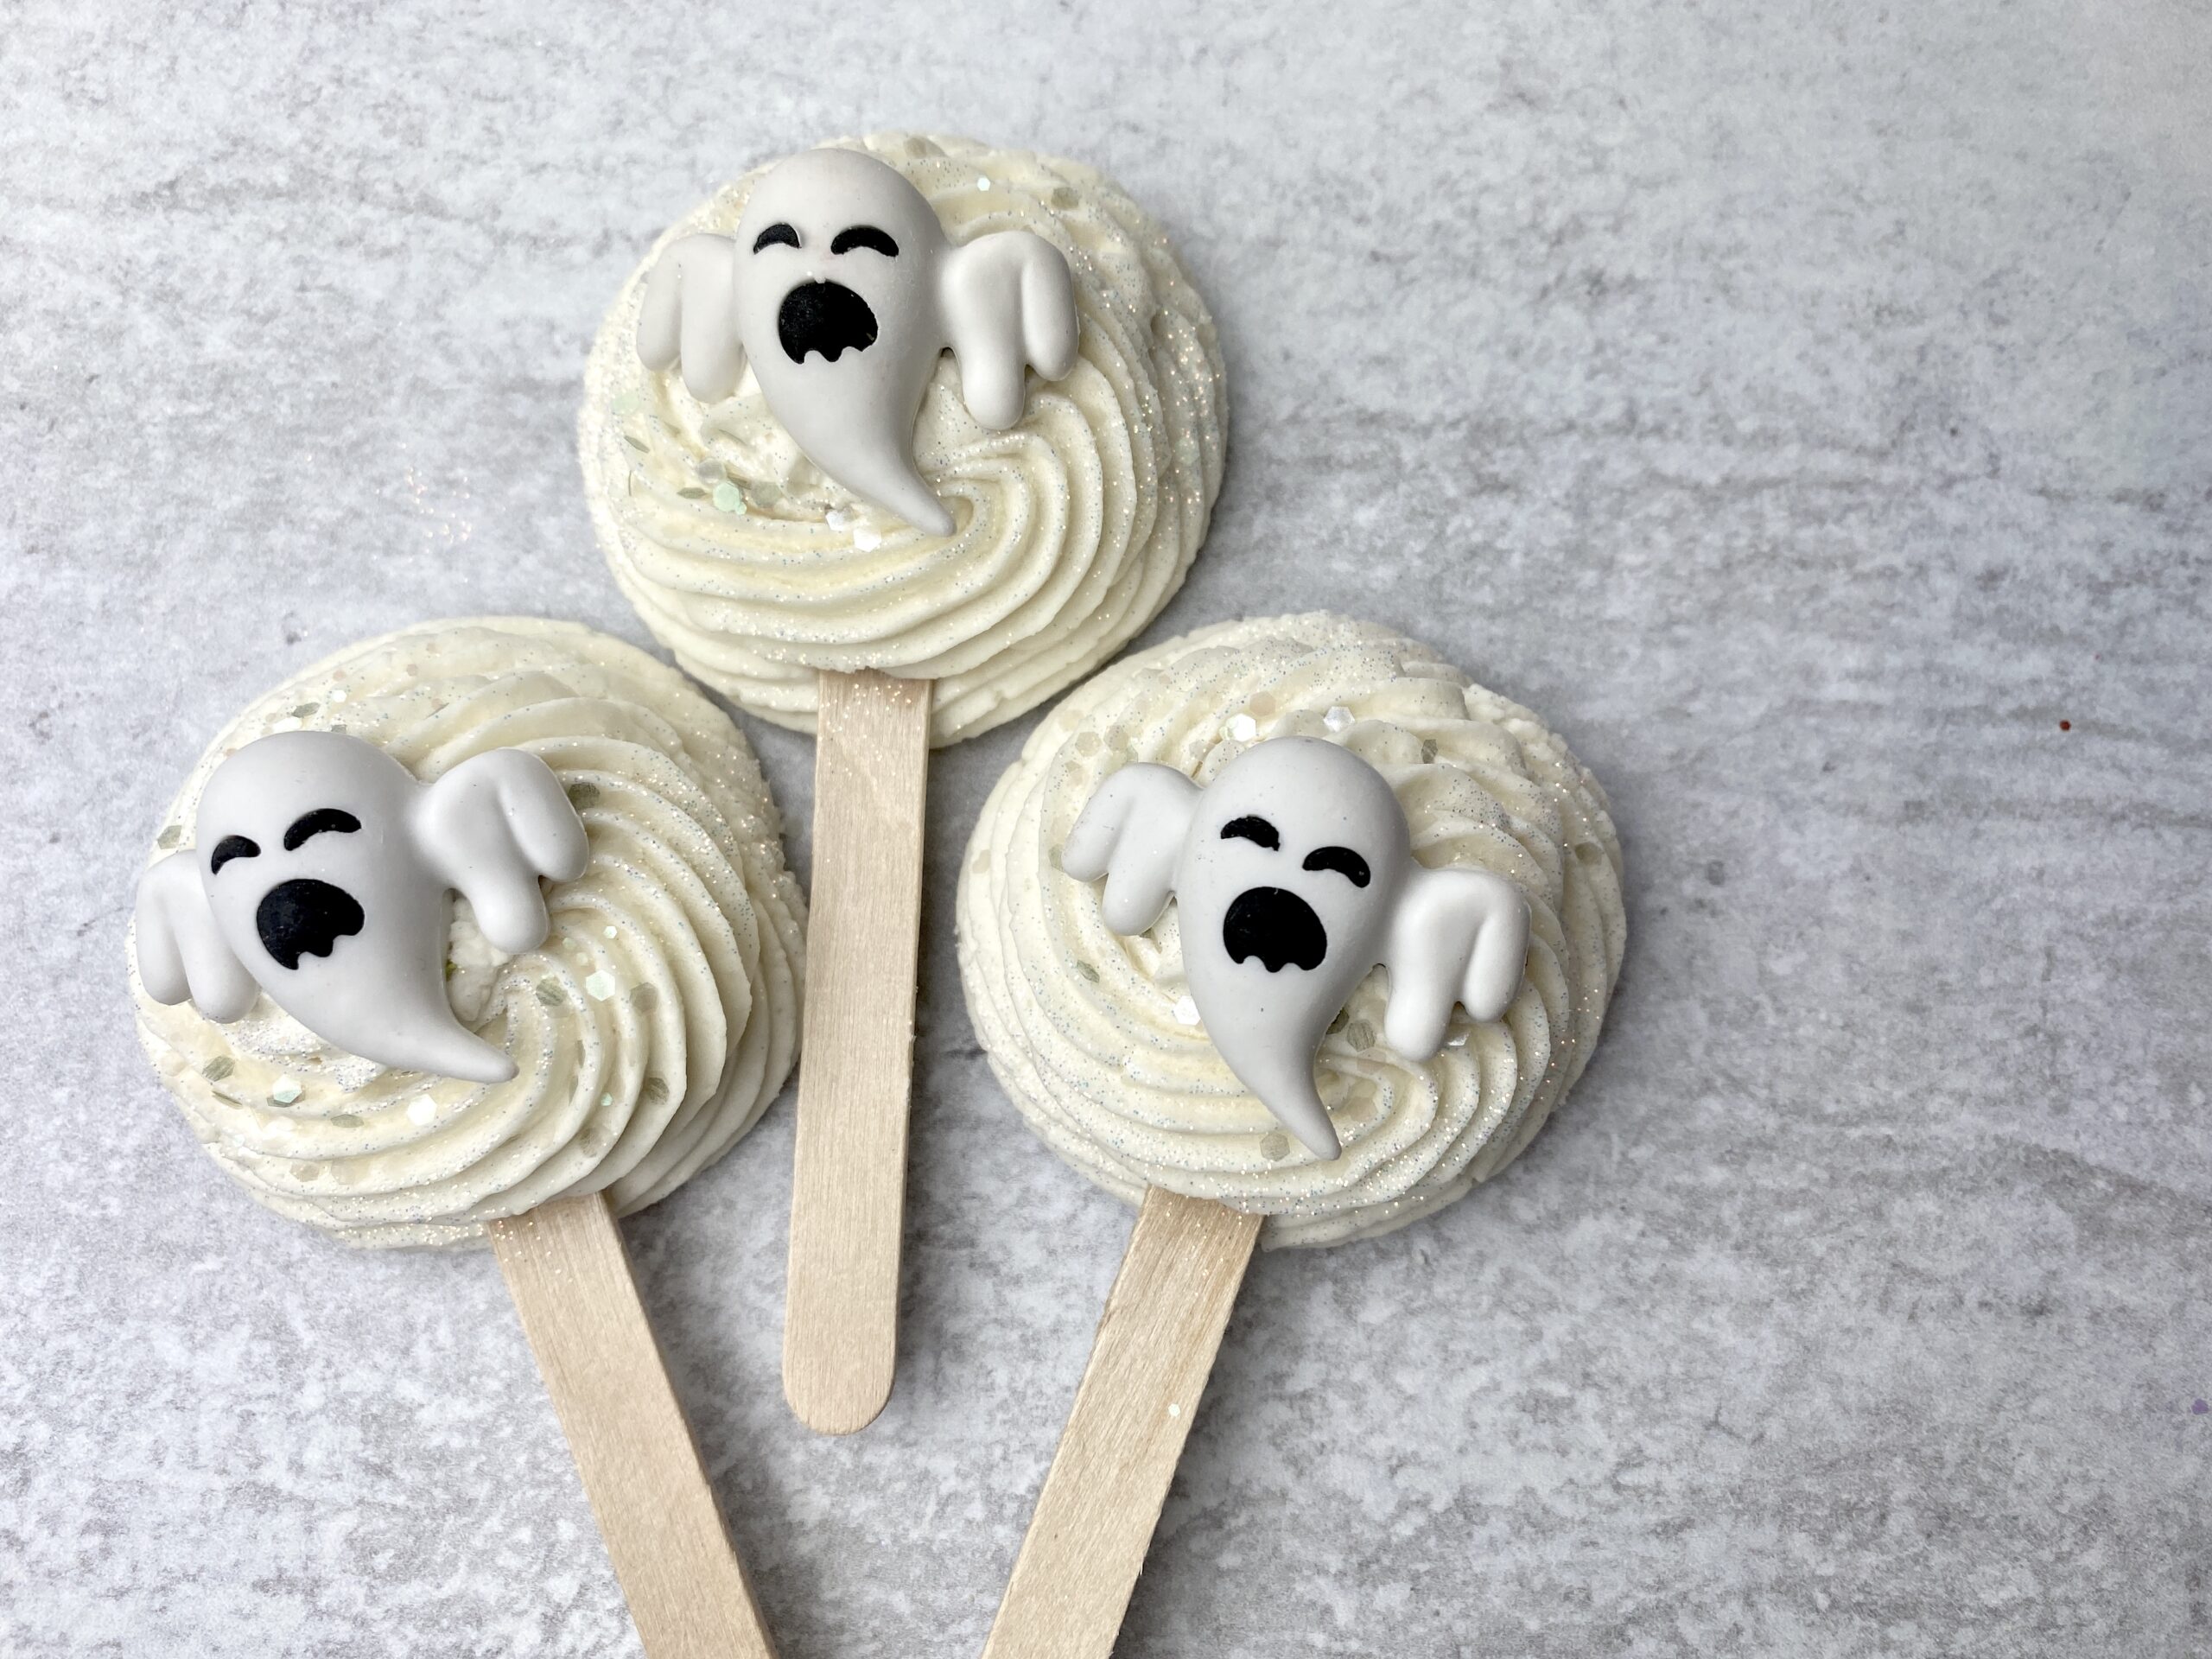
Step 9: Allow your bubble wands to dry for 1-3 days (depends on your humidity).
Tip: Dry your bubble wands in a room with a dehumidifier.
Once dry you can package your bubble wands! I like to package in a bag, tied with a ribbon!
To use a bubble wand, simply direct your customer to hold it under hot running water. As the water dissolves the bubble wand, it create a bath full of bubbles!
Happy Bubble Making!
Robyn & Amanda
Wonder Bar Bubble Bar Recipe + Process Guide
Get one recipe to make it all! Make bubble bar scoops, rolls and bubble frosting, using just ONE recipe! Get Wonder Bar here.