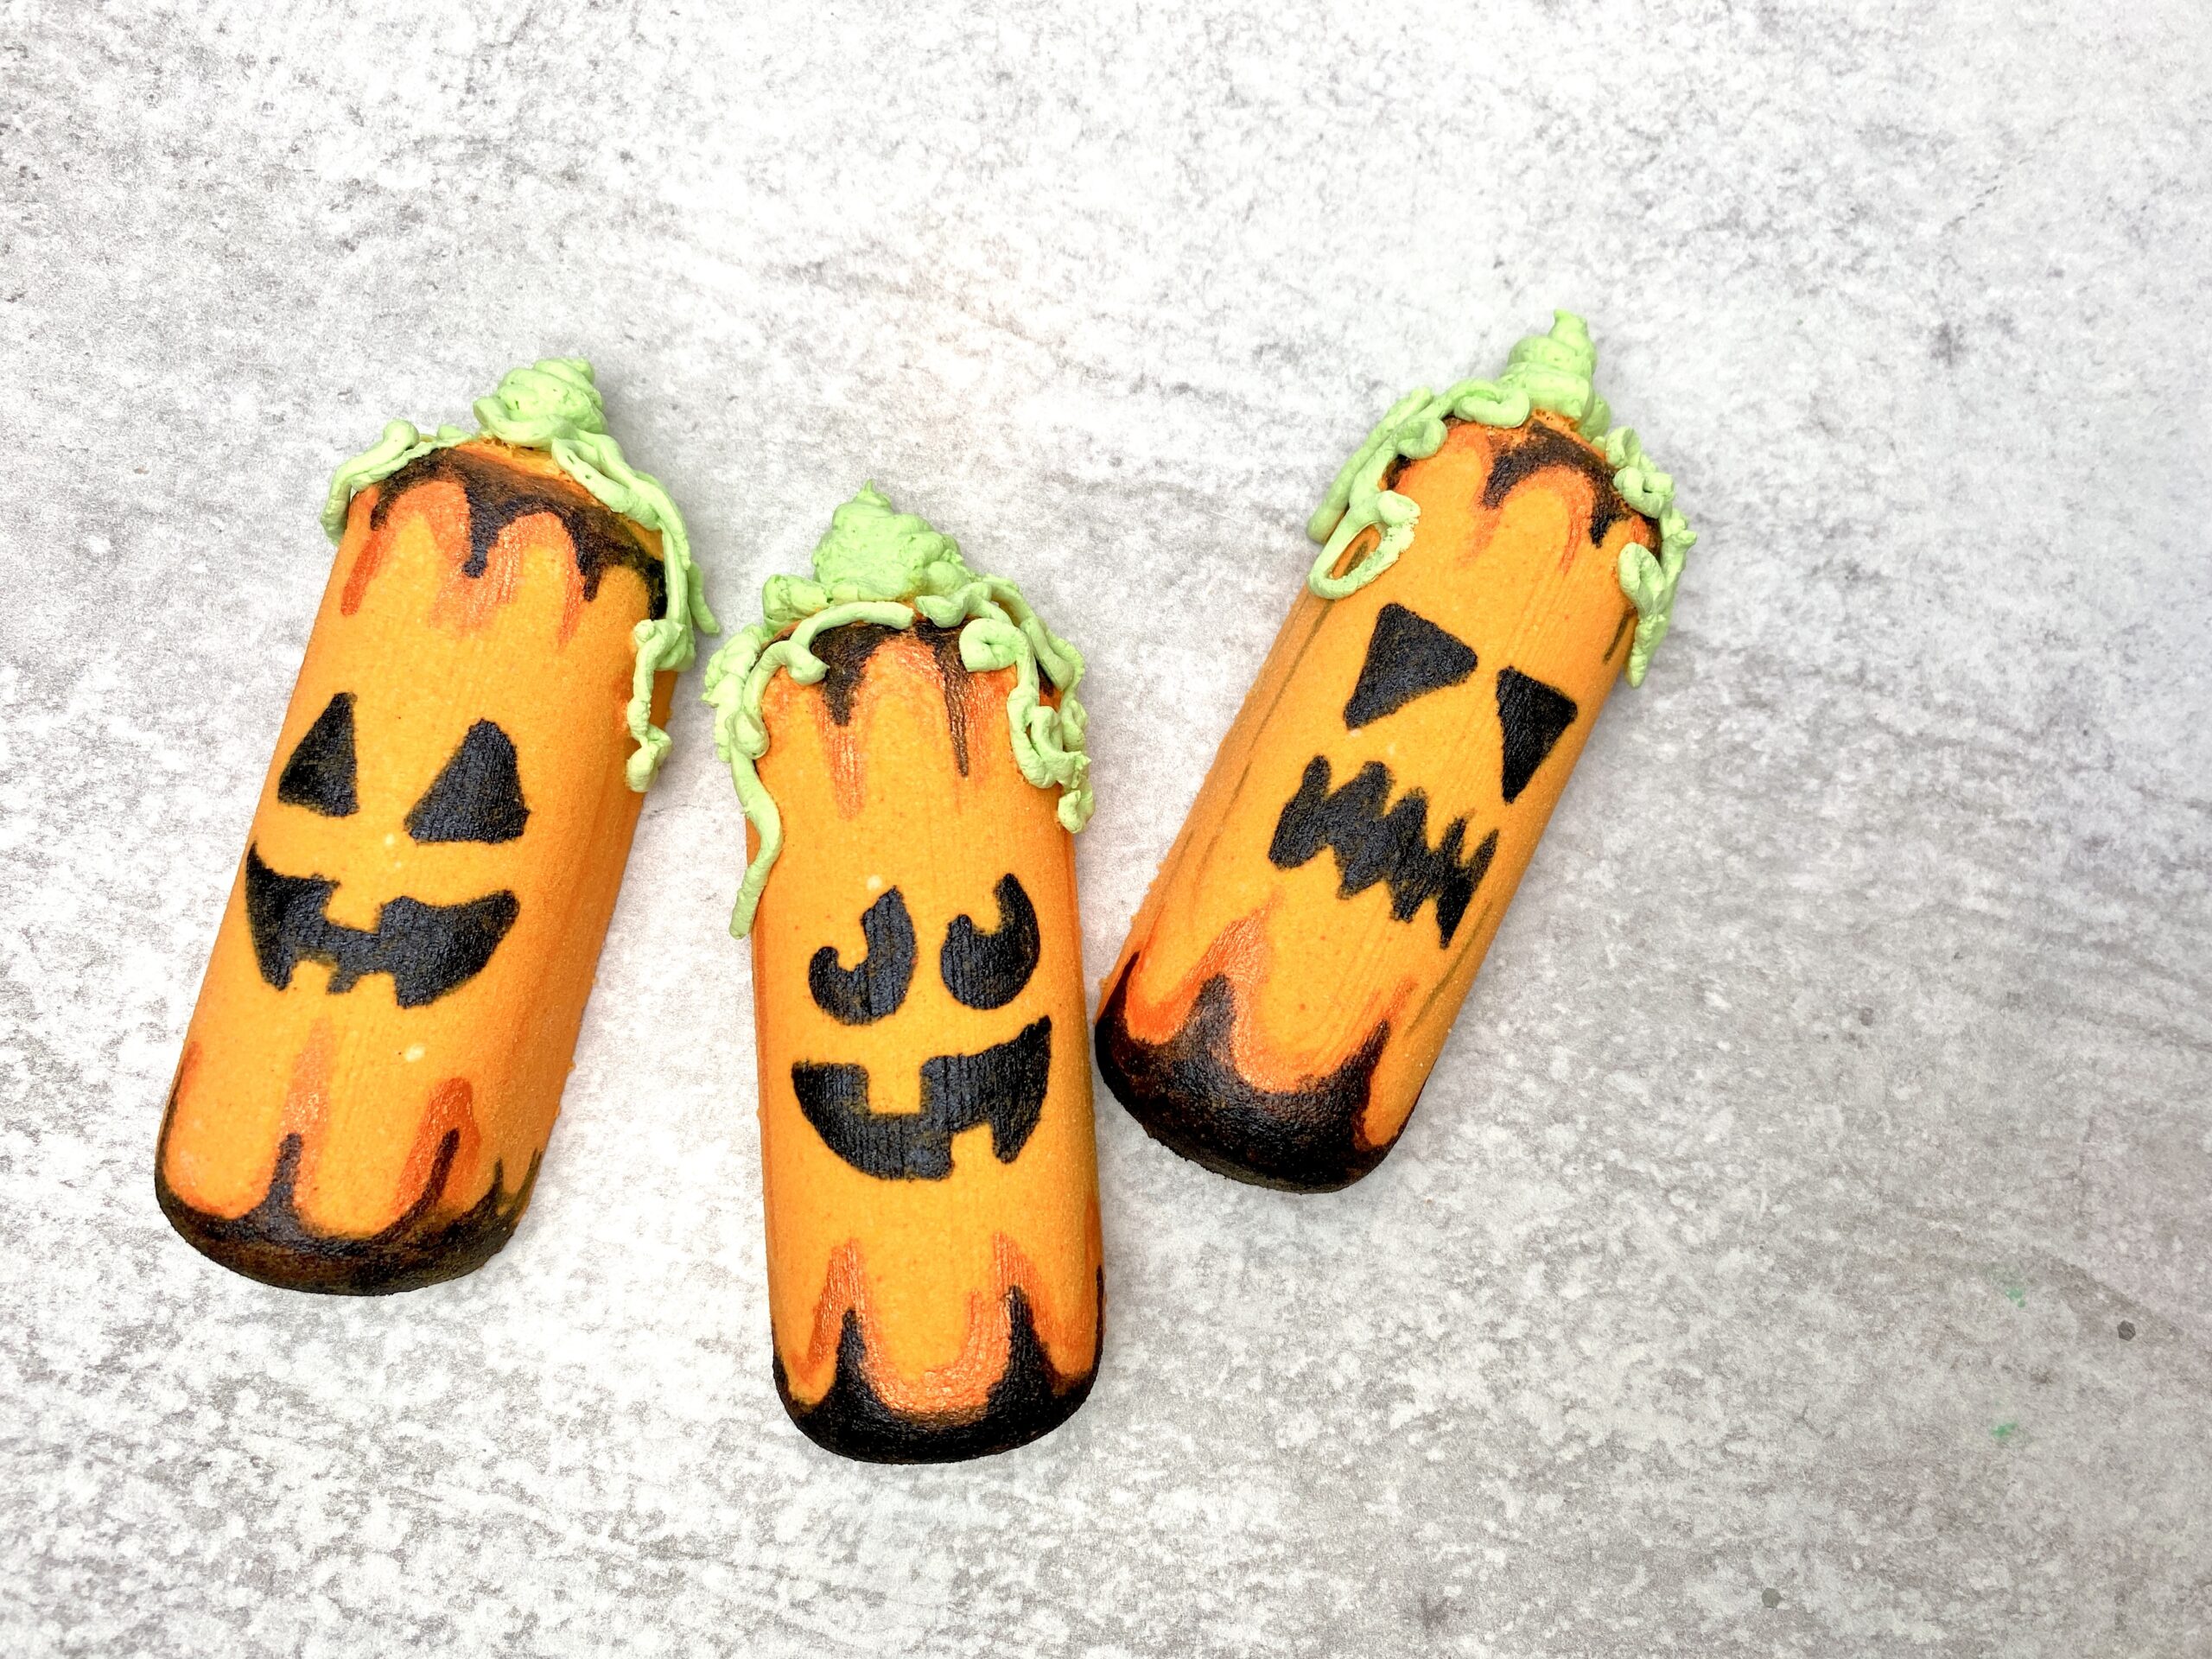
These adorable pumpkin bath bombs were super simple to make! We painted them, turning them into jack-o-lanterns, but you could even leave them plain.
For this project, Robyn and I used Robyn’s Humid Weather Bath Bomb Recipe. We were together making soap in Florida and it behaved perfectly with the high humidity here. When I work with her recipe I like to divide it in half. If you made half of her batch, you’d get 9 pumpkin Twinkies! You could make some fun mummies with the other half (coming tomorrow).
This tutorial is all about the design! You can use any bath bomb recipe that you prefer. Let’s jump into it!
For the mold, we used a Cada Twinkie bath bomb mold. It couldn’t have been any easier to use. You simply overfill the mold with mix, pressing well, slice off any overfill, place onto a tray and bang with a spoon to release. So. Easy.
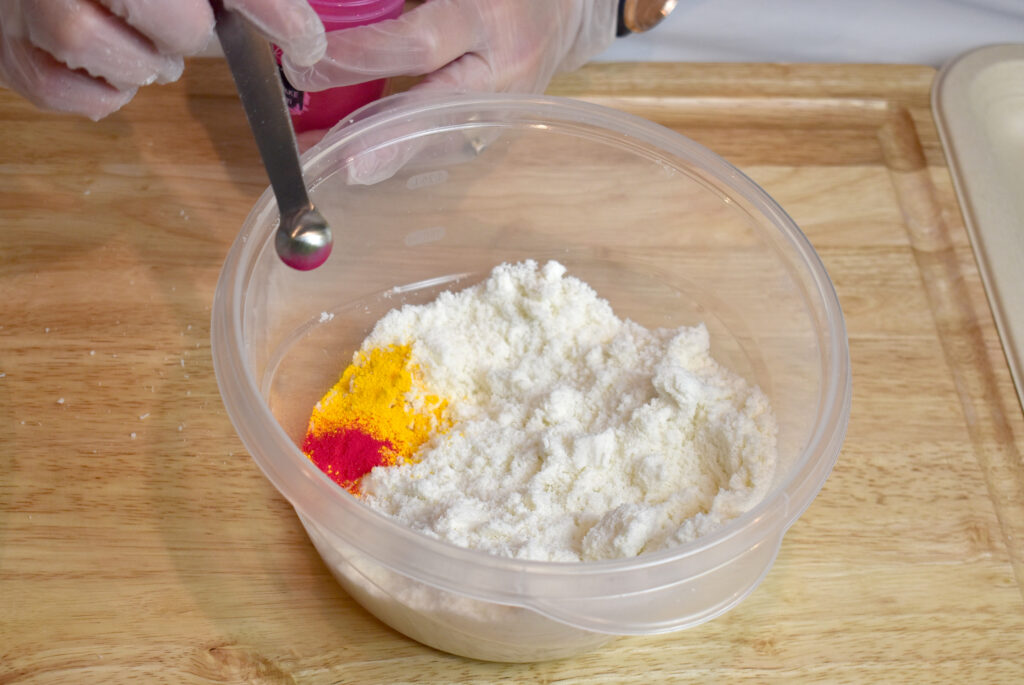
We wanted a nice pumpkin orange for this bath bomb. Check out Robyn’s Orange Color Study for ideas! We used a ratio of 2 parts yellow 5 lake to 1 part red 27 lake (color mix #2).
Step 1: Mix up your bath bomb mixture and add color to get that perfect pumpkin orange! Since we made a smaller batch of Robyn’s recipe, we just mixed by hand. If you’re doing a larger batch, you can certainly use your stand mixer.

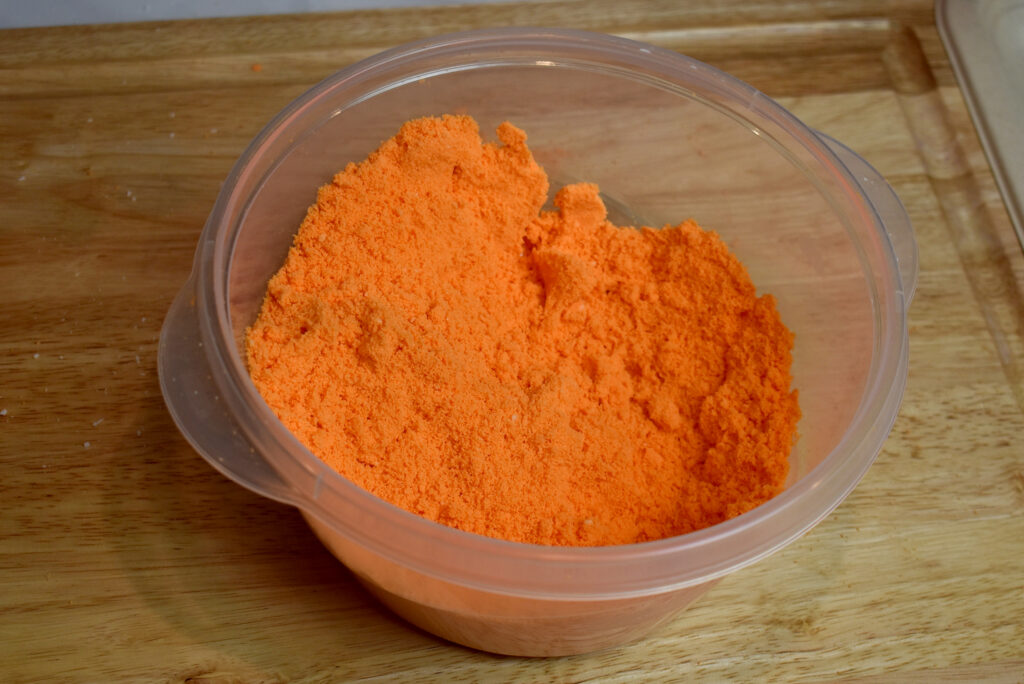
Step 2: Add binder until your mixture is the perfect consistency for molding your bath bombs. We only needed a couple of sprays of water in this small batch.
TIP: Water as a binder: We LOVE water as a binder. It activates the mixture a tiny bit and creates a bath bomb that dries really quickly! You don’t need much! Be sure to mix it well to avoid warting.
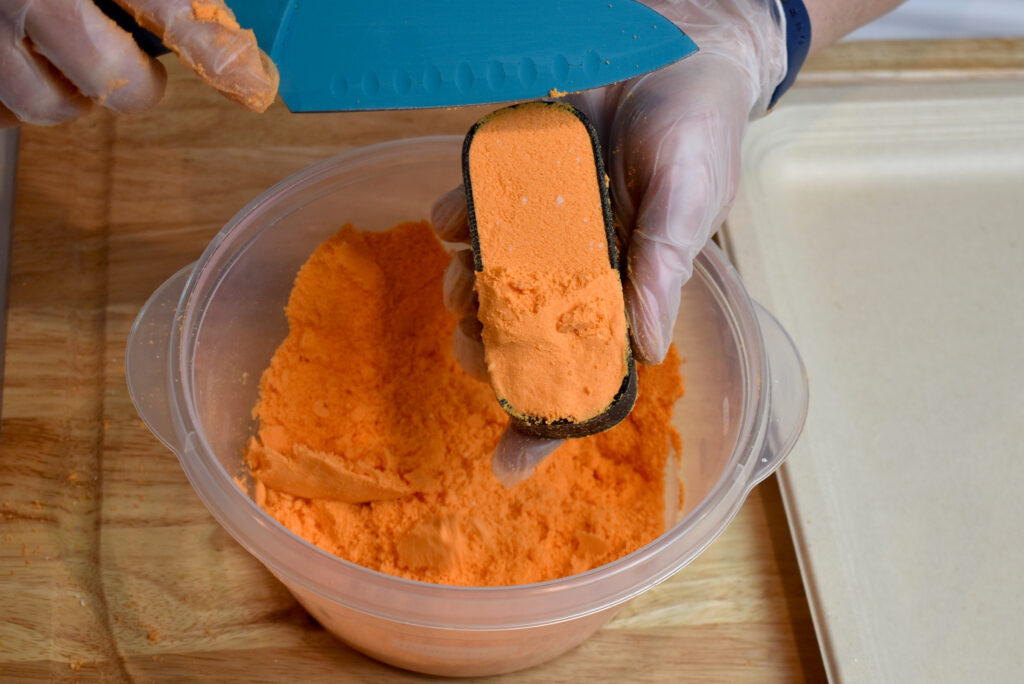
Step 3: Mold your bath bombs! As mentioned above, this Twinkie mold is suuuuuuuuuper easy to use. You simply overfill the mold, pressing the mixture in. Using a knife, slice off the overfill to create a flat back.
Step 4: Place your mold on a flat surface; we used a tray.
Step 5: Tap the mold with a spoon or something similar. Lift the mold up off of your bath bomb. If your bath bomb is still stuck a bit, tap with spoon while lifting to help release.

Step 6: Dry your bath bombs before decorating. Depending on how humid it is where you live, you might need to dry them 1-4 days. I dry in a rum with a dehumidifer running and mine only need about 24 hours to dry (even in humid Florida!).
TIP: Drying your bath bombs: The best way to quickly dry your bath bombs is to place them in a room with a dehumidifier running. If you have no humidity where you live, then you probably don’t have to do this. But if you have any humidity, I highly recommend investing in a dehumidifier. Even if you don’t have high humidity, it can help your bath bombs dry quickly so you can decorate and package even faster! I like this dehumidifier from Homelabs on Amazon.
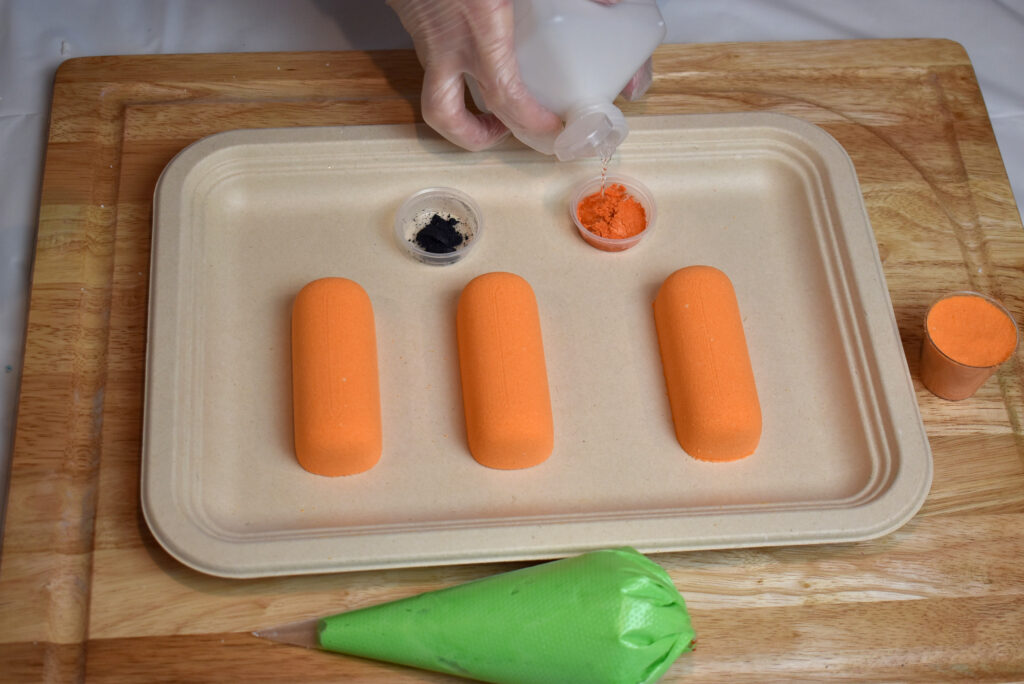
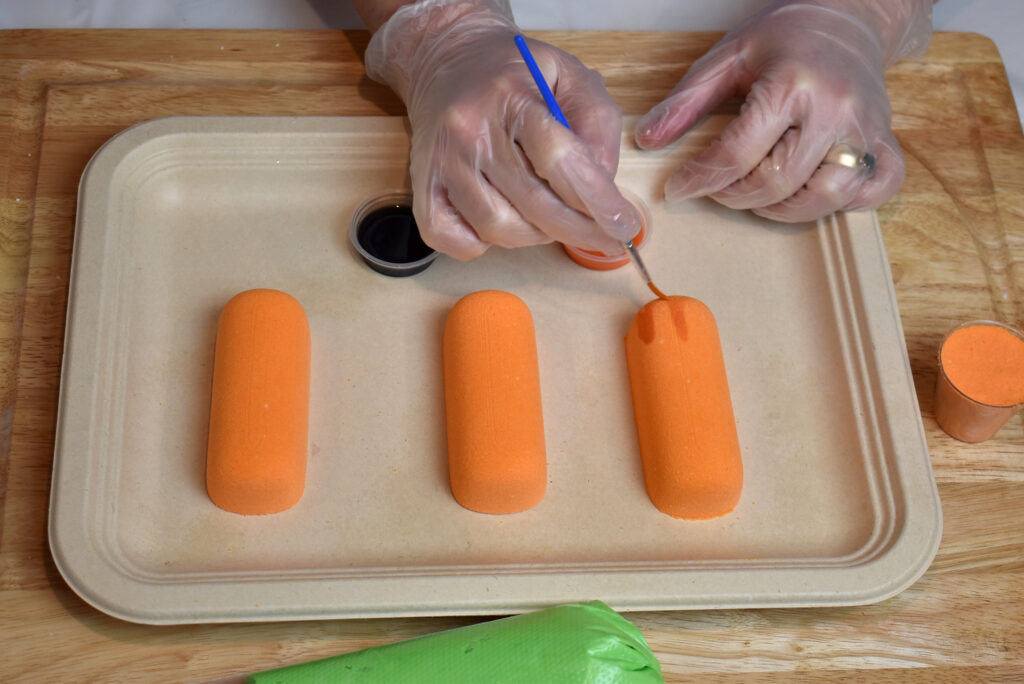
Once dry, you can paint and add vines if you’d like! Here is what we used.
- Bath bomb paint: Mica + 91% rubbing alcohol
- Bath bomb piping: Wonder Bar
Let’s do it!
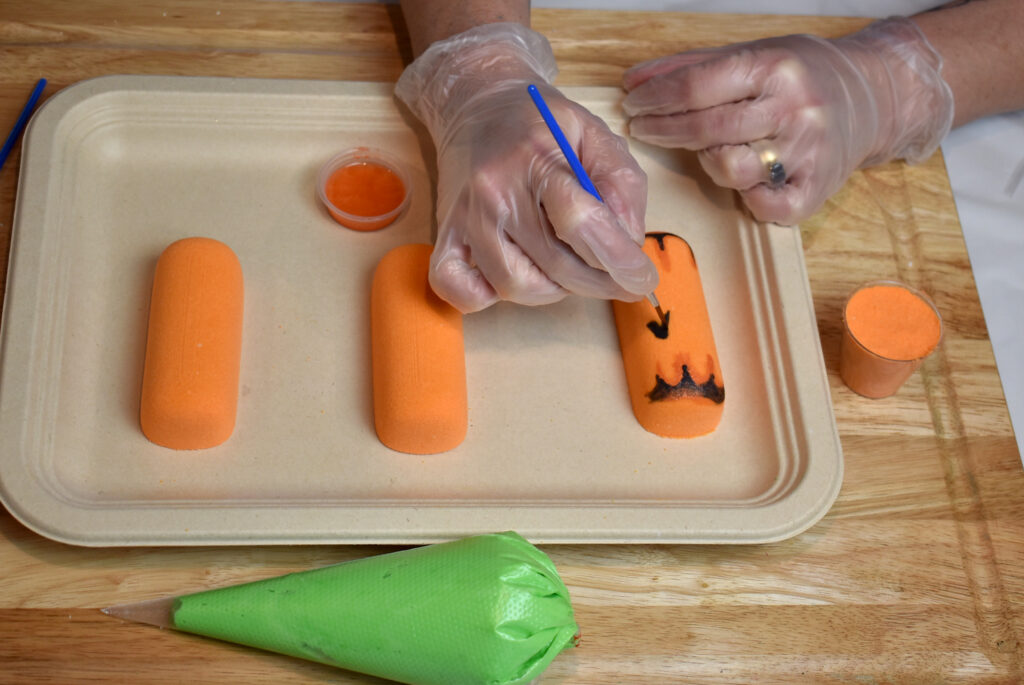
Painting bath bombs is fun and simple to do! Here are some tips for painting bath bombs.
- Make sure your bath bombs are DRY! If they are still wet, the paint might activate your bombs.
- Use 91% rubbing alcohol as alcohols containing more water might activate your bombs.
- You can paint with cosmetic approved mica or lakes, but mica is my personal favorite! Dyes will bleed so I would avoid them for painting.
- Experiment with different ratios of alcohol to colorant. You can make a super thinned down paint or a thick and gloppy paint. Each will give you different effects. I like a thinned down paint for painting over large areas of a bath bomb and a thick and gloppy paint for painting details such as eyes and buttons.
- If your paint dries out, simply add more alcohol.
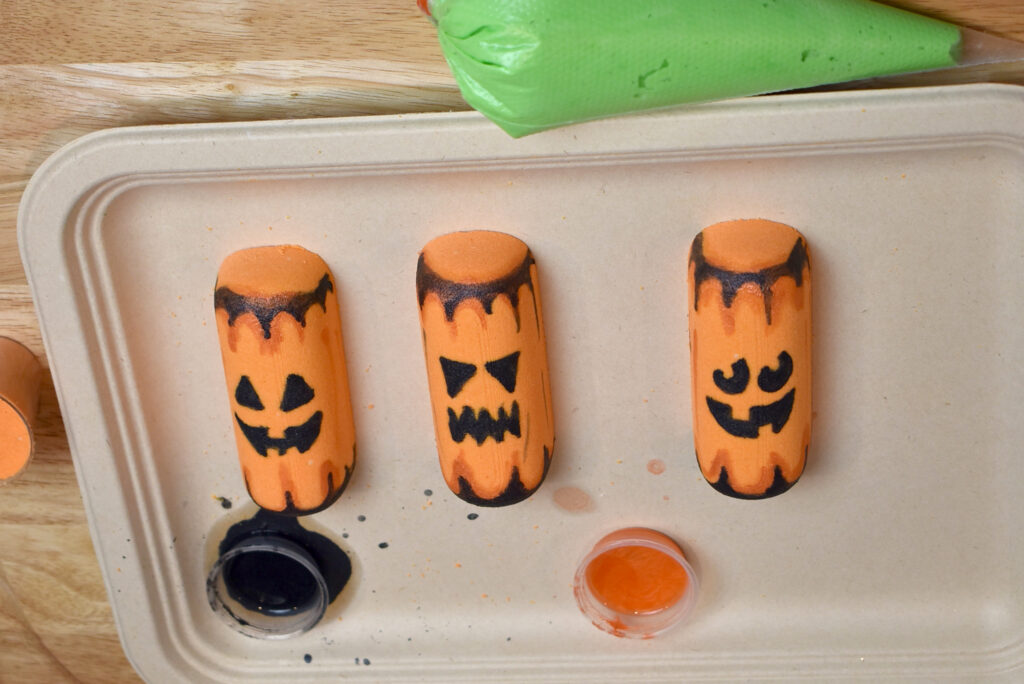
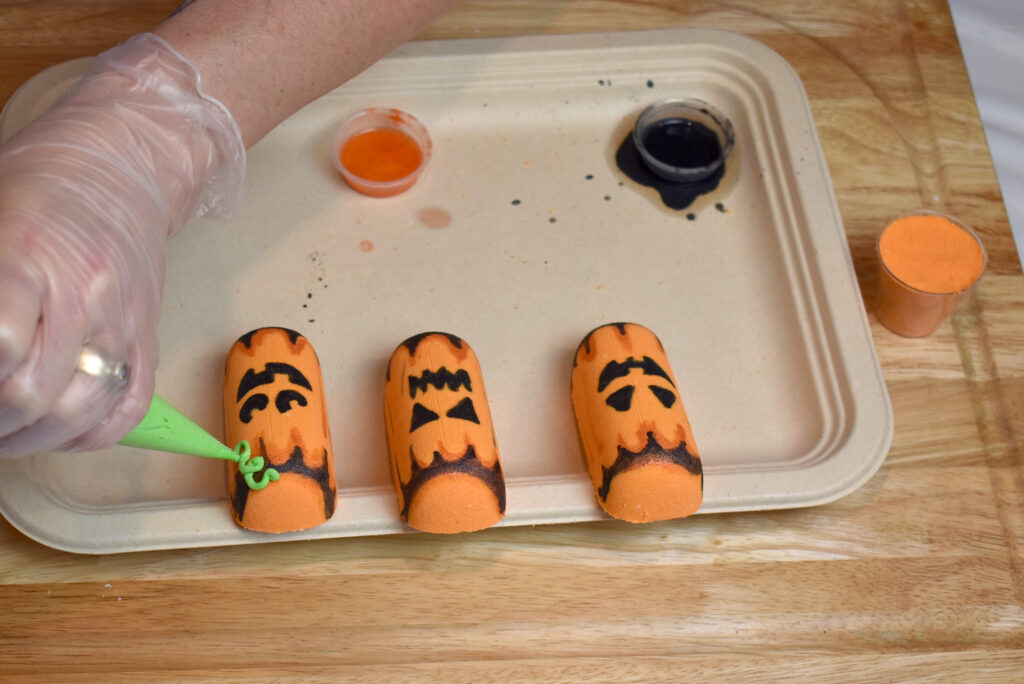
We mixed up two paints, one using black mica and one using orange.
Robyn did a great paint job!

Next we wanted to add a bit of Wonder Bar piping for vines and stem. We happened to need some green for another project, so used a bit on these.
If you want to make just a bit of Wonder Bar for topping your bath bomb project, check out this blog post on masterbatching Wonder Bar! You can simply take out a bit of mixture and add alcohol as needed to get it to that piping consistency.
Or, you could make a whole batch of Wonder Bar and then use the leftovers to pipe bubble wands!
Robyn simply got Wonder Bar to a piping consistency, turned it green using Blue 1 and Yellow 5 and then piped straight from the bag!
TIP: Before piping Wonder Bar onto your bath bombs, be sure to spray bath bombs with 91% alcohol to help it stick!
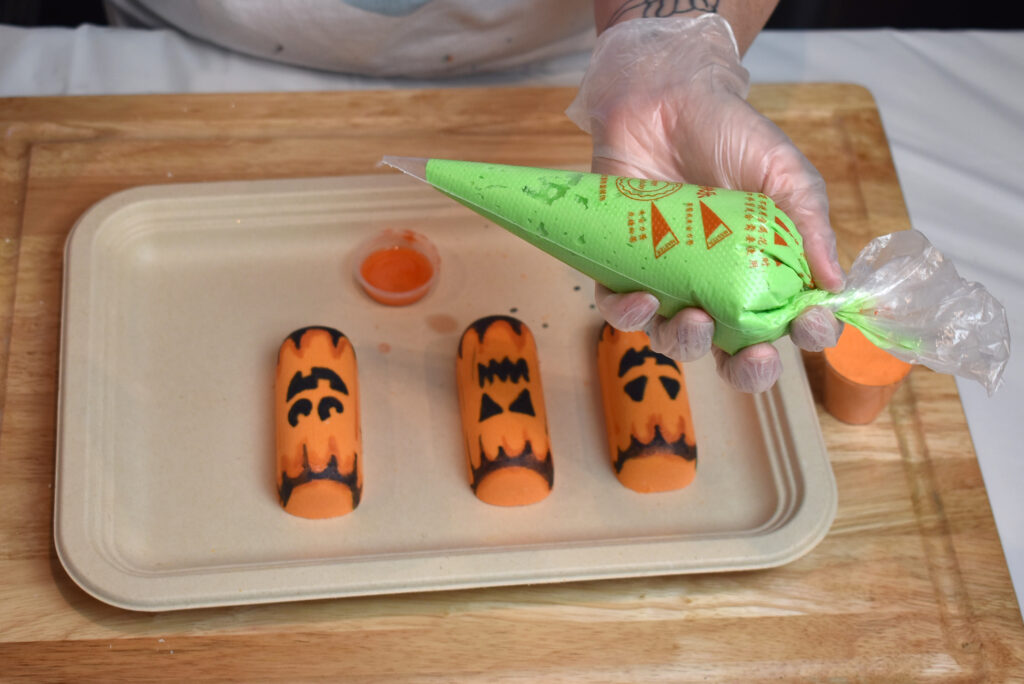
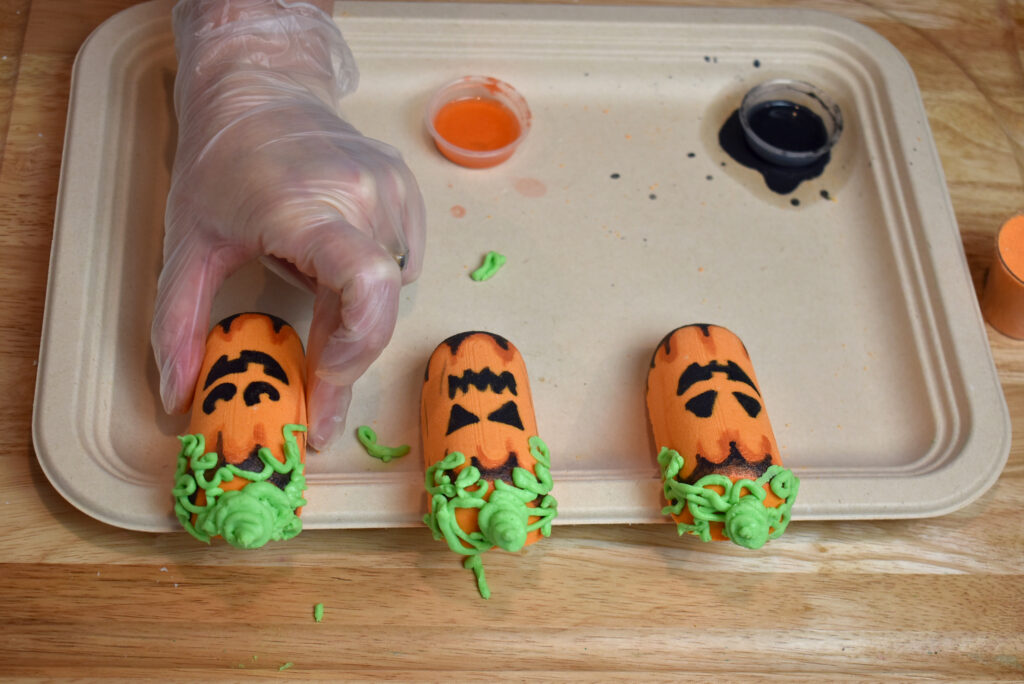
They turned out soooooooooooo cute!
Stay tuned! Tomorrow we’re using the same mold to make mummies!
Happy Making!
Amanda & Robyn
Robyn’s Humid Weather Bath Bomb Recipe
Making bath bombs in wet, rainy weather can be so frustrating! If you live in an area with constant high humidity, then you’ll need a recipe that can hang day in and day out without failing, warting, cracking or crumbling. Check out Robyn’s Humid Weather Bath Bomb Recipe!