Did you catch the Eggnog Bath Bombs? I’m not a fan of eggnog, but I LOVE pumpkin spice lattes! That’s what we’re making today! Same technique, just a different drink.
If you need help darkening your custom mixed oranges, keep reading! We’ll show you an easy way to darken orange if you want a nice deep pumpkin spice latte orange. 🙂
Let’s dive into this fun (and easy) project!
For this project, Robyn and I used Robyn’s Humid Weather Bath Bomb Recipe. We were together making soap in Florida and it behaved perfectly with the high humidity here. The topping is Wonder Bar, which easily makes a pipable bubble bar, perfect for topping bath bombs with decadent bubble frosting.
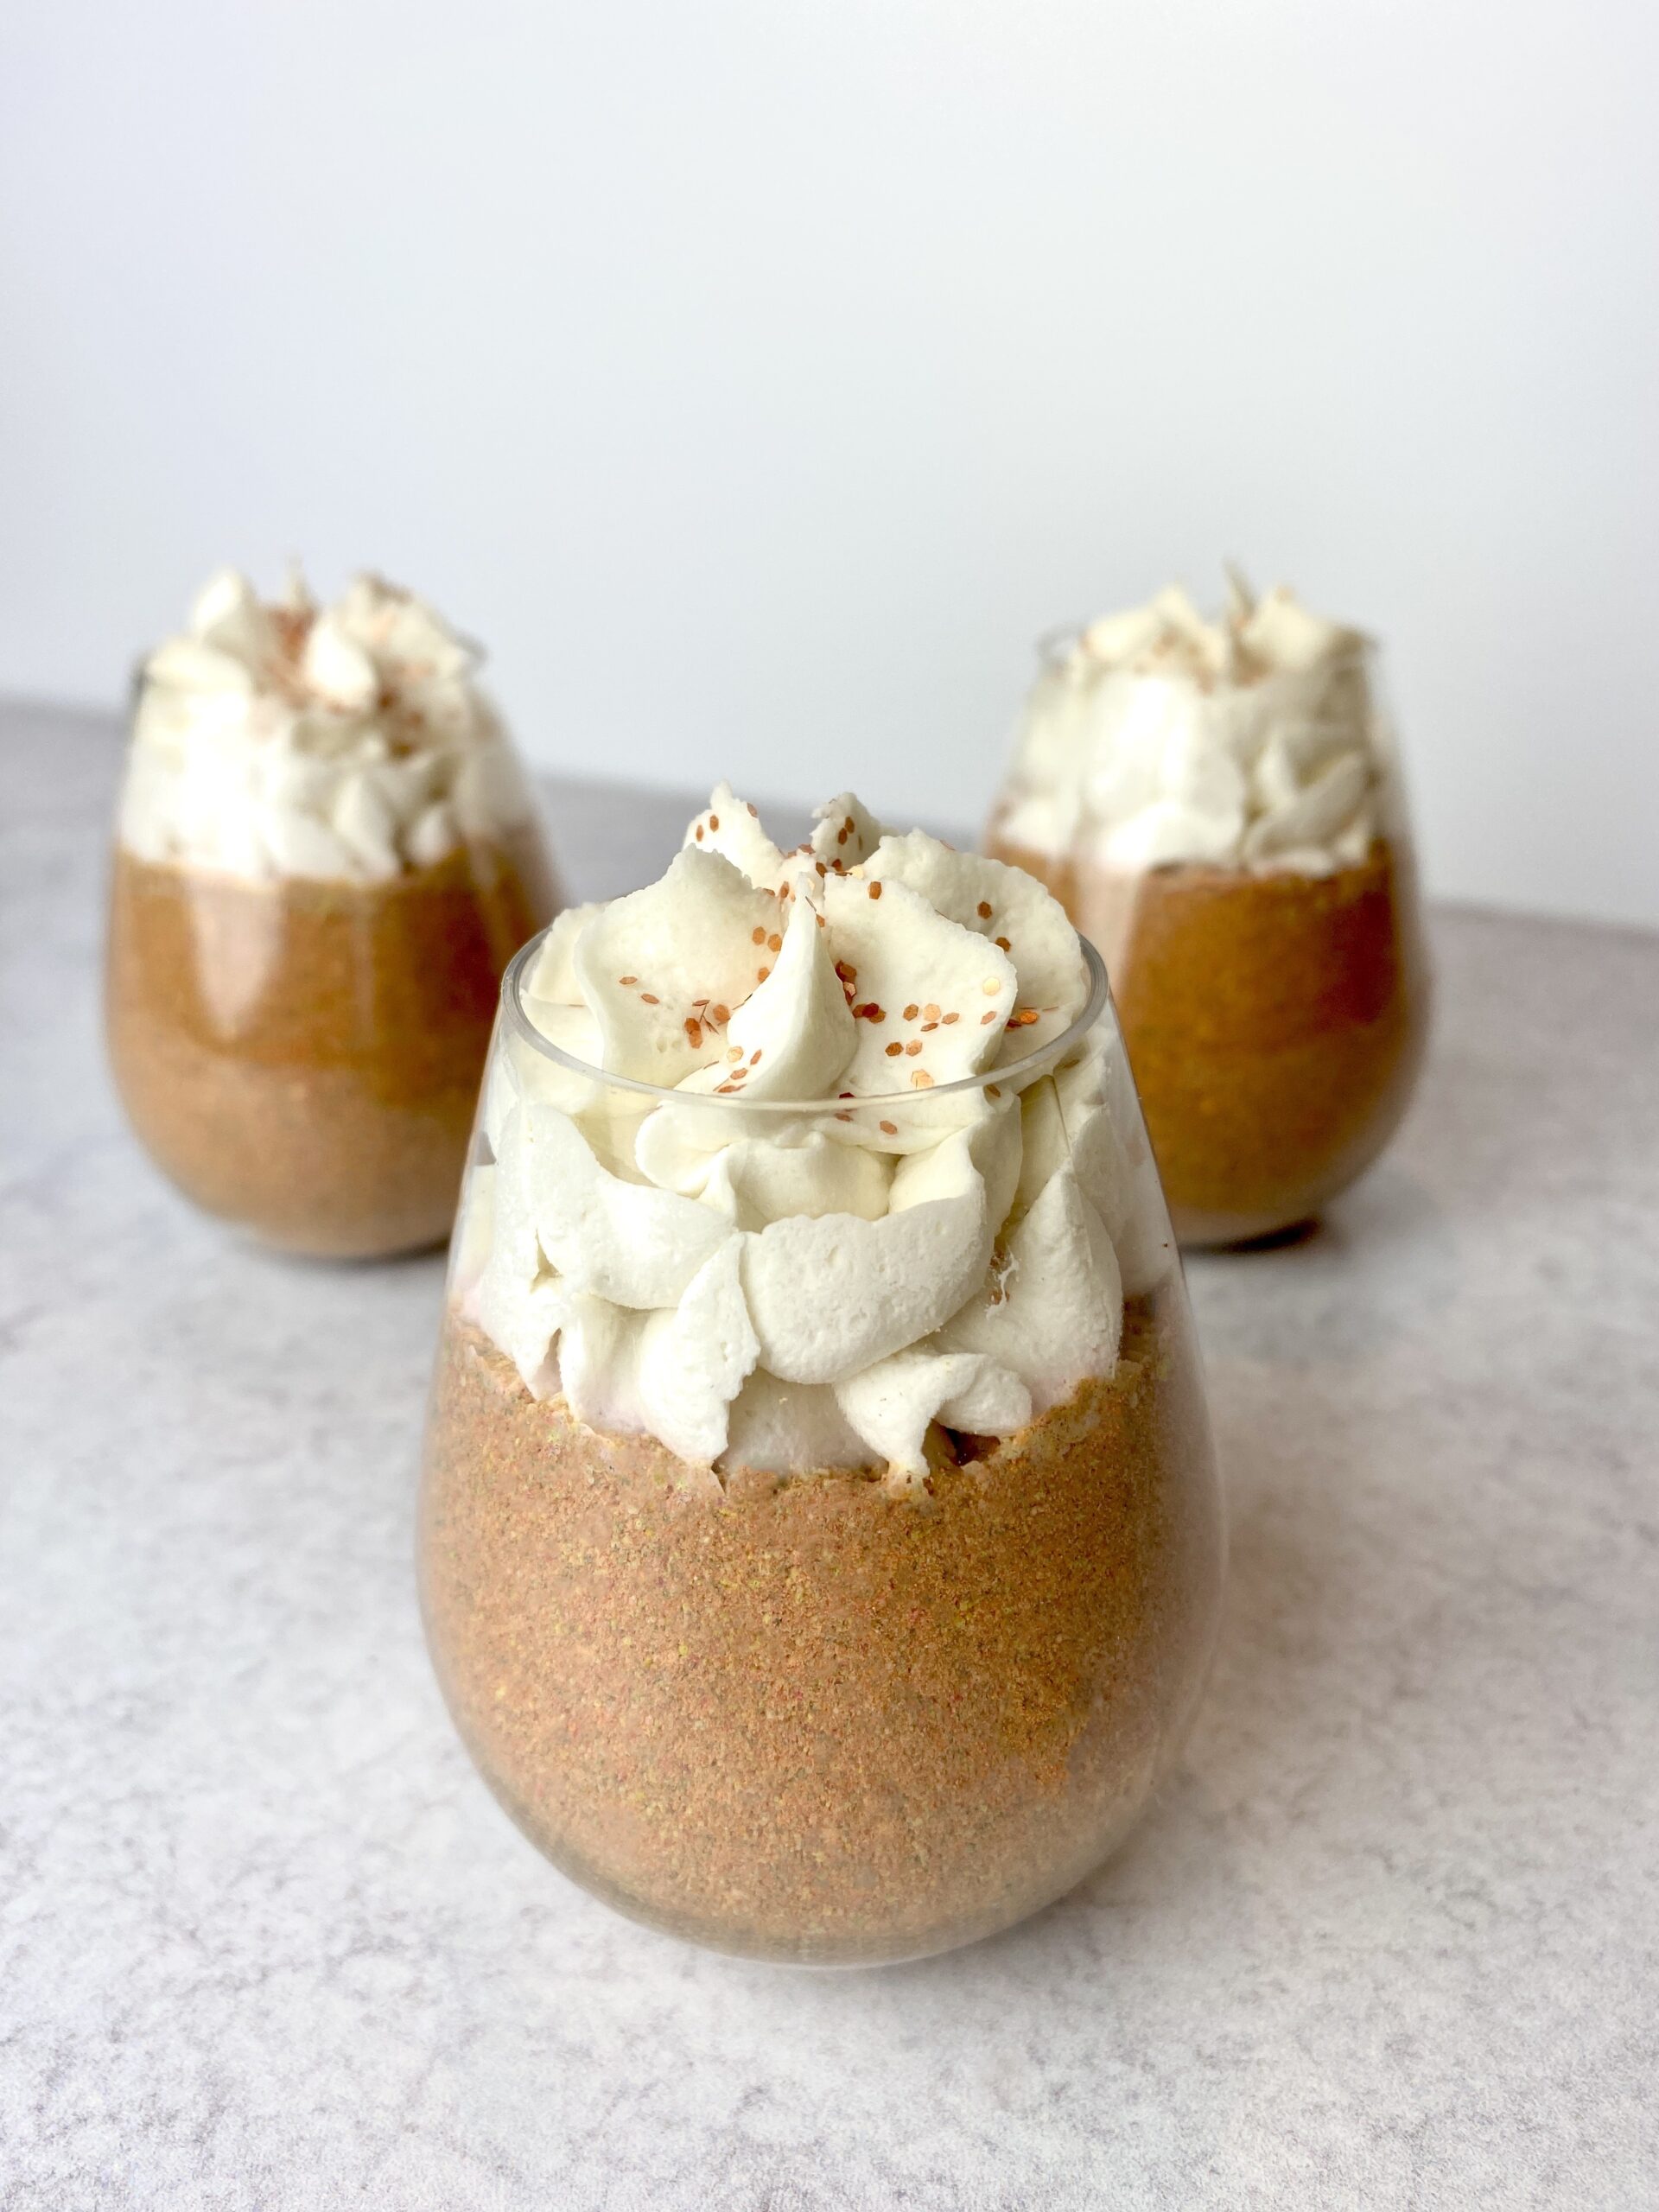
We found the mini plastic stemless wine glasses from Party City! Party City has a ton of plastic ware that would make adorable drink and dessert bath bomb projects.
Tips for Making Bath Bombs in Hard Plastic Containers
- To pack or not to pack…We’ve done it both ways. I feel like the best way to pack these containers is to loosely fill and then give it a gentle pack at the end.
- Binder? You can use binder or not! It is simply a matter of preference. The bubble bar frosting traps the mixture in the cup in case you don’t add binder and it doesn’t harden up like a usual bath bomb.
- Toppings – You can make your drinks with or without a topping. If you want to keep it a simple bath bomb, that works! We topped ours with Wonder Bar and I’ve even seen some people top with a drizzle. I really like topping with Wonder Bar because then you can add a dusting of glitter or sprinkles.
- Poke a hole! – If you allow your bath bombs to dry in hard/brittle plastic containers, they might actually crack! To prevent this, poke a hole down the middle of your bath bomb. This gives your bombs a little room to expand if needed (especially if you added binder).
Let’s make them!
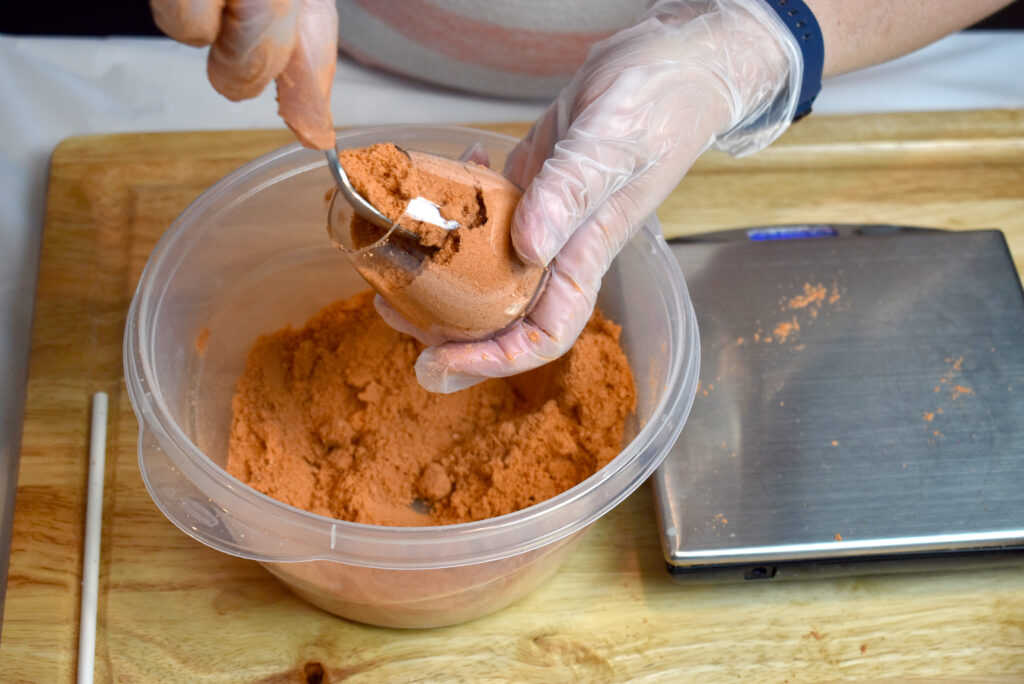
Step 1: Mix up your bath bomb mixture!
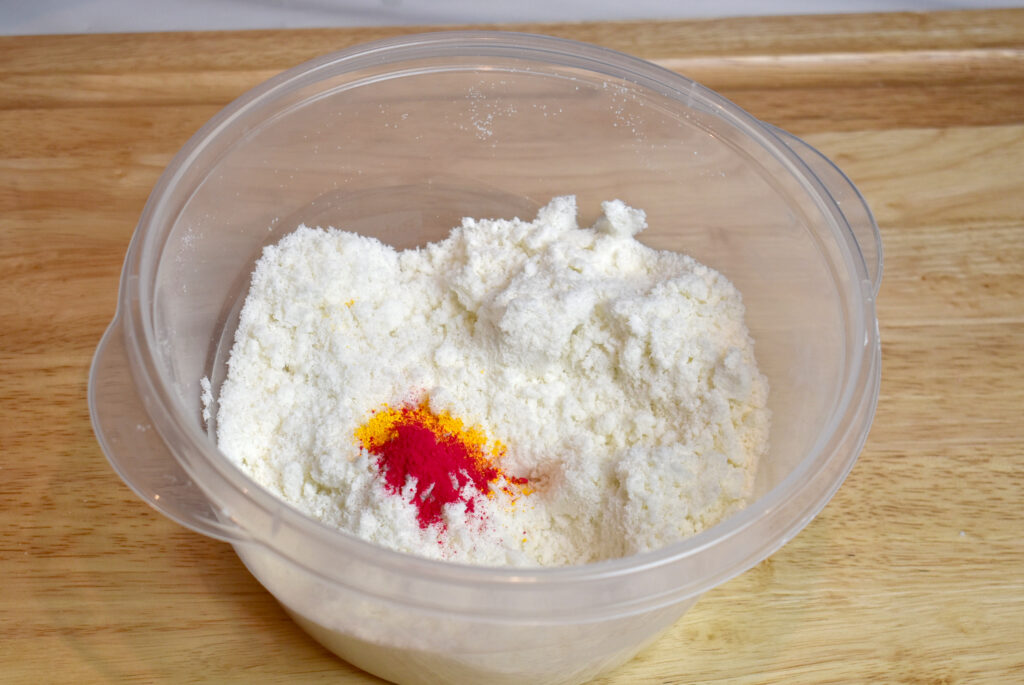
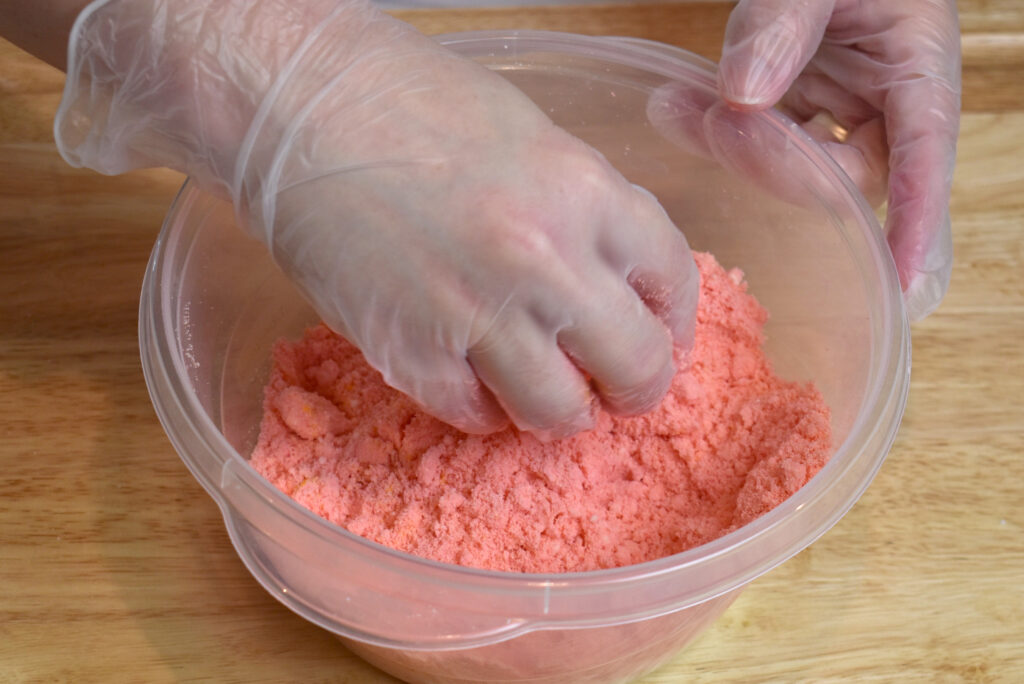
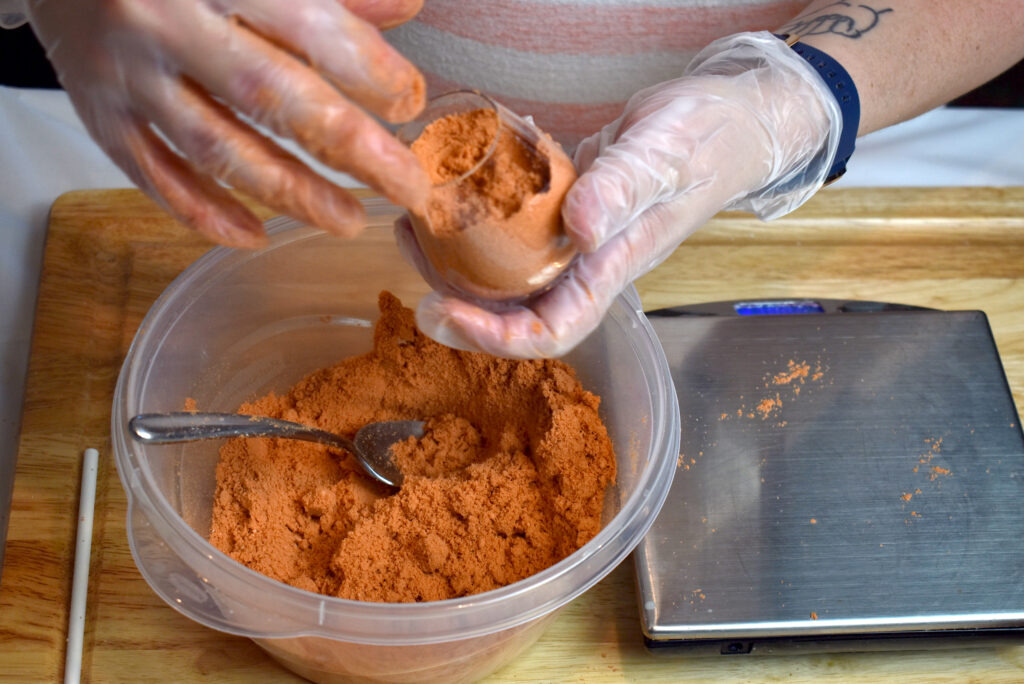
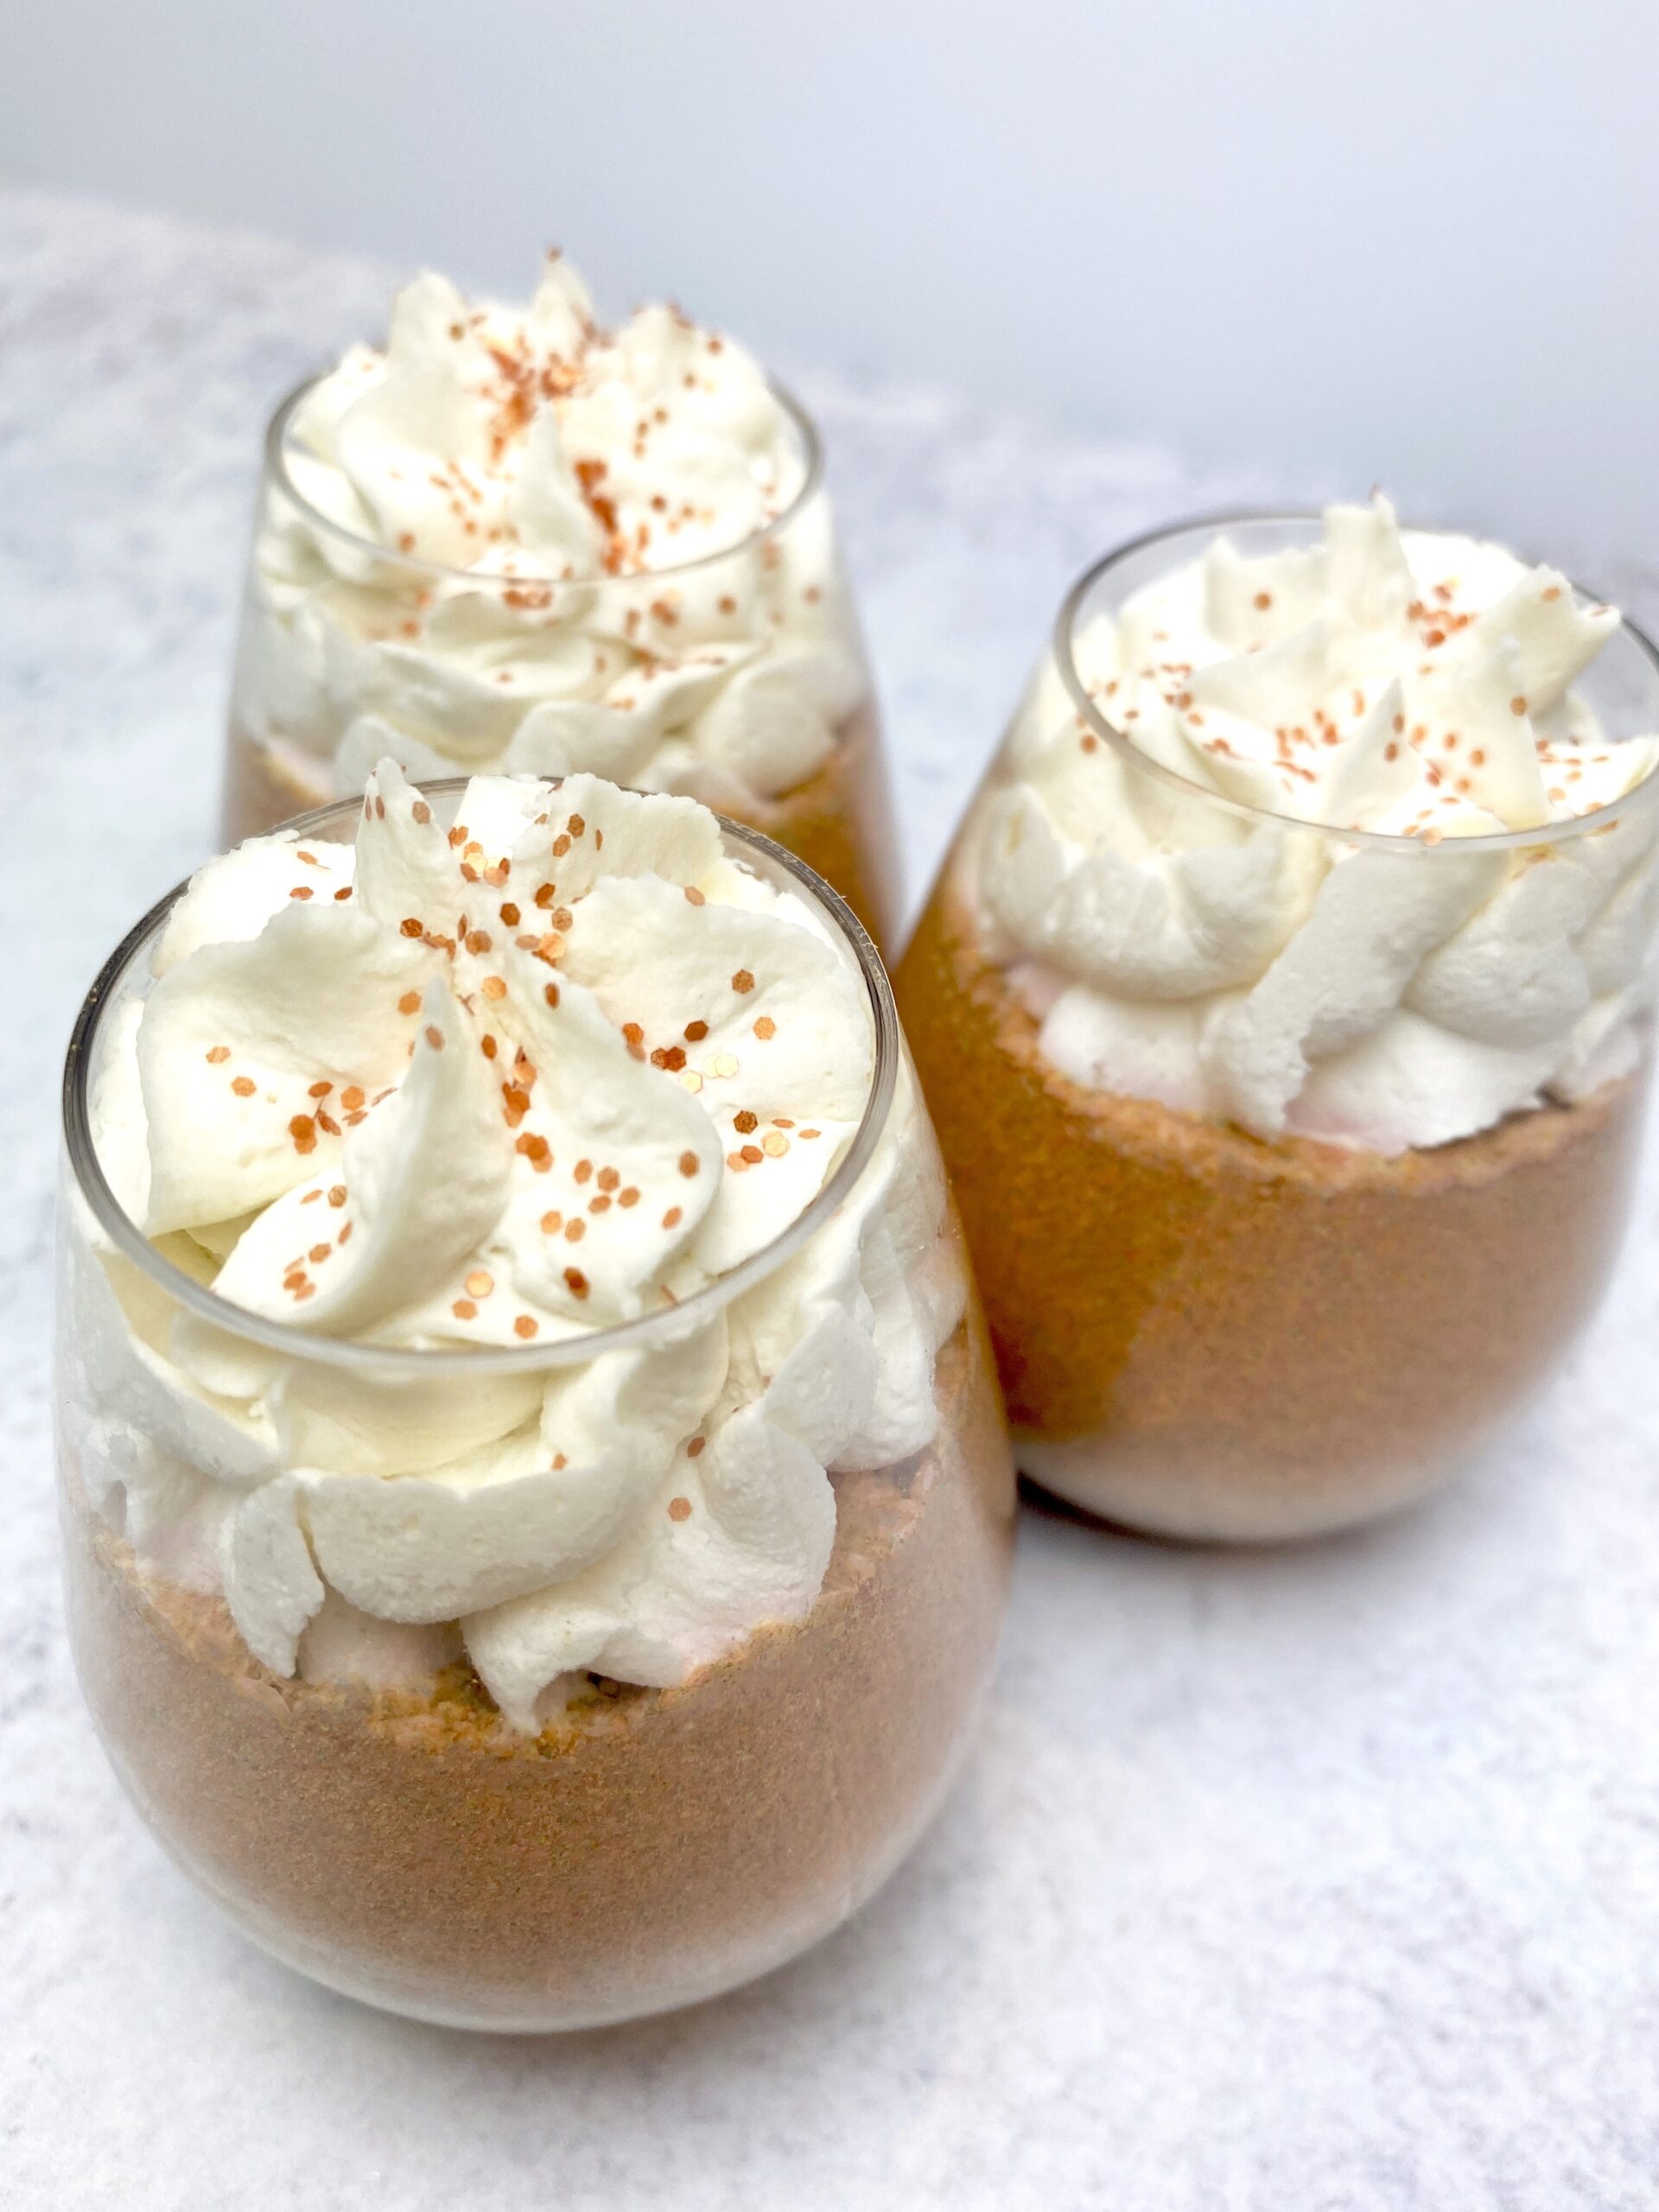
Step 2: We started with a bright orange and then darkened it to a nice dark spicy orange, perfect for these lattes.
First we added 1/2 teaspoon of yellow 5 lake and 1/8 teaspoon of red 27 lake to make our bright orange. (Makes a nice neon orange!) This wasn’t going to work for lattes…
Then we added 1 microscoop of red 40 lake to knock the neon down and darken it a bit. Nice orange!
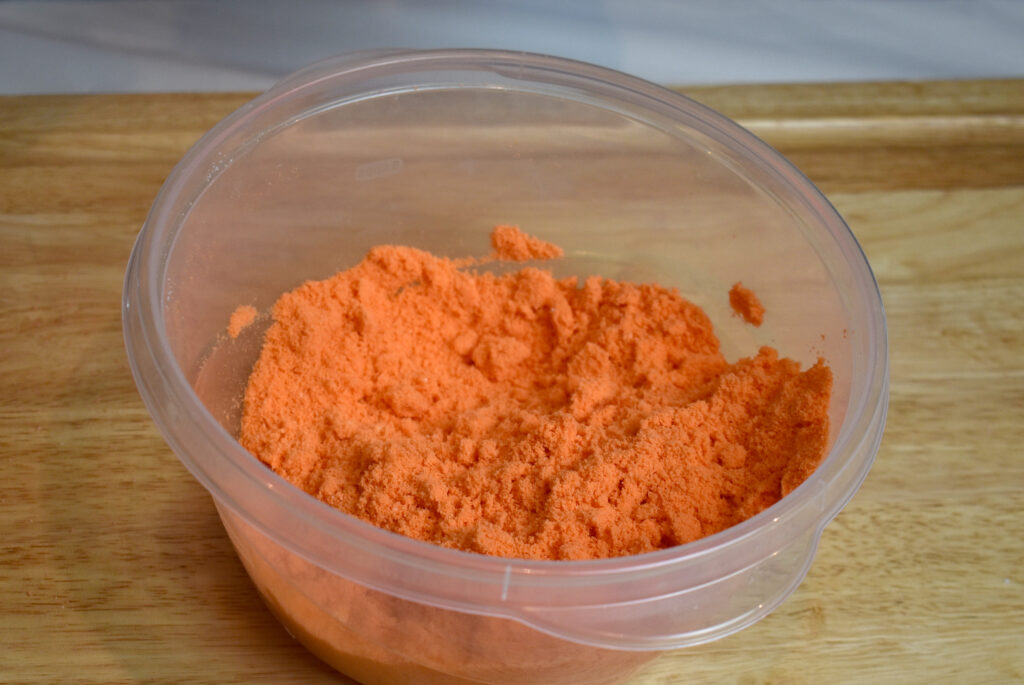
Not bad, but we wanted a deeper orange that screamed pumpkin spice latte! We added a microscoop of blue 1 and…

Perfection! Robyn nailed it!
We wanted to share that progression of adding color, so you can try it too! Don’t be afraid to add a little blue 1 lake or red 40 lake to darken your blends.
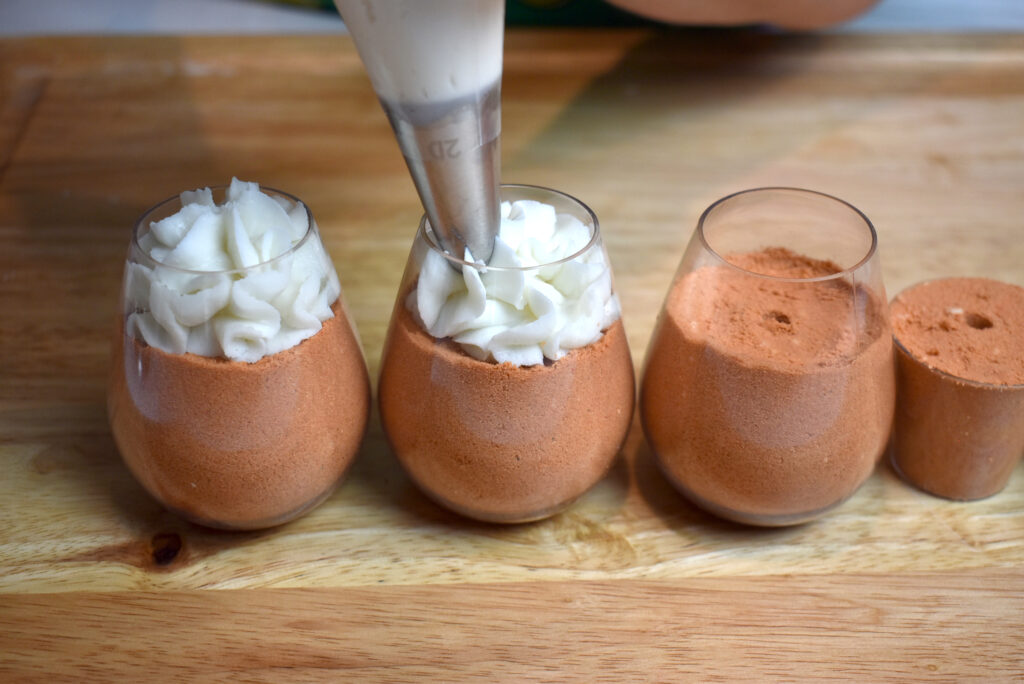
Step 3: Once everything is mixed up, fill your cups. We knew that we wanted to top our drinks with Wonder Bar, so we left plenty of room on top for bubble frosting. If you aren’t topping your drinks with anything, fill to the top!
TIP: Remember to poke a hole down the center of your bath bombs or they might crack your hard plastic cups!
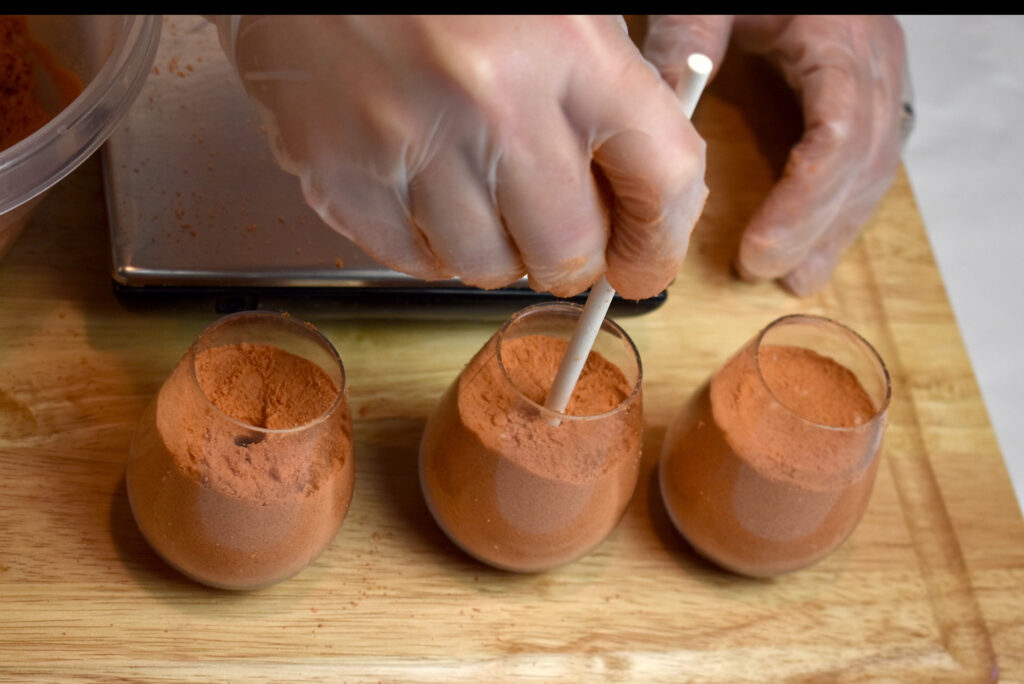
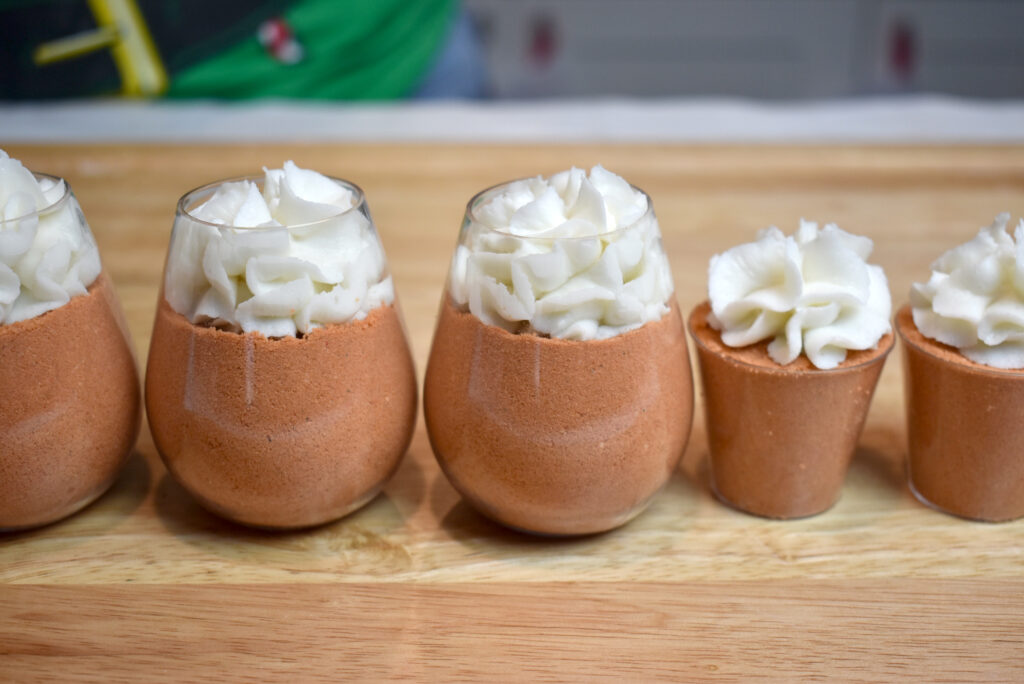
We had a little mix leftover so made some bubble shots as well using little plastic shot glasses.

Step 4: Dry your bath bombs before decorating. Depending on how humid it is where you live, you might need to dry them 1-4 days. I dry in a room with a dehumidifer running and mine only need about 24 hours to dry (even in humid Florida!).
TIP: Drying your bath bombs: The best way to quickly dry your bath bombs is to place them in a room with a dehumidifier running. If you have no humidity where you live, then you probably don’t have to do this. But if you have any humidity, I highly recommend investing in a dehumidifier. Even if you don’t have high humidity, it can help your bath bombs dry quickly so you can decorate and package even faster! I like this dehumidifier from Homelabs on Amazon.
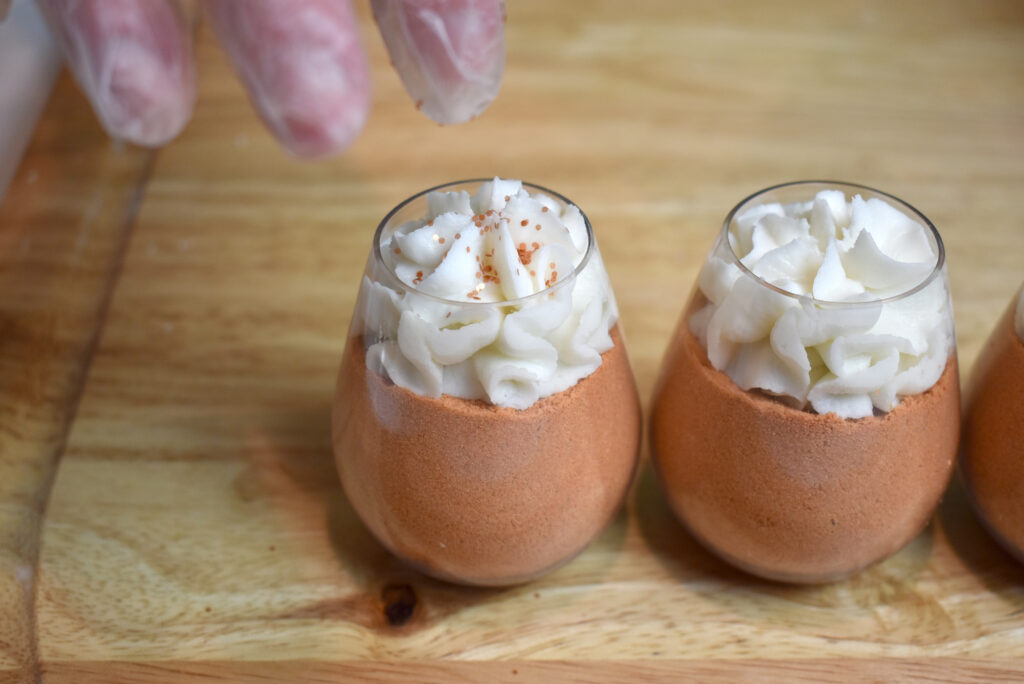
Once dry, you can decorate! We piped Wonder Bar on top and added a light sprinkling of Auburn glitter from Good Glitter.
You don’t have to make a whole batch of Wonder bar, because then you’d have to much left over. You can simply grab some from a masterbatch. Check out this blog post where we talk about how to masterbatch Wonder Bar.
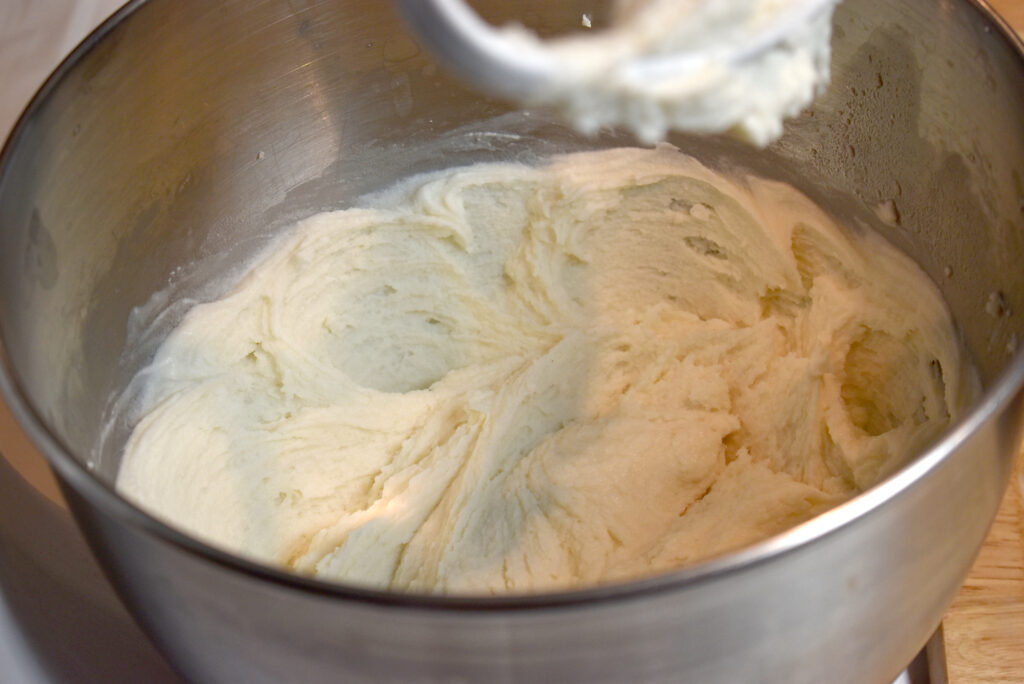
When it comes to piping Wonder Bar, it is ALL about consistency.
Step 1: Mix Wonder Bar until you get a pipeable consistency! It should look like frosting.
Step 2: Prepare your piping bag with tip and add frosting to your bag.
Step 3: Pipe! We piped Wonder Bar using an Ateco 2D tip. It came out so cute!
TIP: If you keep your piping under the lip of the cup, it is actually really easy to shrink wrap these for shipping! We went a bit over, but just wanted to mention that if you plan to ship!
Step 4: Top with a light sprinkling of glitter! (You can also dust with a bit of copper penny mica for a cinnamon look!)
To use them you simply instruct your customer to hold under running water to dissolve and activate the bubble bar. Then they can dip the bath bomb in water and watch the fun fizziness bubble over!
Happy Bubble Making!
Robyn & Amanda
Wonder Bar Bubble Bar Recipe + Process Guide
Get one recipe to make it all! Make bubble bar scoops, rolls and bubble frosting, using just ONE recipe! Get Wonder Bar here.
Robyn’s Humid Weather Bath Bomb Recipe
Making bath bombs in wet, rainy weather can be so frustrating! If you live in an area with constant high humidity, then you’ll need a recipe that can hang day in and day out without failing, warting, cracking or crumbling. Check out Robyn’s Humid Weather Bath Bomb Recipe!